")
")
")
")
CNC Router DIY
The project:
Nowadays, a variety of CNC routers are available and at prices that can be called affordable. In 2004 a CNC router, as shown above, made out of aluminum cost over € 1300,- and my budget at the time did not permit me to buy one. The principles of CNC routers or similar equipment are well known, in the Chinese market you can find almost all of the mechanical components at low prices. So I decided to make my own router from scratch. In Germany, there were several businesses that imported directly from China, and they shipped at low cost to Italy too. But before buying anything I had to draw the machine first.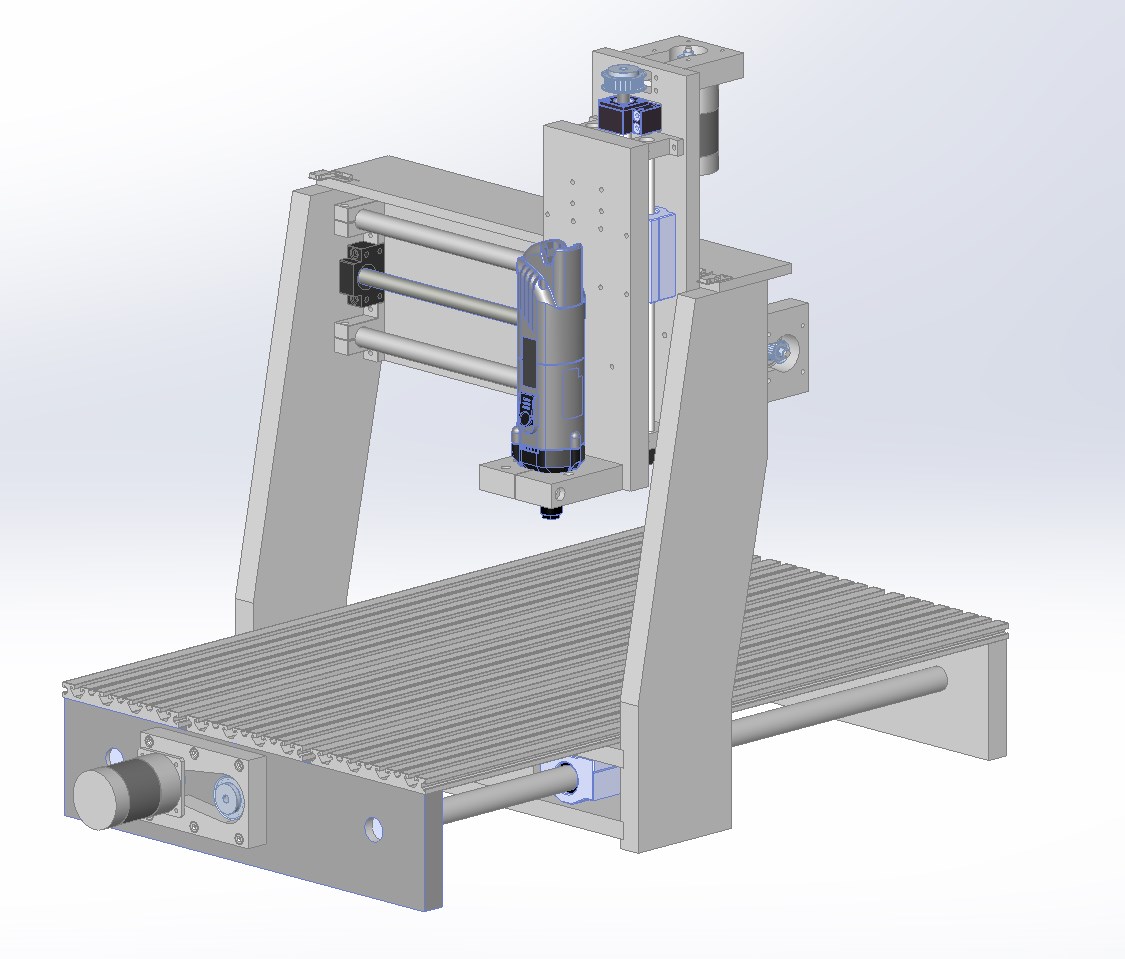
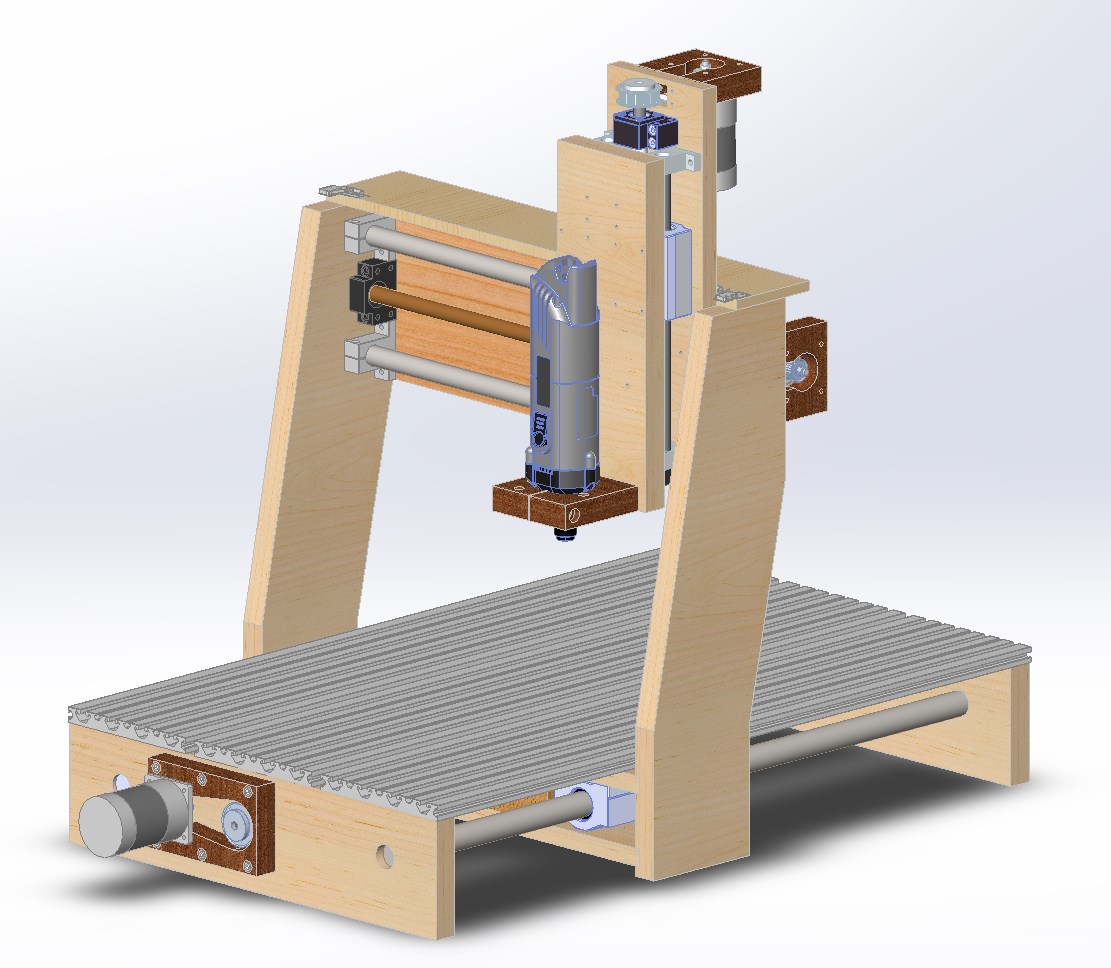
On the right, you can see the complete assembly of the router drawn in Solidworks. To get all the measurements correct, I downloaded a bunch of data sheets of the various parts as guides, ball screws, bearings, etc. My intent was to have a working area of at least 300 x 400 mm. As I don't own machinery to work metal but have some woodworking machines, I proceeded to make the structure out of the best quality plywood.
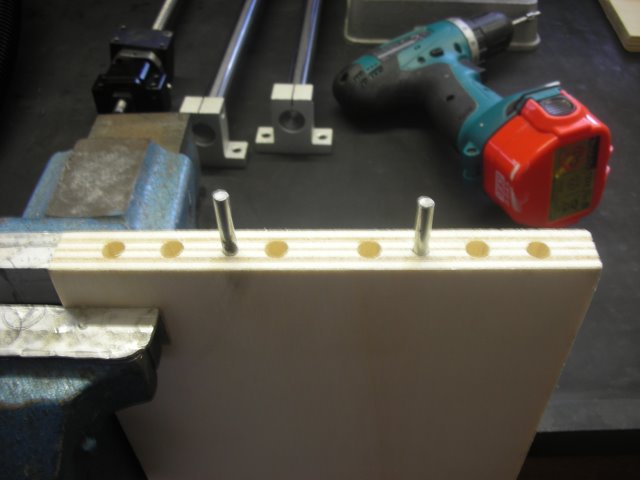
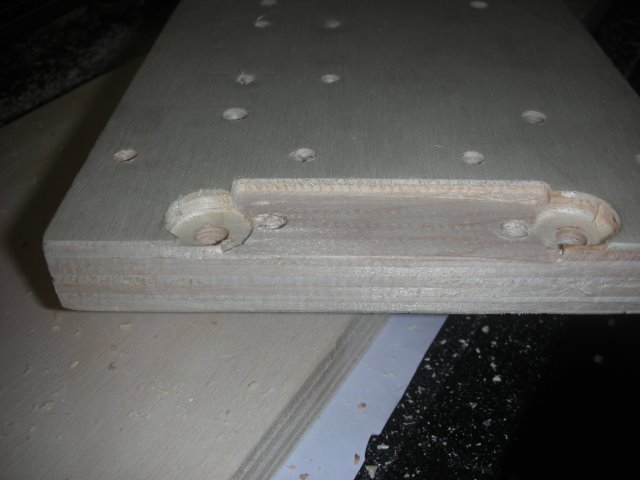
Based on the pictures on the internet I looked for a neat design that was good enough for my needs and not least easy to build. As all woodworkers know, putting screws at the end-grain side of these boards will compromise durability and mechanical strength. Luckily there are some nice engineers who "invented" metal inserts to solve this problem, one can buy them easily on Amazìon, Alibaba, or else.
I began designing all the wooden parts, taking care of the thickness and the possibility of making them with my machines in the hobby basement. On eBay.de I found someone who was selling his used T-Slot aluminum profiles at a good price inclusive of shipping. That was very nice and would add some professionality to the design too. This was the best choice I could have made, making the platform like this, to put the pieces on to clamp them down easily.
The first design in Solidworks was the main project.
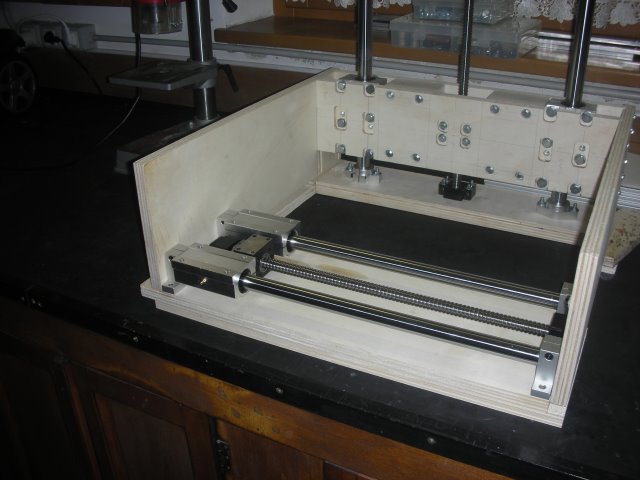
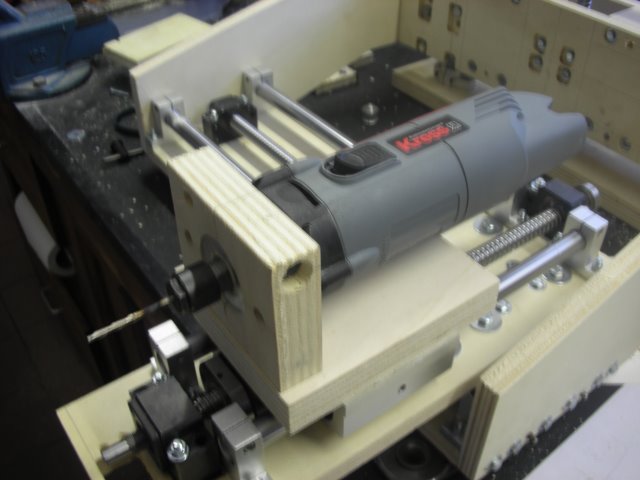
Once all the wooden parts were made, (some were really difficult and complex to make with only hand tools) I started assembling the machine step by step. In the meantime, all the mechanical parts from Germany arrived too. I chose ball scews for the movement of the X, Y, and Z, axis because of the repeatability of the movement itself, which is precise 0.05 mm in any direction.
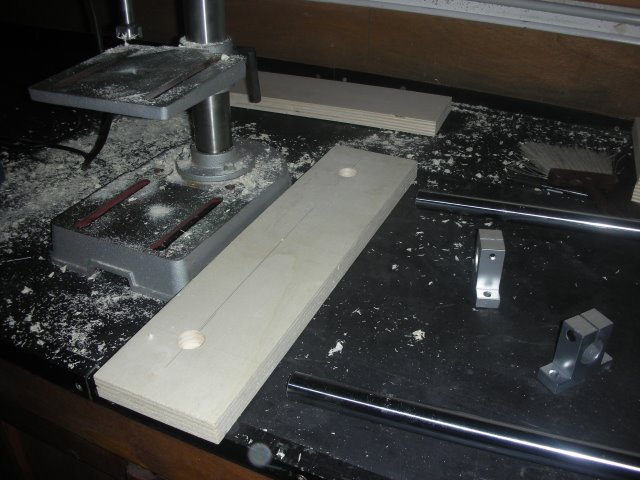
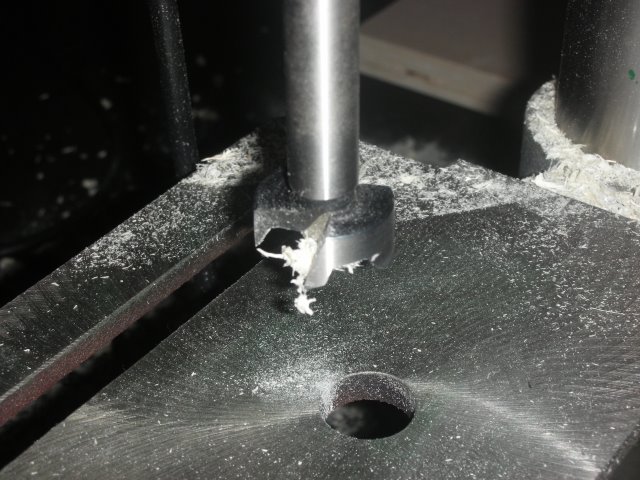
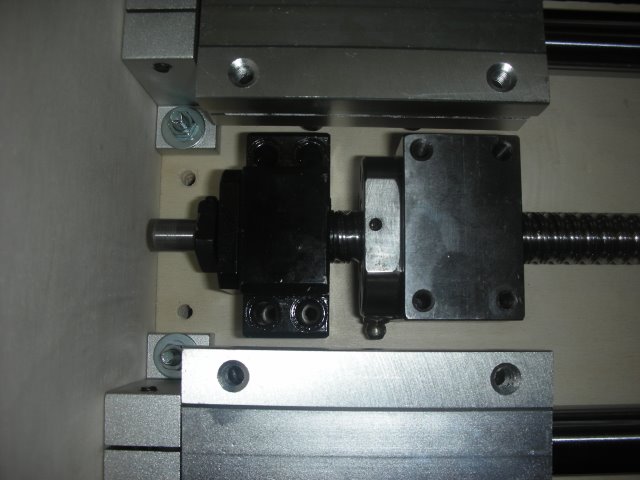
For some complex parts, I used a hand router to cut out some of the shapes needed to fit the bearings and other mechanical stuff. The depth precision does not matter so precisely, because one of the bearings of the ball screws is floating and permits some axial adjustment.

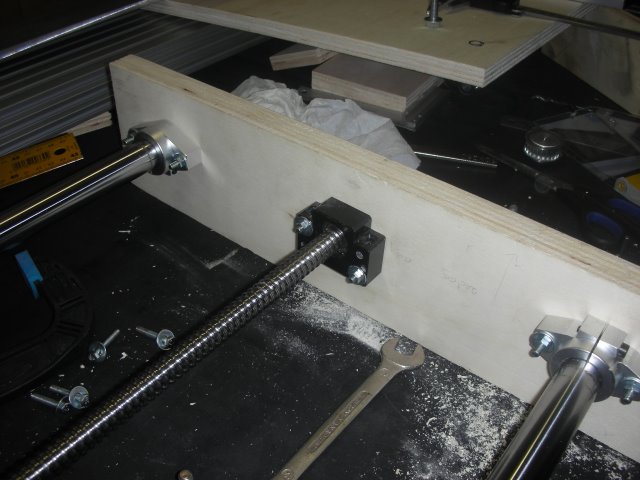
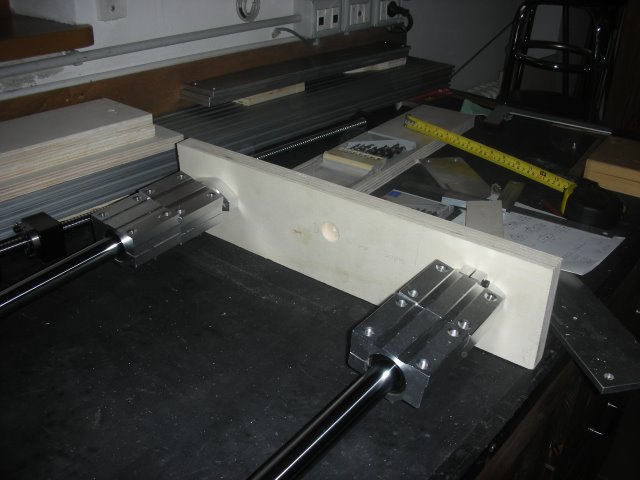
The most difficult part of the assembly was the parallelism of the guides and ball screws. I made some adjustments screws to move one of the guides in the X, and Y axis. As for the ball screw and the bearings, I moved the X-axis to either end of the guides, then centered the bearing and fixed them with the bolts.
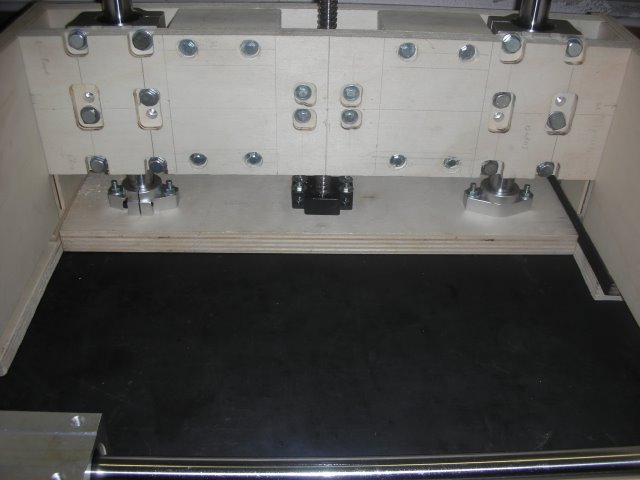
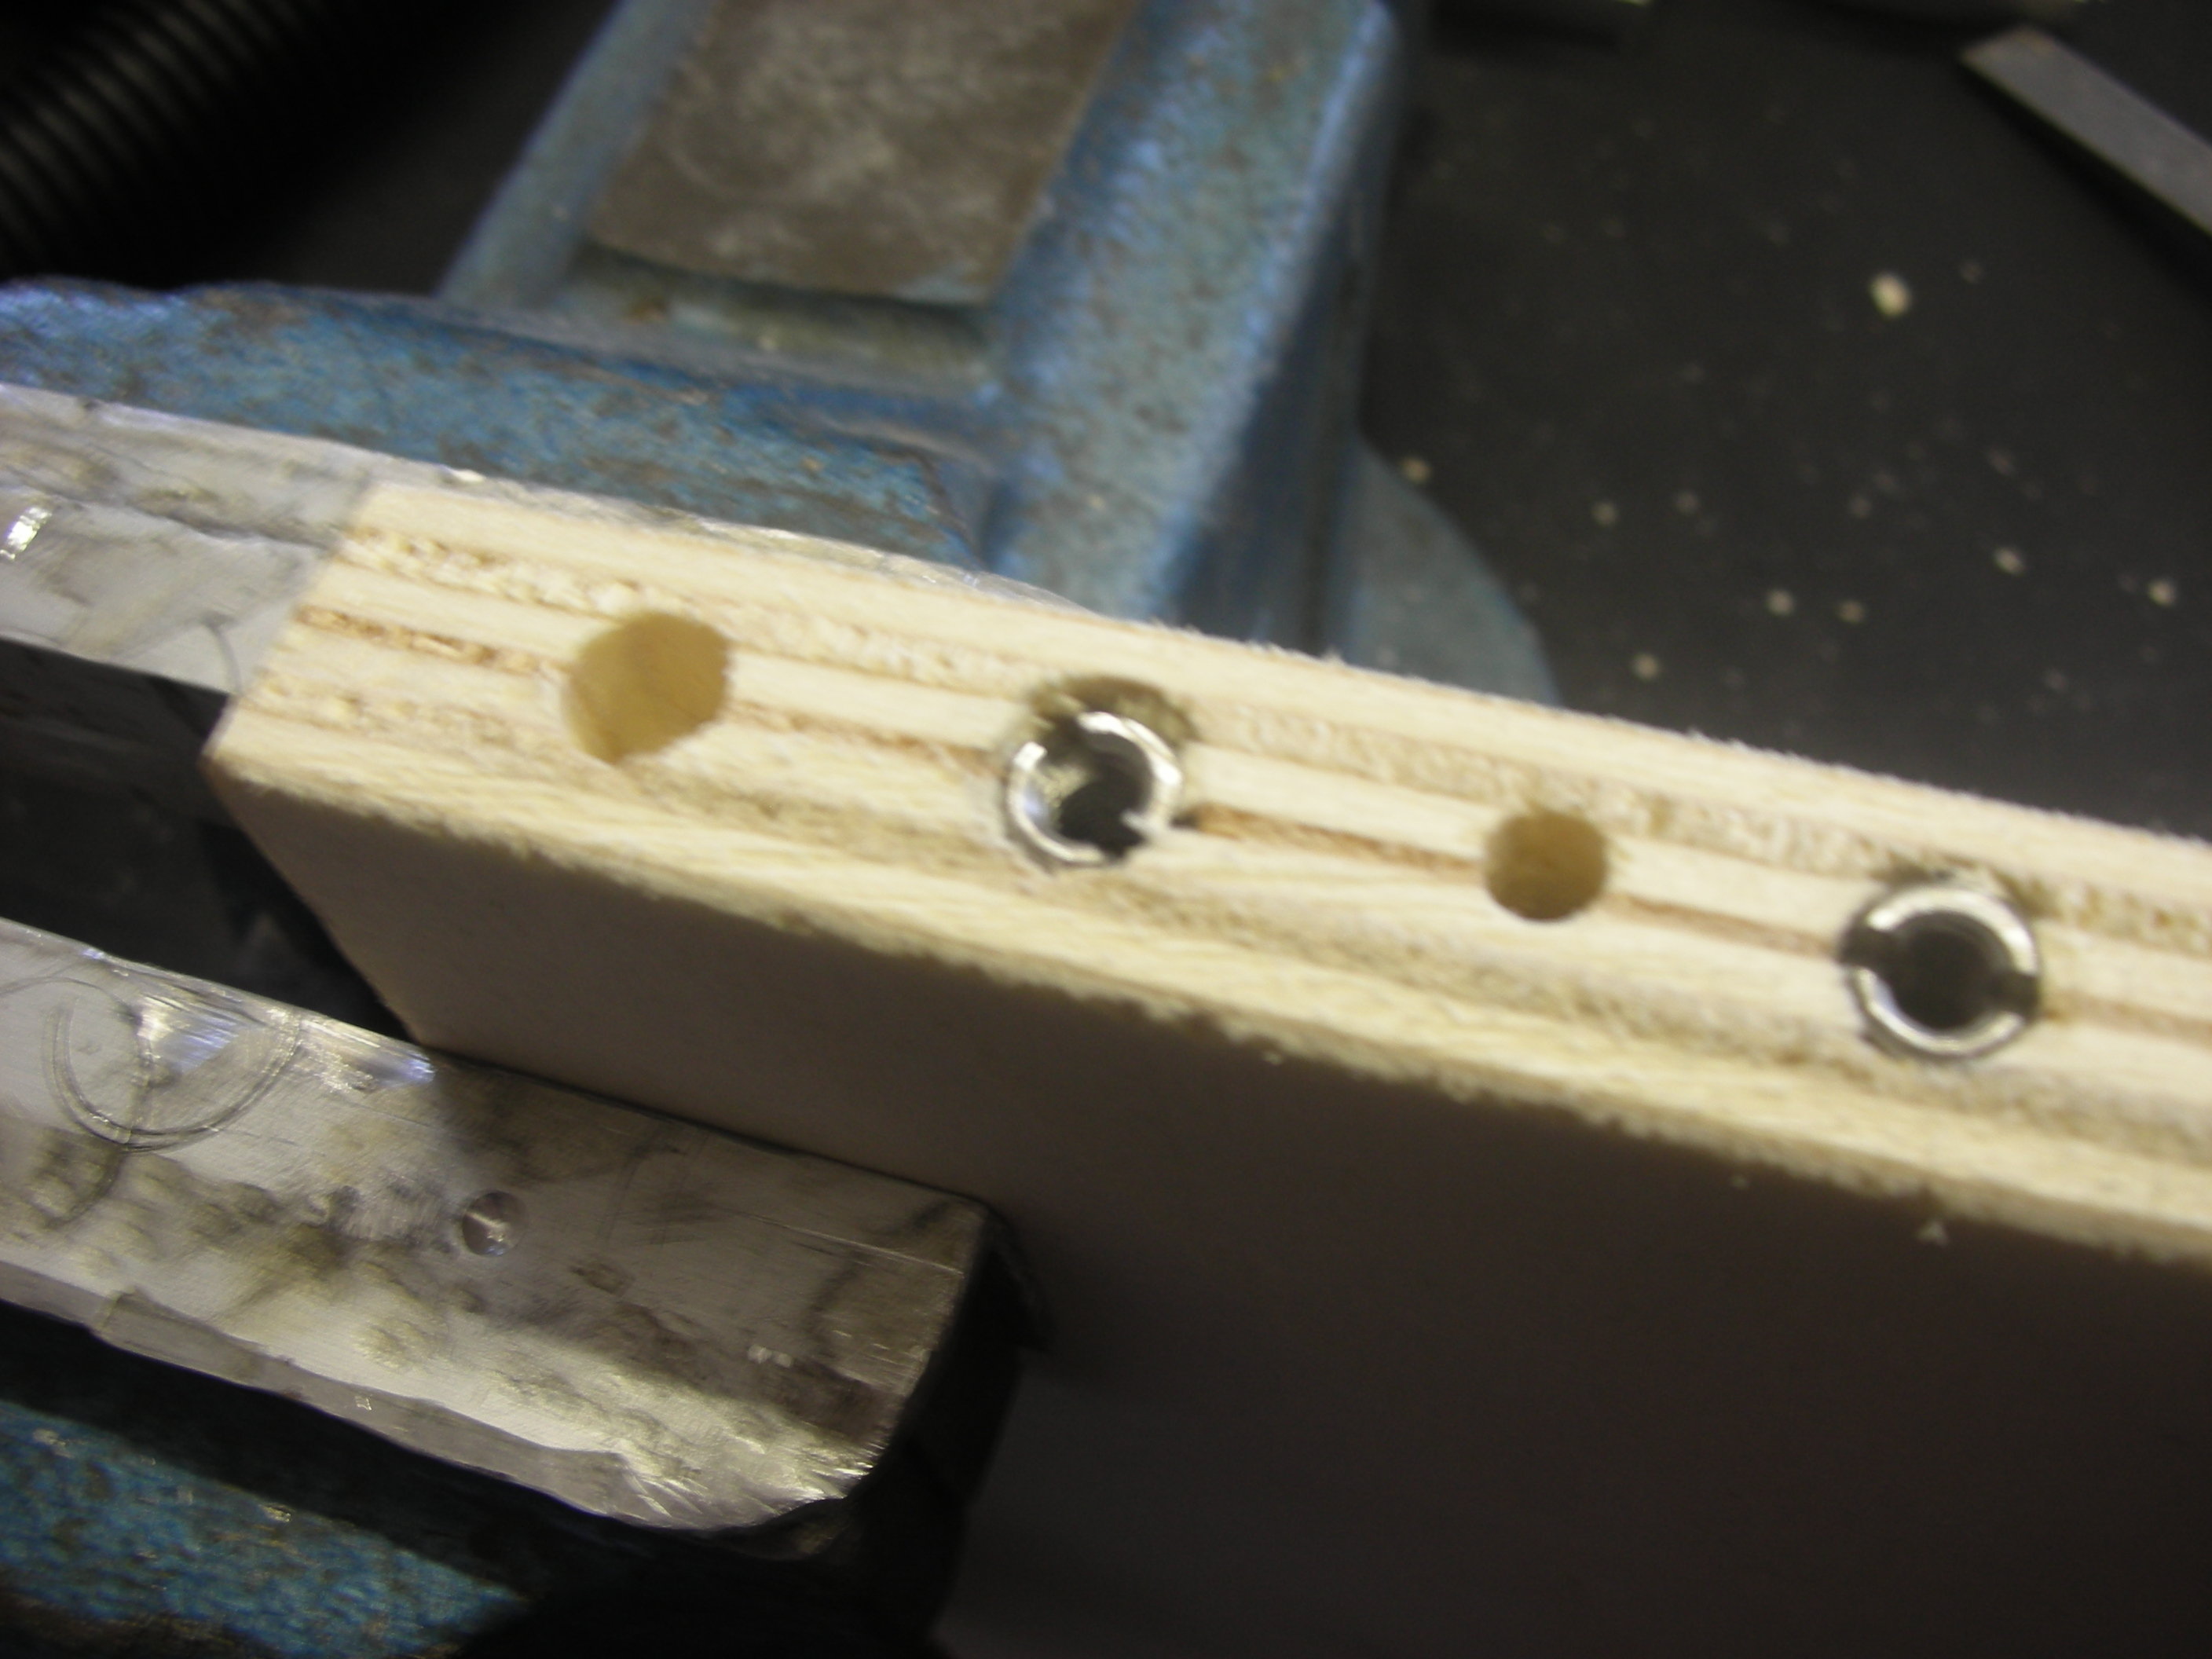
For the alignment of the parts, I used a set of pins so that I could be sure the parts would line up at assembly as they should. However the plywood was really good quality, the surface was kind of weak. So I had to put plenty of washers under each bolt and screw. The final result was rather satisfying.
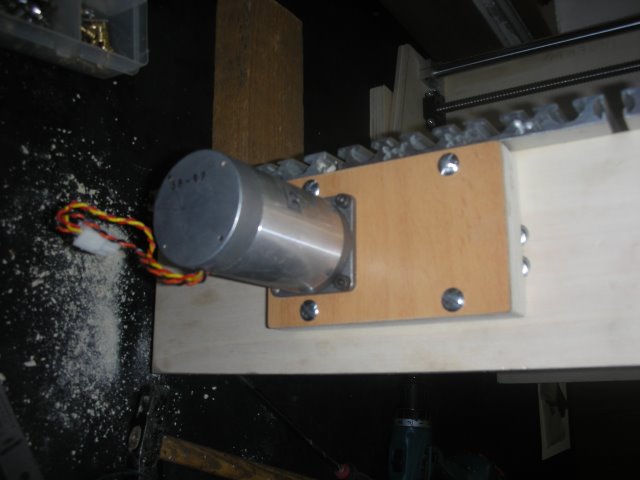
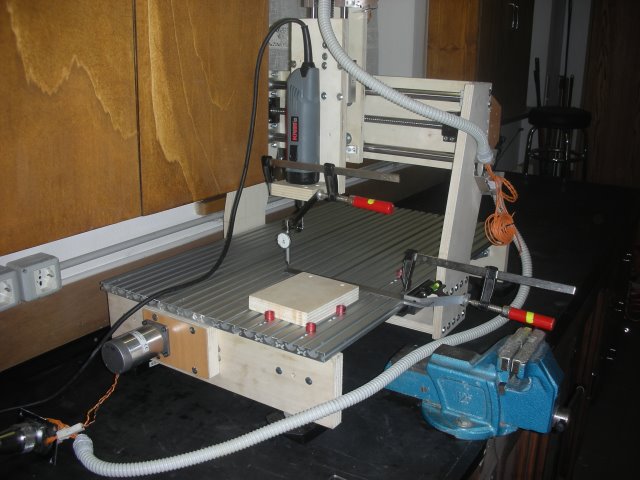
The assembly was going quite well, but now and then I discovered some flaws in the design and had to cope with it, modifying the part in the best way possible. But as you can see, the router was taking shape day by day. I used a KRESS 1150 W / 220V AC router motor. This motor fits very well in the structure and is strong enough for the "job" I had in mind to do after finishing the machine.
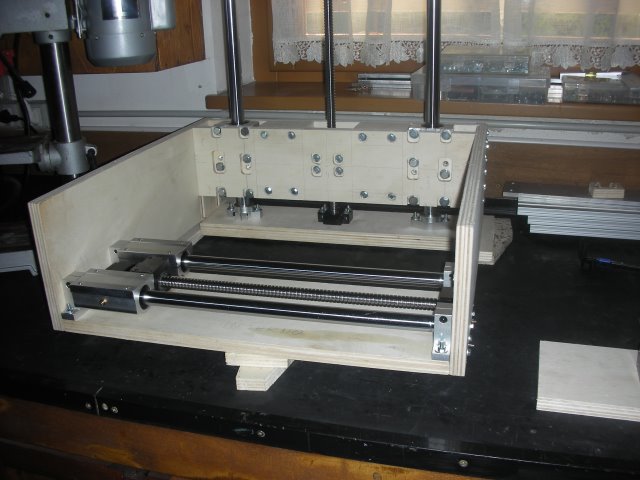
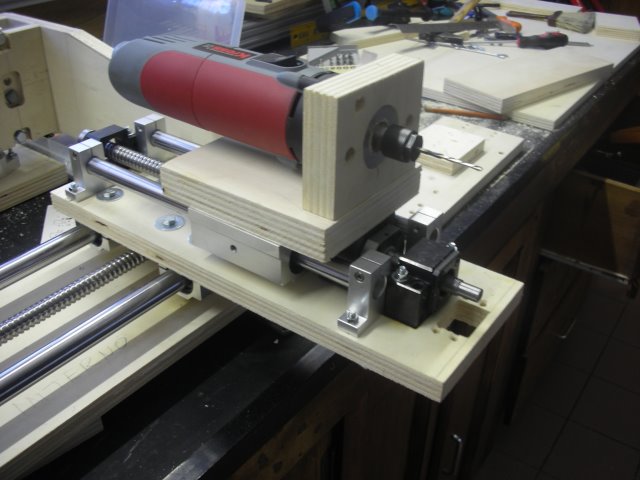
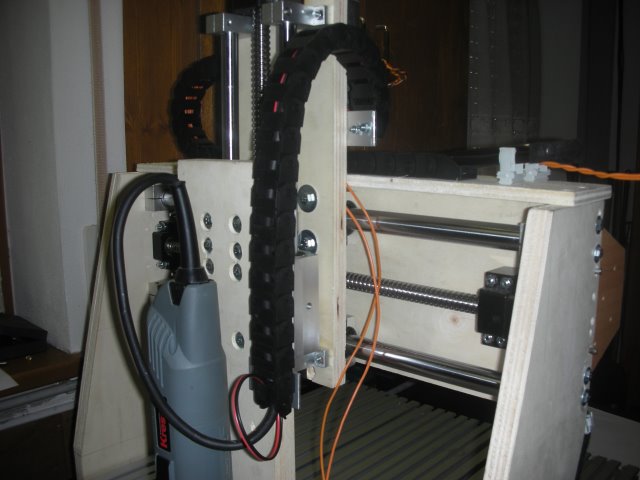
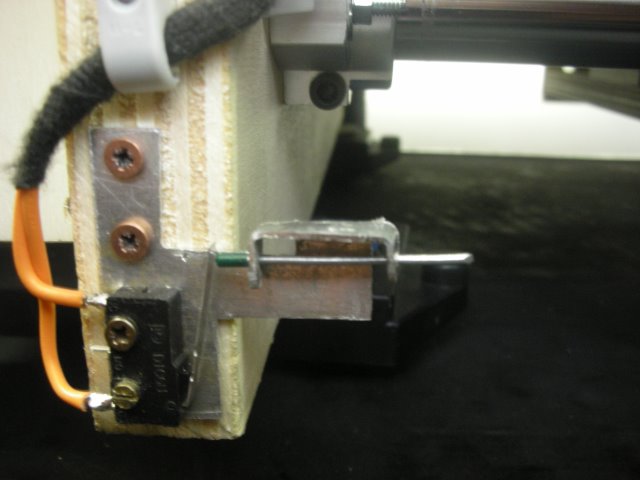
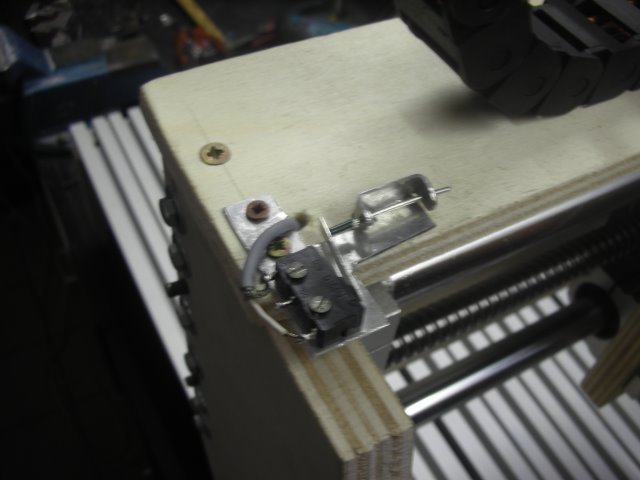
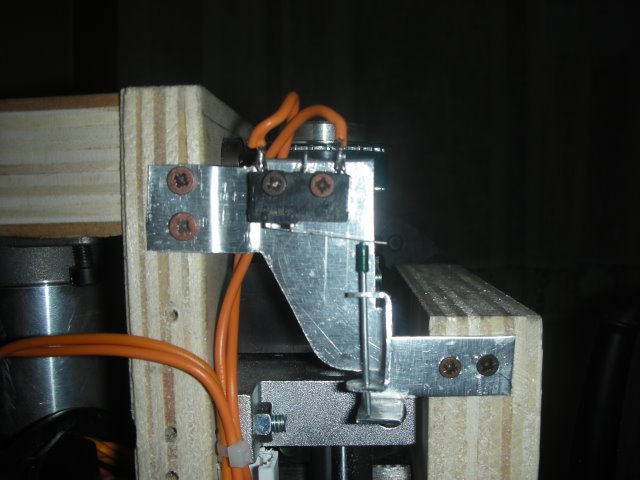
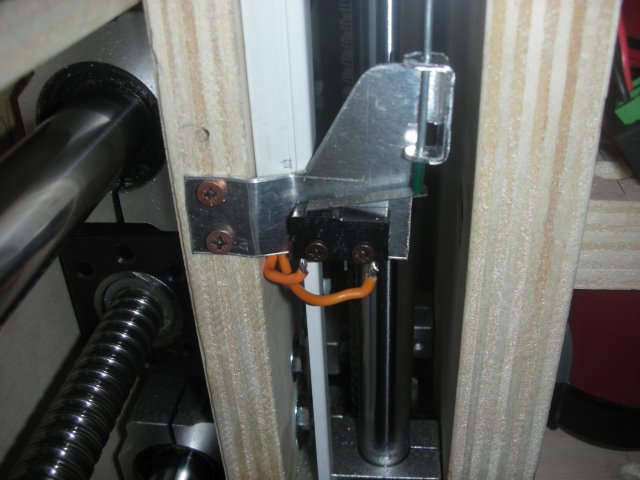
The assembly was going quite well, and I went on putting the electric parts on the frame as cable chains, stepper motors, and wiring to obtain the final look as the Solidworks rendering was shown. I've made some brackets to fit the limit switches on the X, Y, and Z, axis for safety at operation, to prevent collision with the structure, and protection of the mechanics.
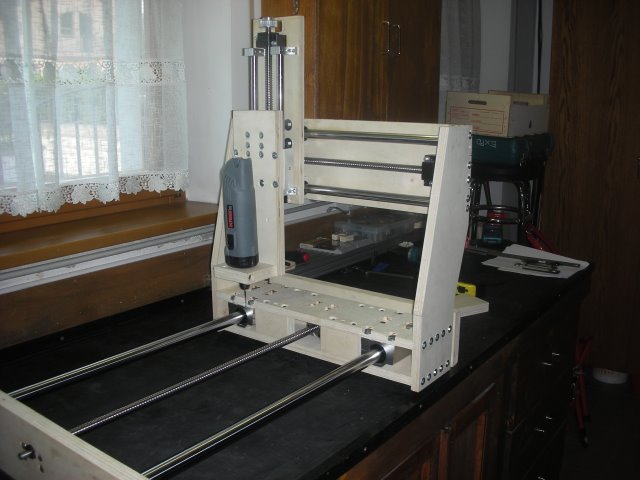
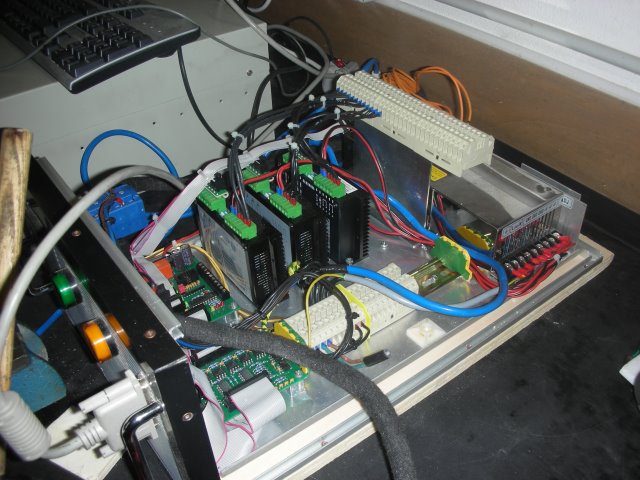
Then I started with the stepper controller and electric cabinet, using of-the-shelf components which were ordered in China and came within two weeks. The stepper-controller is a unit with 48V= power supply and 4 A current capacity. These drivers were connected to a so-called breakout board, which will be operated on a PC with the famous CNC software MACH-3 on the parallel port.
.jpg)

Some fine tuning was necessary to push the performance of the stepper motors to get maximum speed without losing torque or steps during operation. The MACH-3 software has a nice option to do this without any effort and is quite efficient.
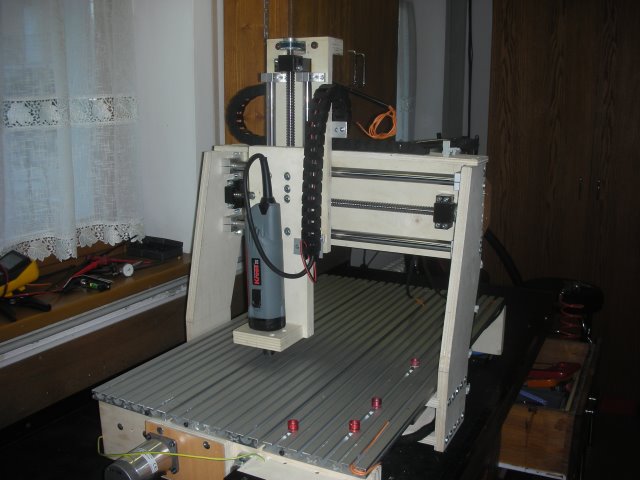
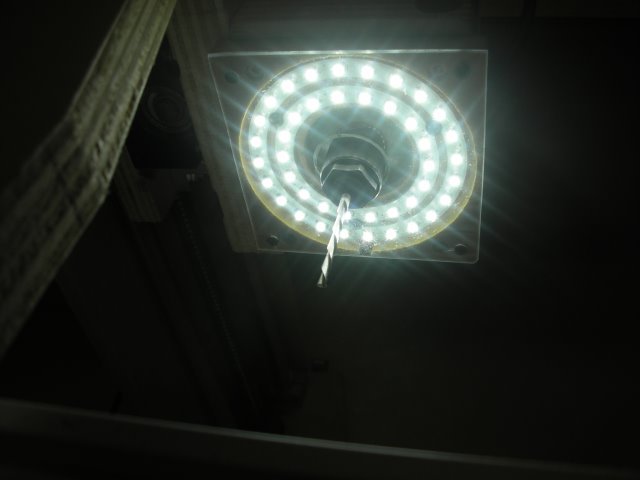
During these tests, I had the opportunity to check on parallelism and correct perpendicular movement of all three axes using a micrometer gouge. The precision was within 0.03 mm on all movements. Fair enough for the work I want to perform on this router. Now I added some nice accessories like an illumination by LEDs of the workpiece directly mounted on the motor stand.

And that was basically all that I did back in the time. During operation and gaining some more experience with the router, I added some more accessories, such as a dust collector, and some other features so that I could mount even a Laser-Module instead of a router motor to engrave or even cut wood. Here is a picture of what the router looked like just one year after finishing. I've added also a 4th-axis, so I can now work on round parts, cutting, engraving, or using a laser.

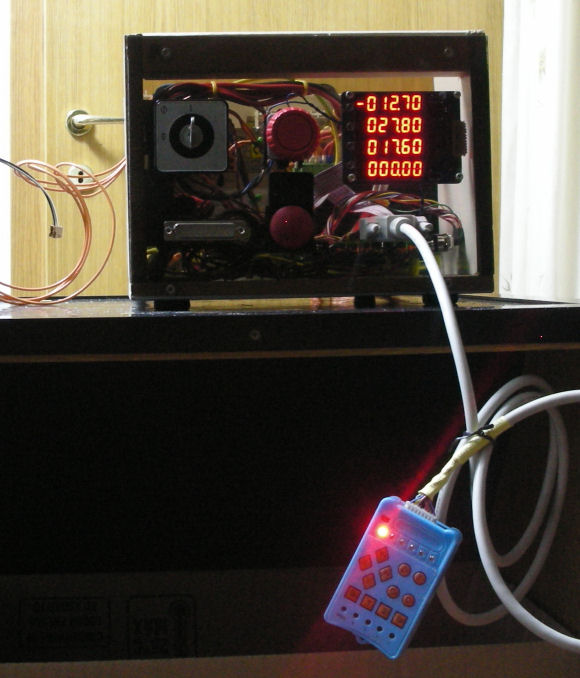
For manual use and adjusting the router/workpiece and tools, I added a DRO display with remote control, so even without a PC or MACH3 I am able to move and tune the router easily.
Over time I realised many small hobby projects using this tiny but efficient router setup. As the motor has only 1150 watts, metal engraving and cutting is somewhat time-consuming but with a little patience, all jobs were done nicely. I used the router for making PCBs and memorabilia, spare parts for teleprinters, and a lot of other stuff. I don't regret building this router by myself, because other than spending less money, I learned a lot (trial and error) about how to do things and how not.