Hobby basement conversion
380170 Johannes 2021
The beginning
The new apartment had just been finished, everything was cleaned (in 2002), and moved in within a week. I started setting up the hobby cellar just a month after moving in. In the beginning, I wasn't sure how I should design the desk, work surface, and shelves, so I created a mixture of work surfaces in a "U" shape, equipment storage areas for teleprinters, and, a little higher, some shelves for smaller devices such as keyboards, monitors, etc. ( i-Telex was not yet in sight.) To power the devices, a number of power strips were used, initially without switches, and later (Chinese production) with switches.
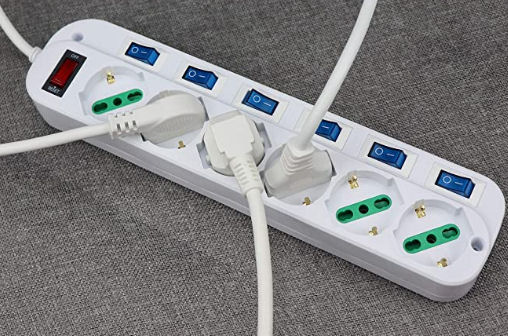
China power strip

Tangled cables
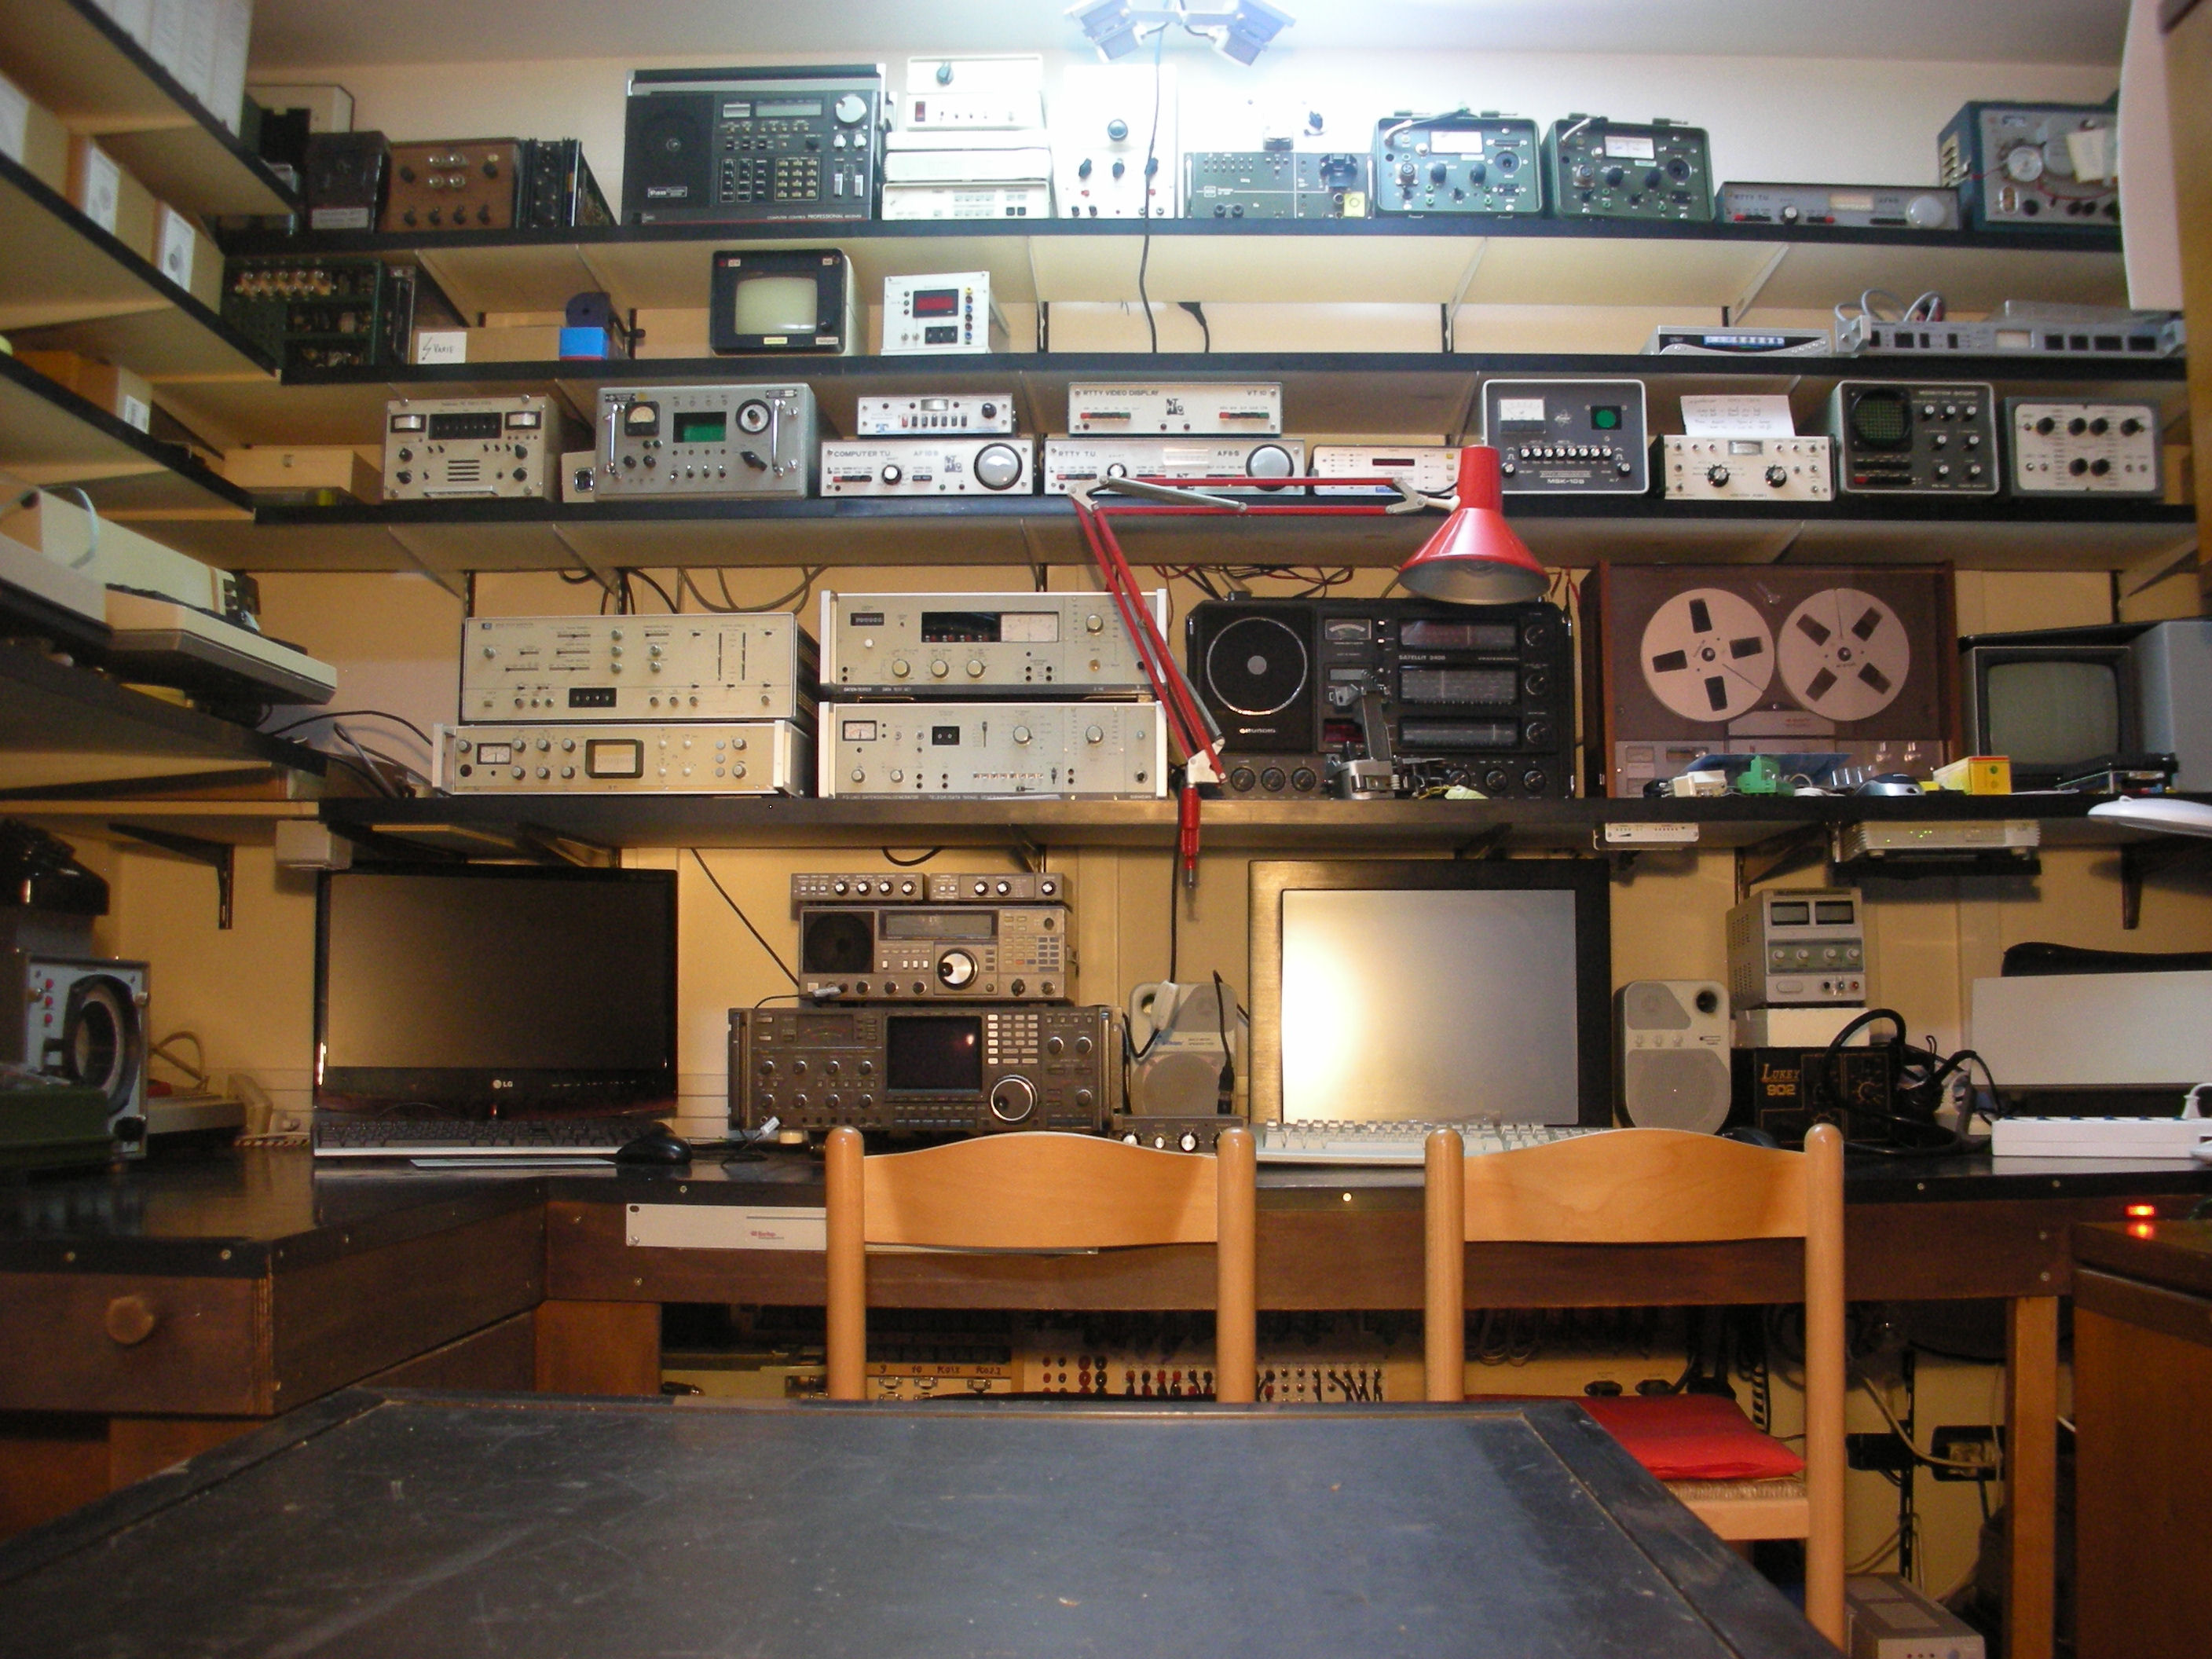
Hobby cellar before the renovation in June 2020
At first glance it was satisfactory, but the cables hanging down to reach the individual strips and the inevitable tangle of cables behind them wasn't how it was supposed to work in the long term. In addition, many devices such as receivers, keypads, etc. also have audio inputs and outputs, which should be connected to each other using RCA / video cables.
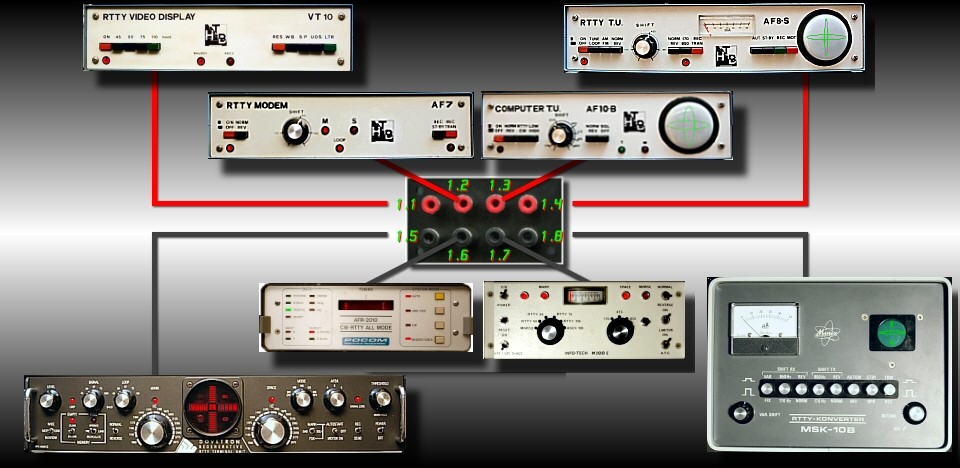
Example of audio/video signal connections
The constant "plugging" of the cables, very inconvenient because they were always connected to the back of the devices, gradually became too much. So I built a small “switch cabinet” with RCA audio and video sockets, several 10-pin rotary switches to make connecting individual devices easier. (If you live and live in Italy long enough like I did, you slowly become “a lazy Dutchman”)
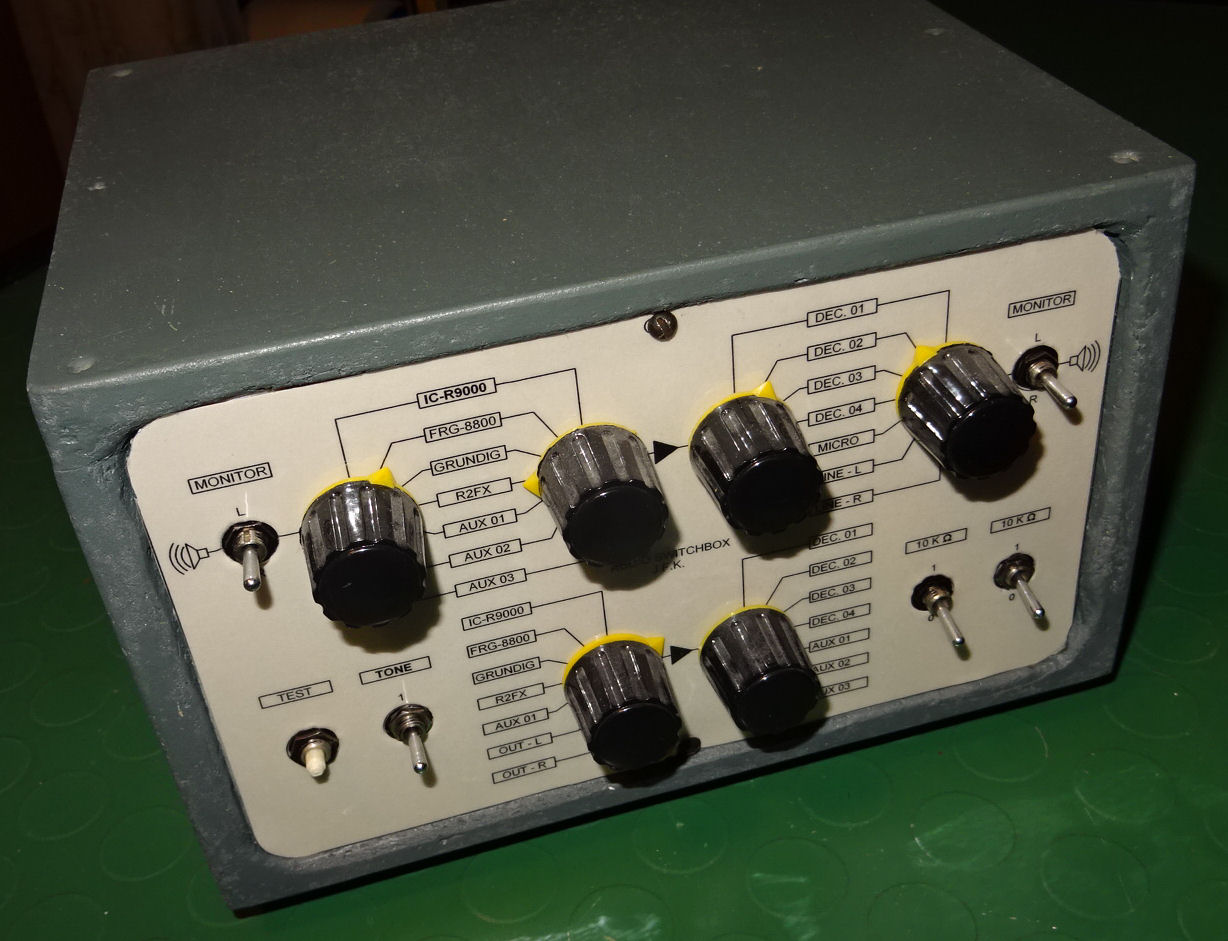
Manual switch of audio/video signals
In order to make it easier to connect the devices using RCA / video cables and not to be tied to a “fixed” configuration, I systematically attached smaller “distribution boxes” to the shelves. They were then connected to a “main distributor” using a shielded cable. In this way, cable laying could be made more beautiful and, above all, clearer without tangled cables. No matter how well you plan, changes are always possible and devices change constantly, some simply break, some have been sold or given away, so this "universal" connection system has its advantages.
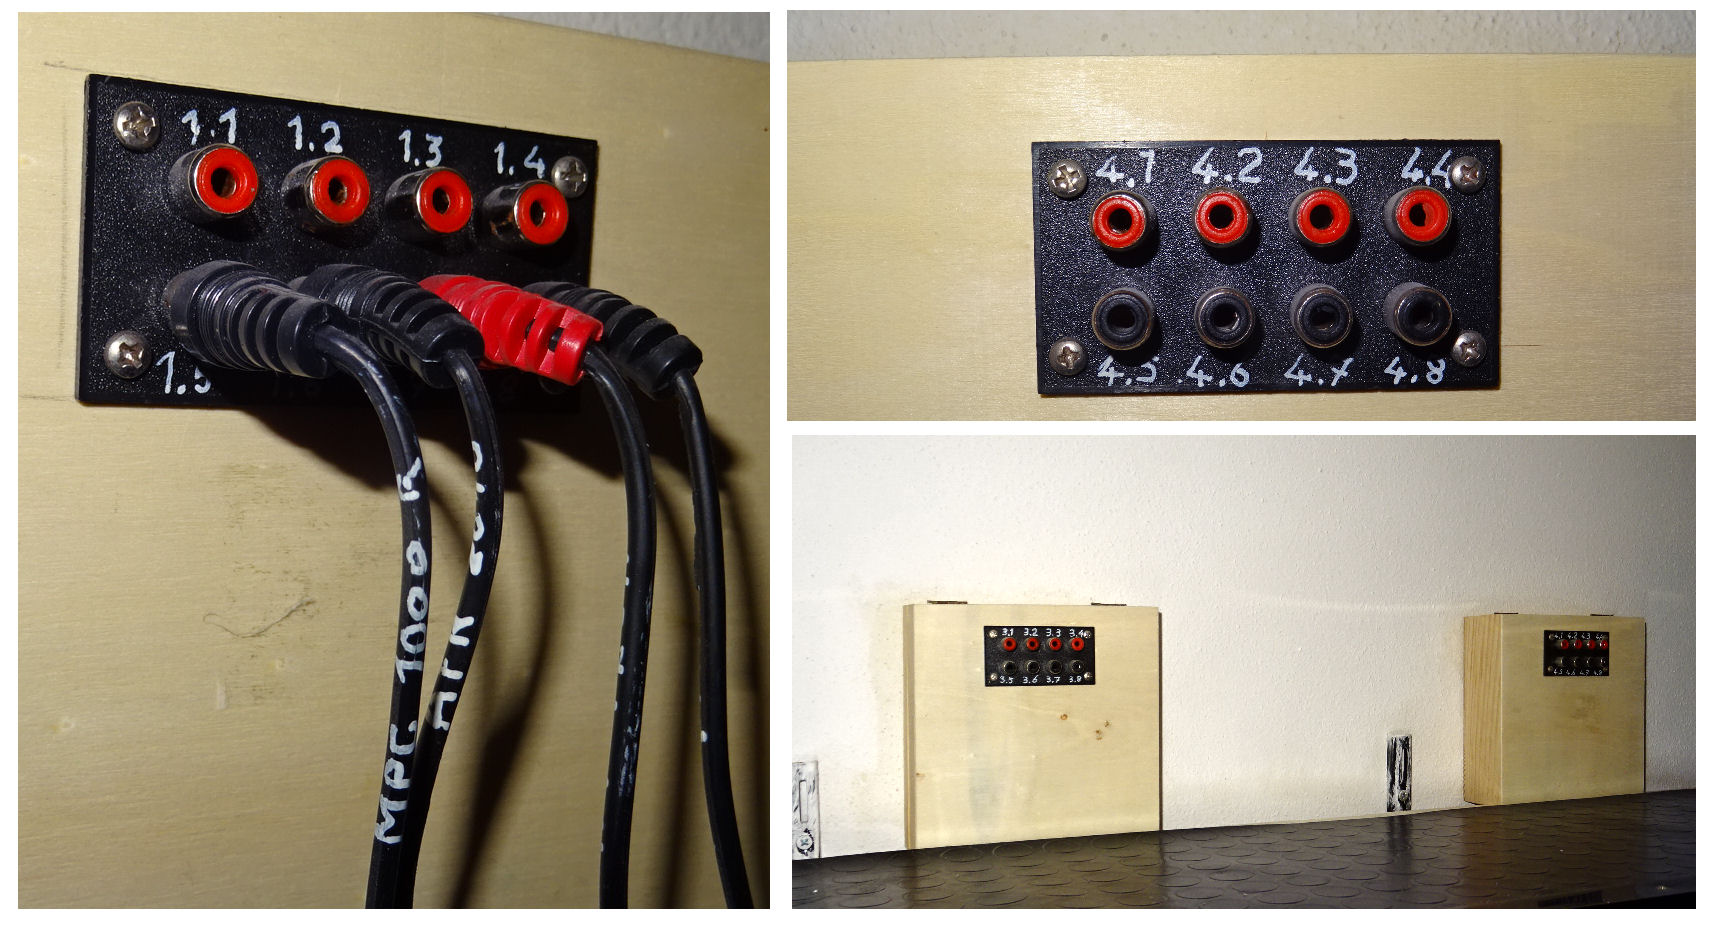
RCA sockets with shielded cable and distribution box
Now we are almost 20 years further and with the excuse of the Corona pandemic and the inevitable lockdowns, as a pensioner you have a lot of time to take care of your hobby. A few years ago I had already removed some Hitachi PLCs from former fruit processing plants in order to use them “at some point”, the type is almost vintage these days!
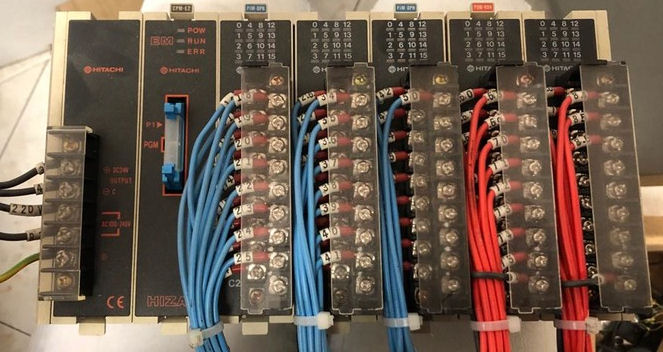
Brand HITACHI, type HIZAC CPU 700
Now it was the opportunity to use this PLC instead of manual switching. For this purpose, a frame was made from wooden strips and plywood in which all the required components should have space. It immediately became clear that it was “a little” more than I had initially imagined. I actually only wanted to limit myself to switching the audio signals and video, but because I still had several PLC modules available and "modifying" them was relatively easy, I made the frame a little larger.
I then wrote down my idea of how and what the “ thing ” should be able to do in a table to support my thoughts and used it to arrange the components on the frame.
| 1.) Audio signals | 2.) Video signals | 3.) Supply voltage 230V |
| 4.) Supply voltage 12V = | 5.) Supply voltage 24V = | 6.) TTY signals from the decoders and teleprinters. |
| 7.) Switching RS232 PC | 8.) Free future connections | 9.) Free |

Distributor and switch frame with PLC and other components
From left to right - from top to bottom: 24V= power supply (The 12V= power supply was mounted on the inside.) Main station PLC - extension PLC 1-10 Realis for controlling and connecting the TTY signals - RS232 sockets to and from PC - Free 12V= and 24V= connections - RCA audio sockets - RCA video sockets - PLC supply voltage - 230V 50 Hz supply line.
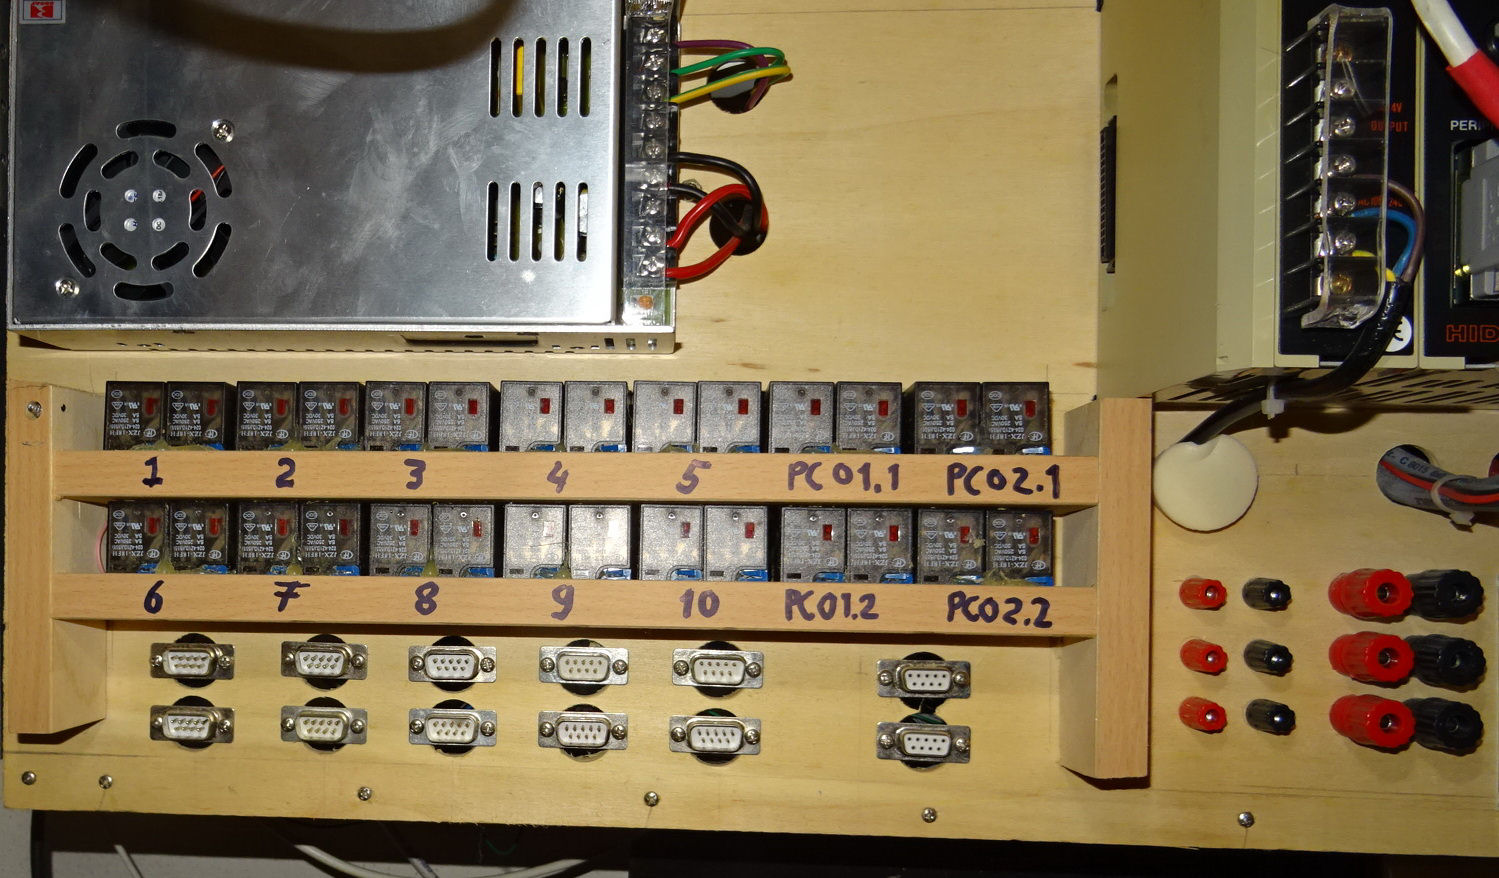
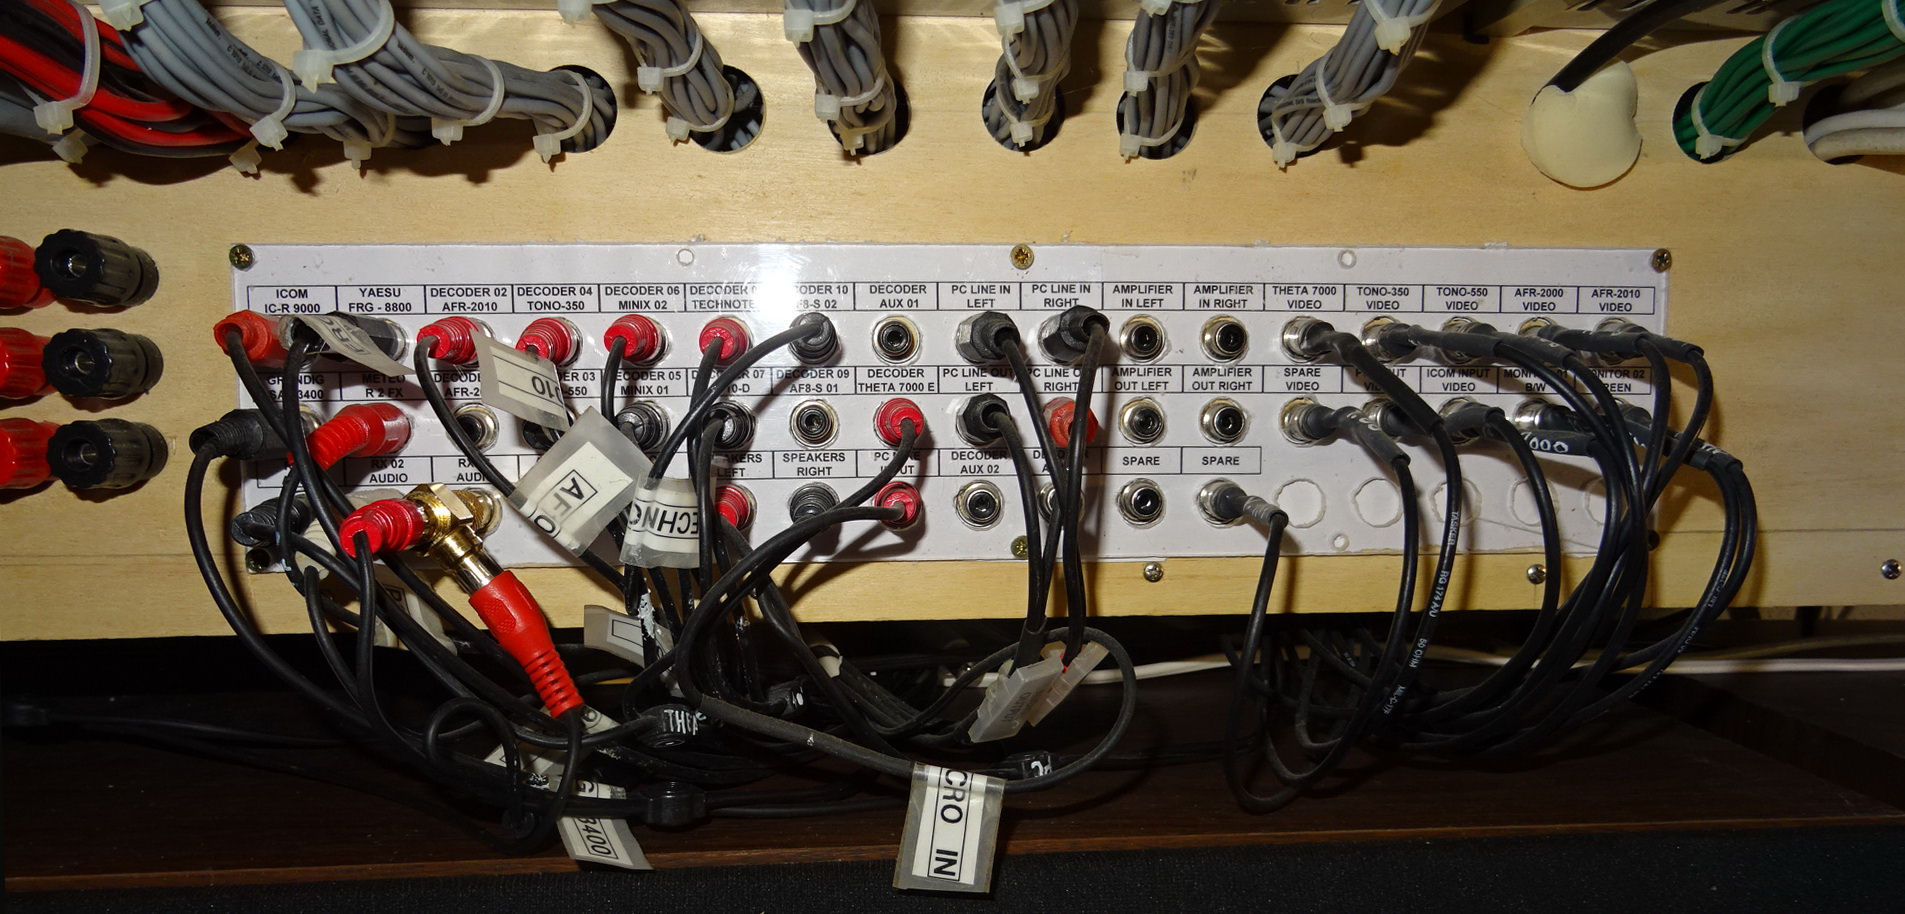
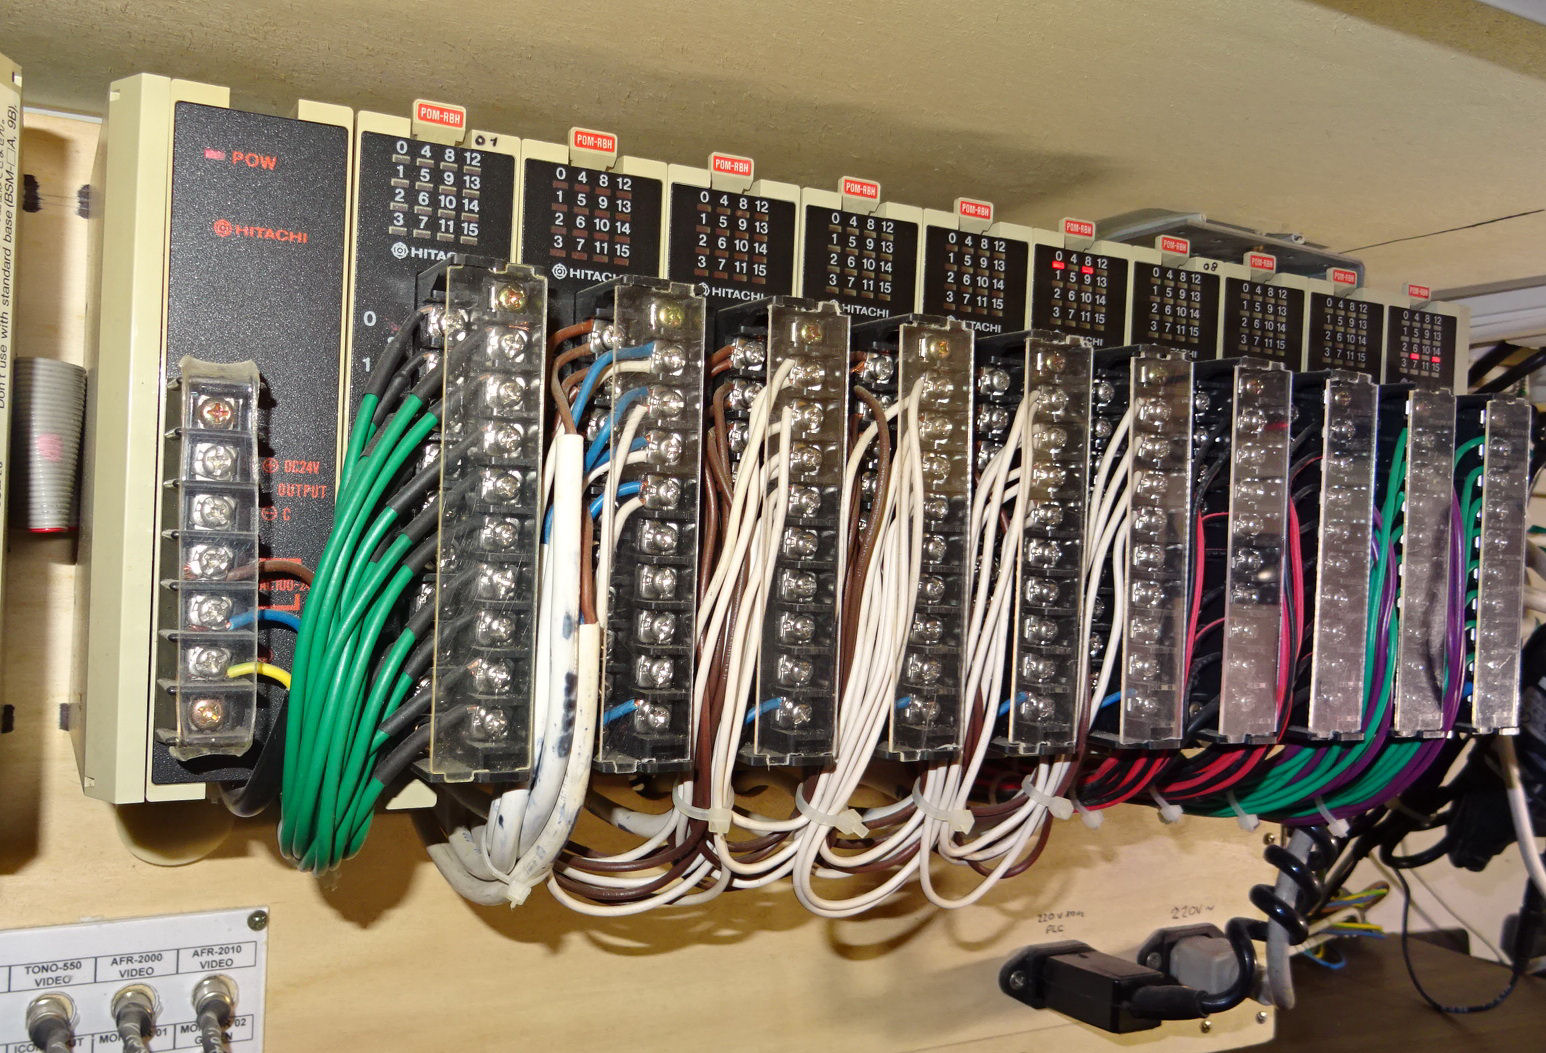
PLC power supply 24V= relay TTY and RS232 audio and video RCA sockets PLC extension
Storage spaces and shelves
After the "electronics" and distribution were finished, I would also have to redesign the parking spaces for teleprinters, etc. so that I don't have to deal with the tangled cables again. For this purpose, cable ducts and sockets for electricity and TTY were installed. This arrangement now makes it possible to set up, connect, and test teleprinters in no time at all. If you are not satisfied with the order, simply unplug it, change its location, plug it in and you're done!
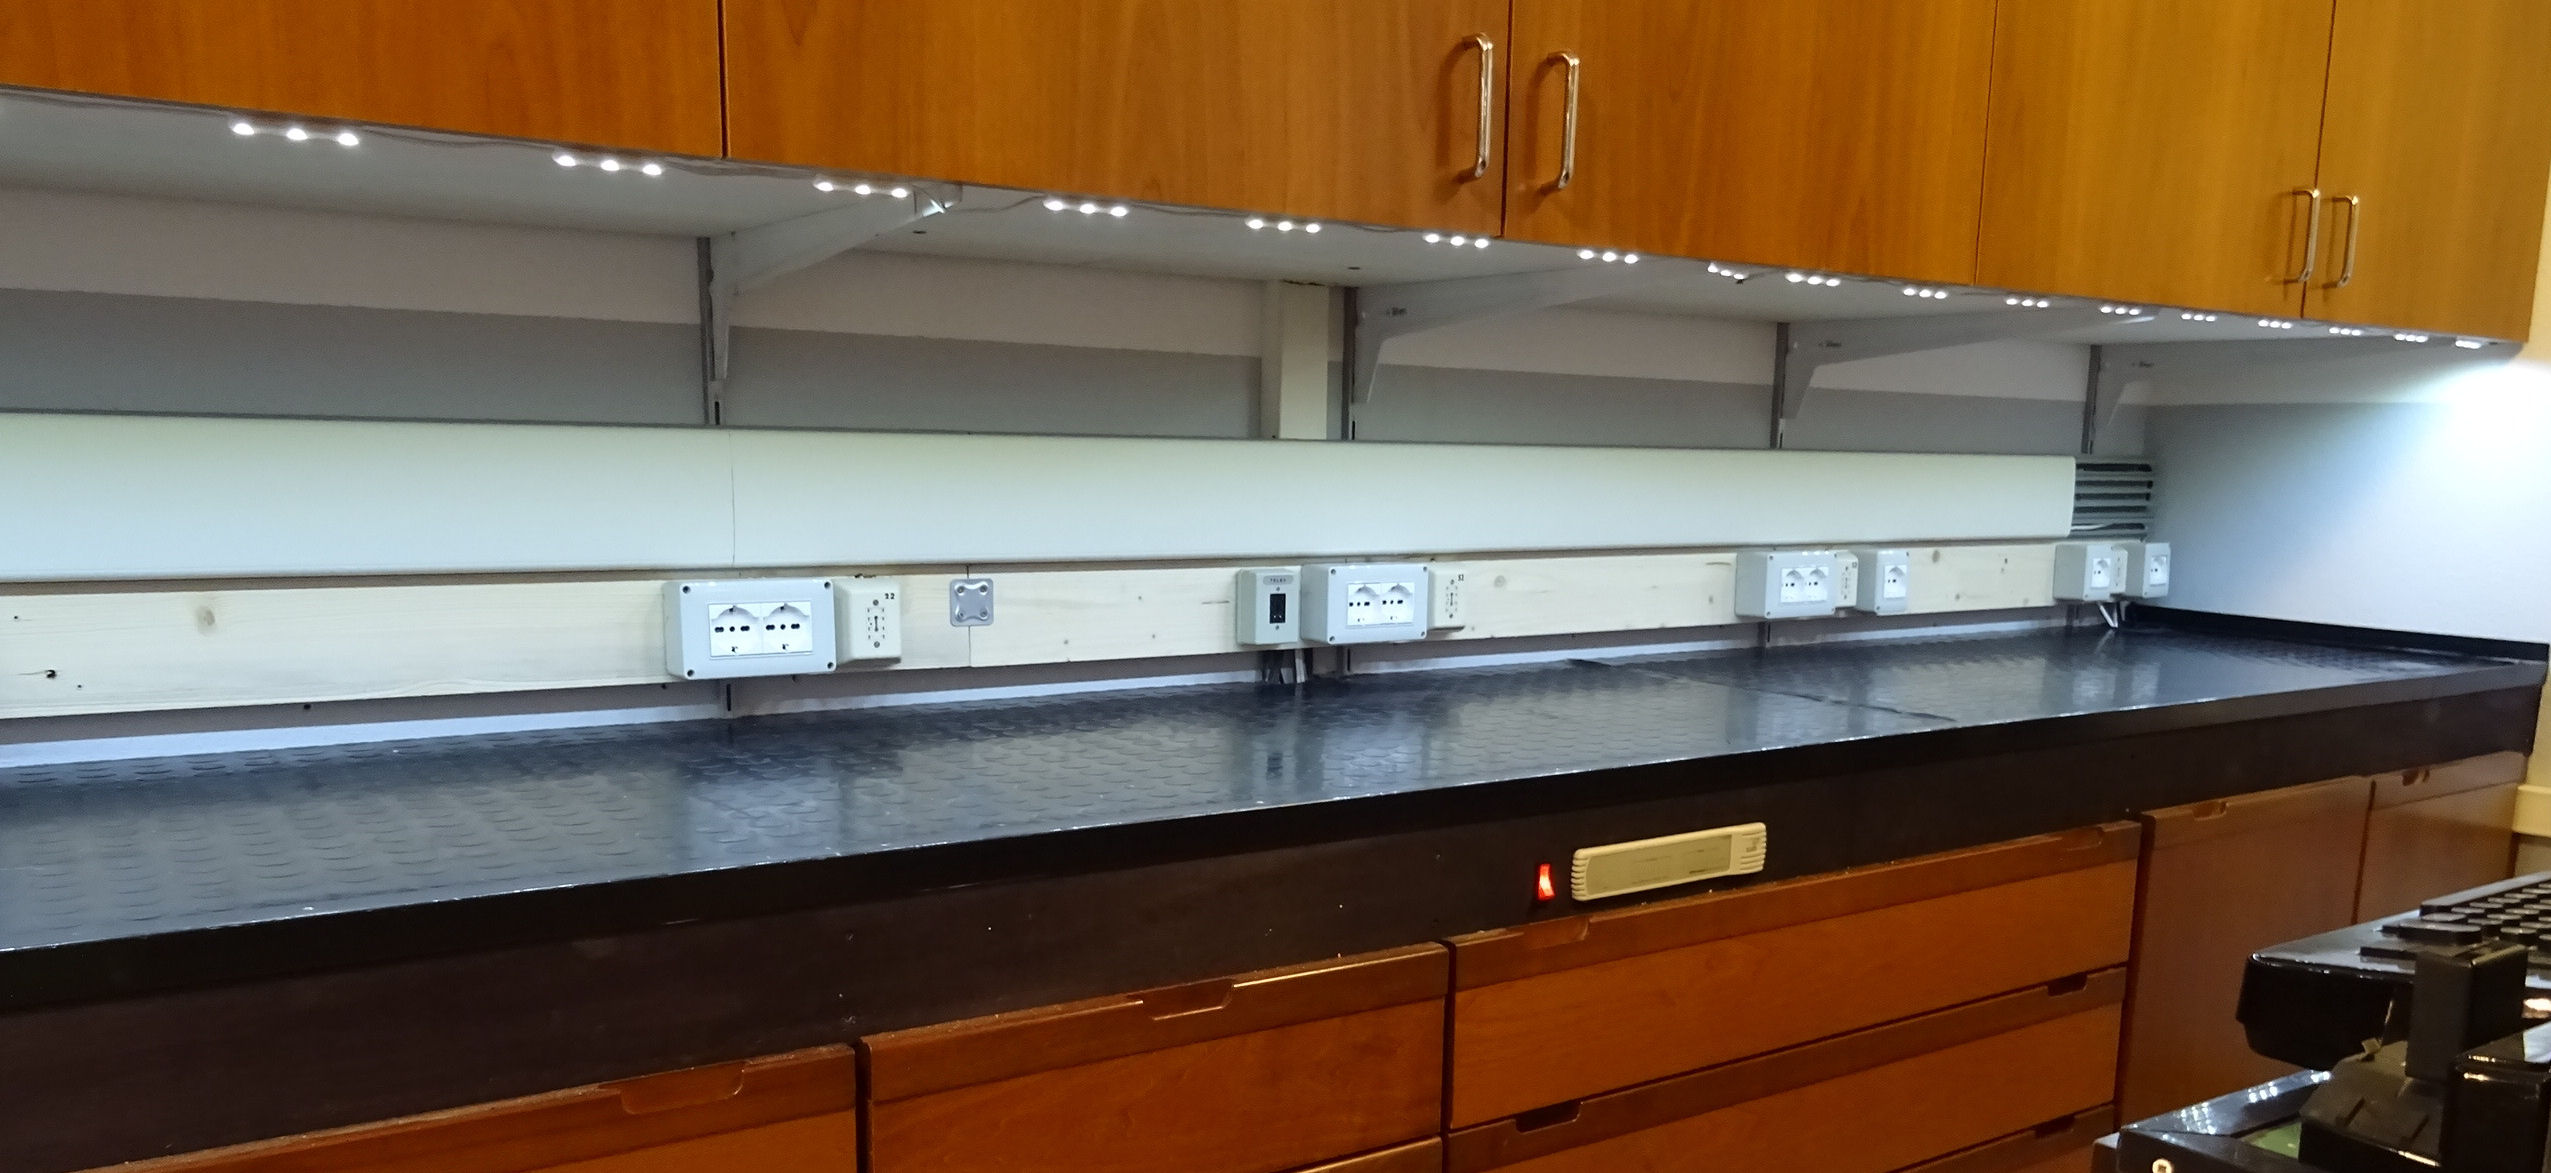
New equipment storage areas for teleprinters and remote switching devices with sockets (230V direct and 220V isolating transformer) and ADo8 sockets
Most sockets are double, so there is a socket with a magnetic circuit breaker and FI 230V directly on the mains or a magnetic circuit breaker without FI 220V using an isolating transformer. Older devices often have a problem with the insulation of the wiring, which can quickly cause an FI switch to fail. You can easily operate such devices with the isolating transformer. The isolating transformer has an output of 1500VA, which is enough power for several teleprinters at the same time.
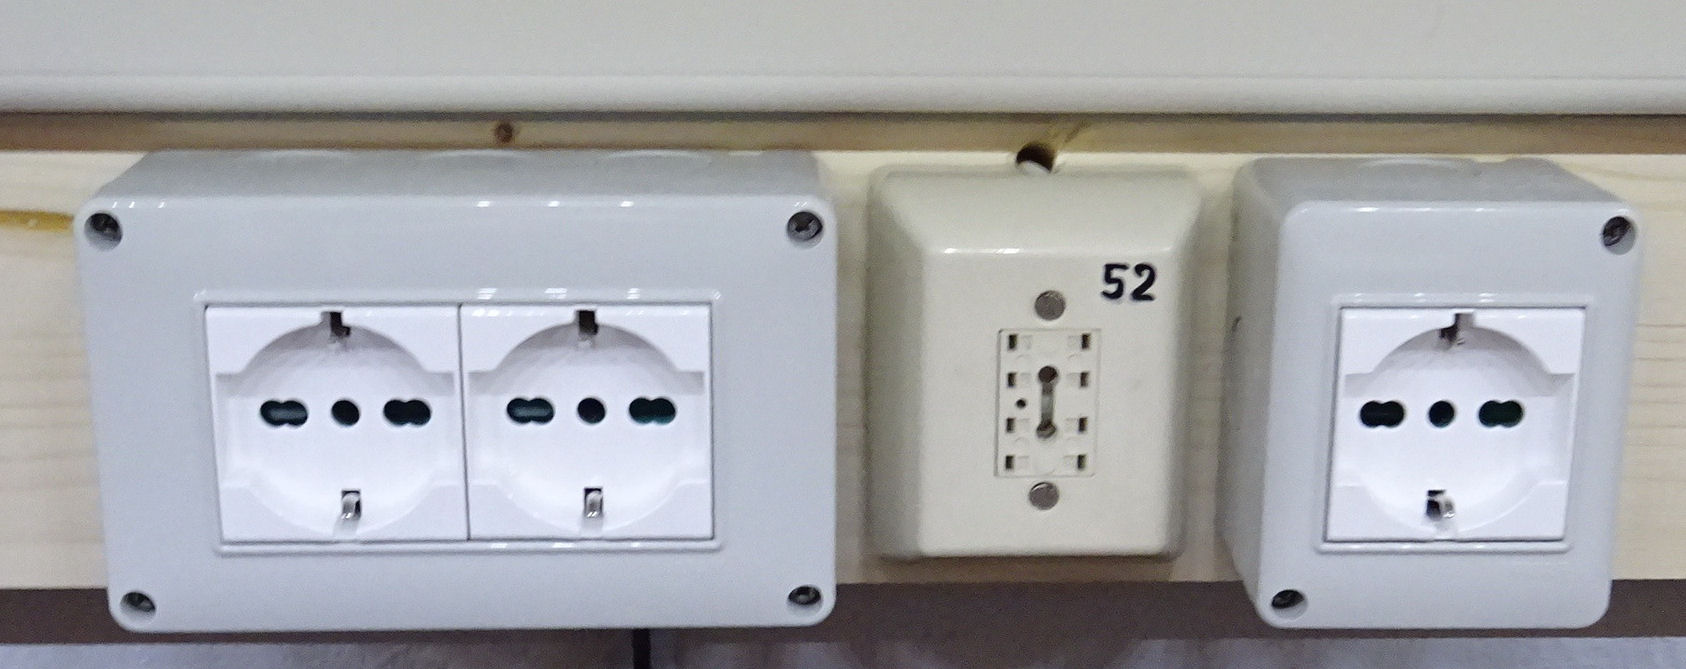 The single socket is my main connection, 380170 RFT F2000, and can therefore not be switched because, as it should be, 24/7 on the i-Telex network.
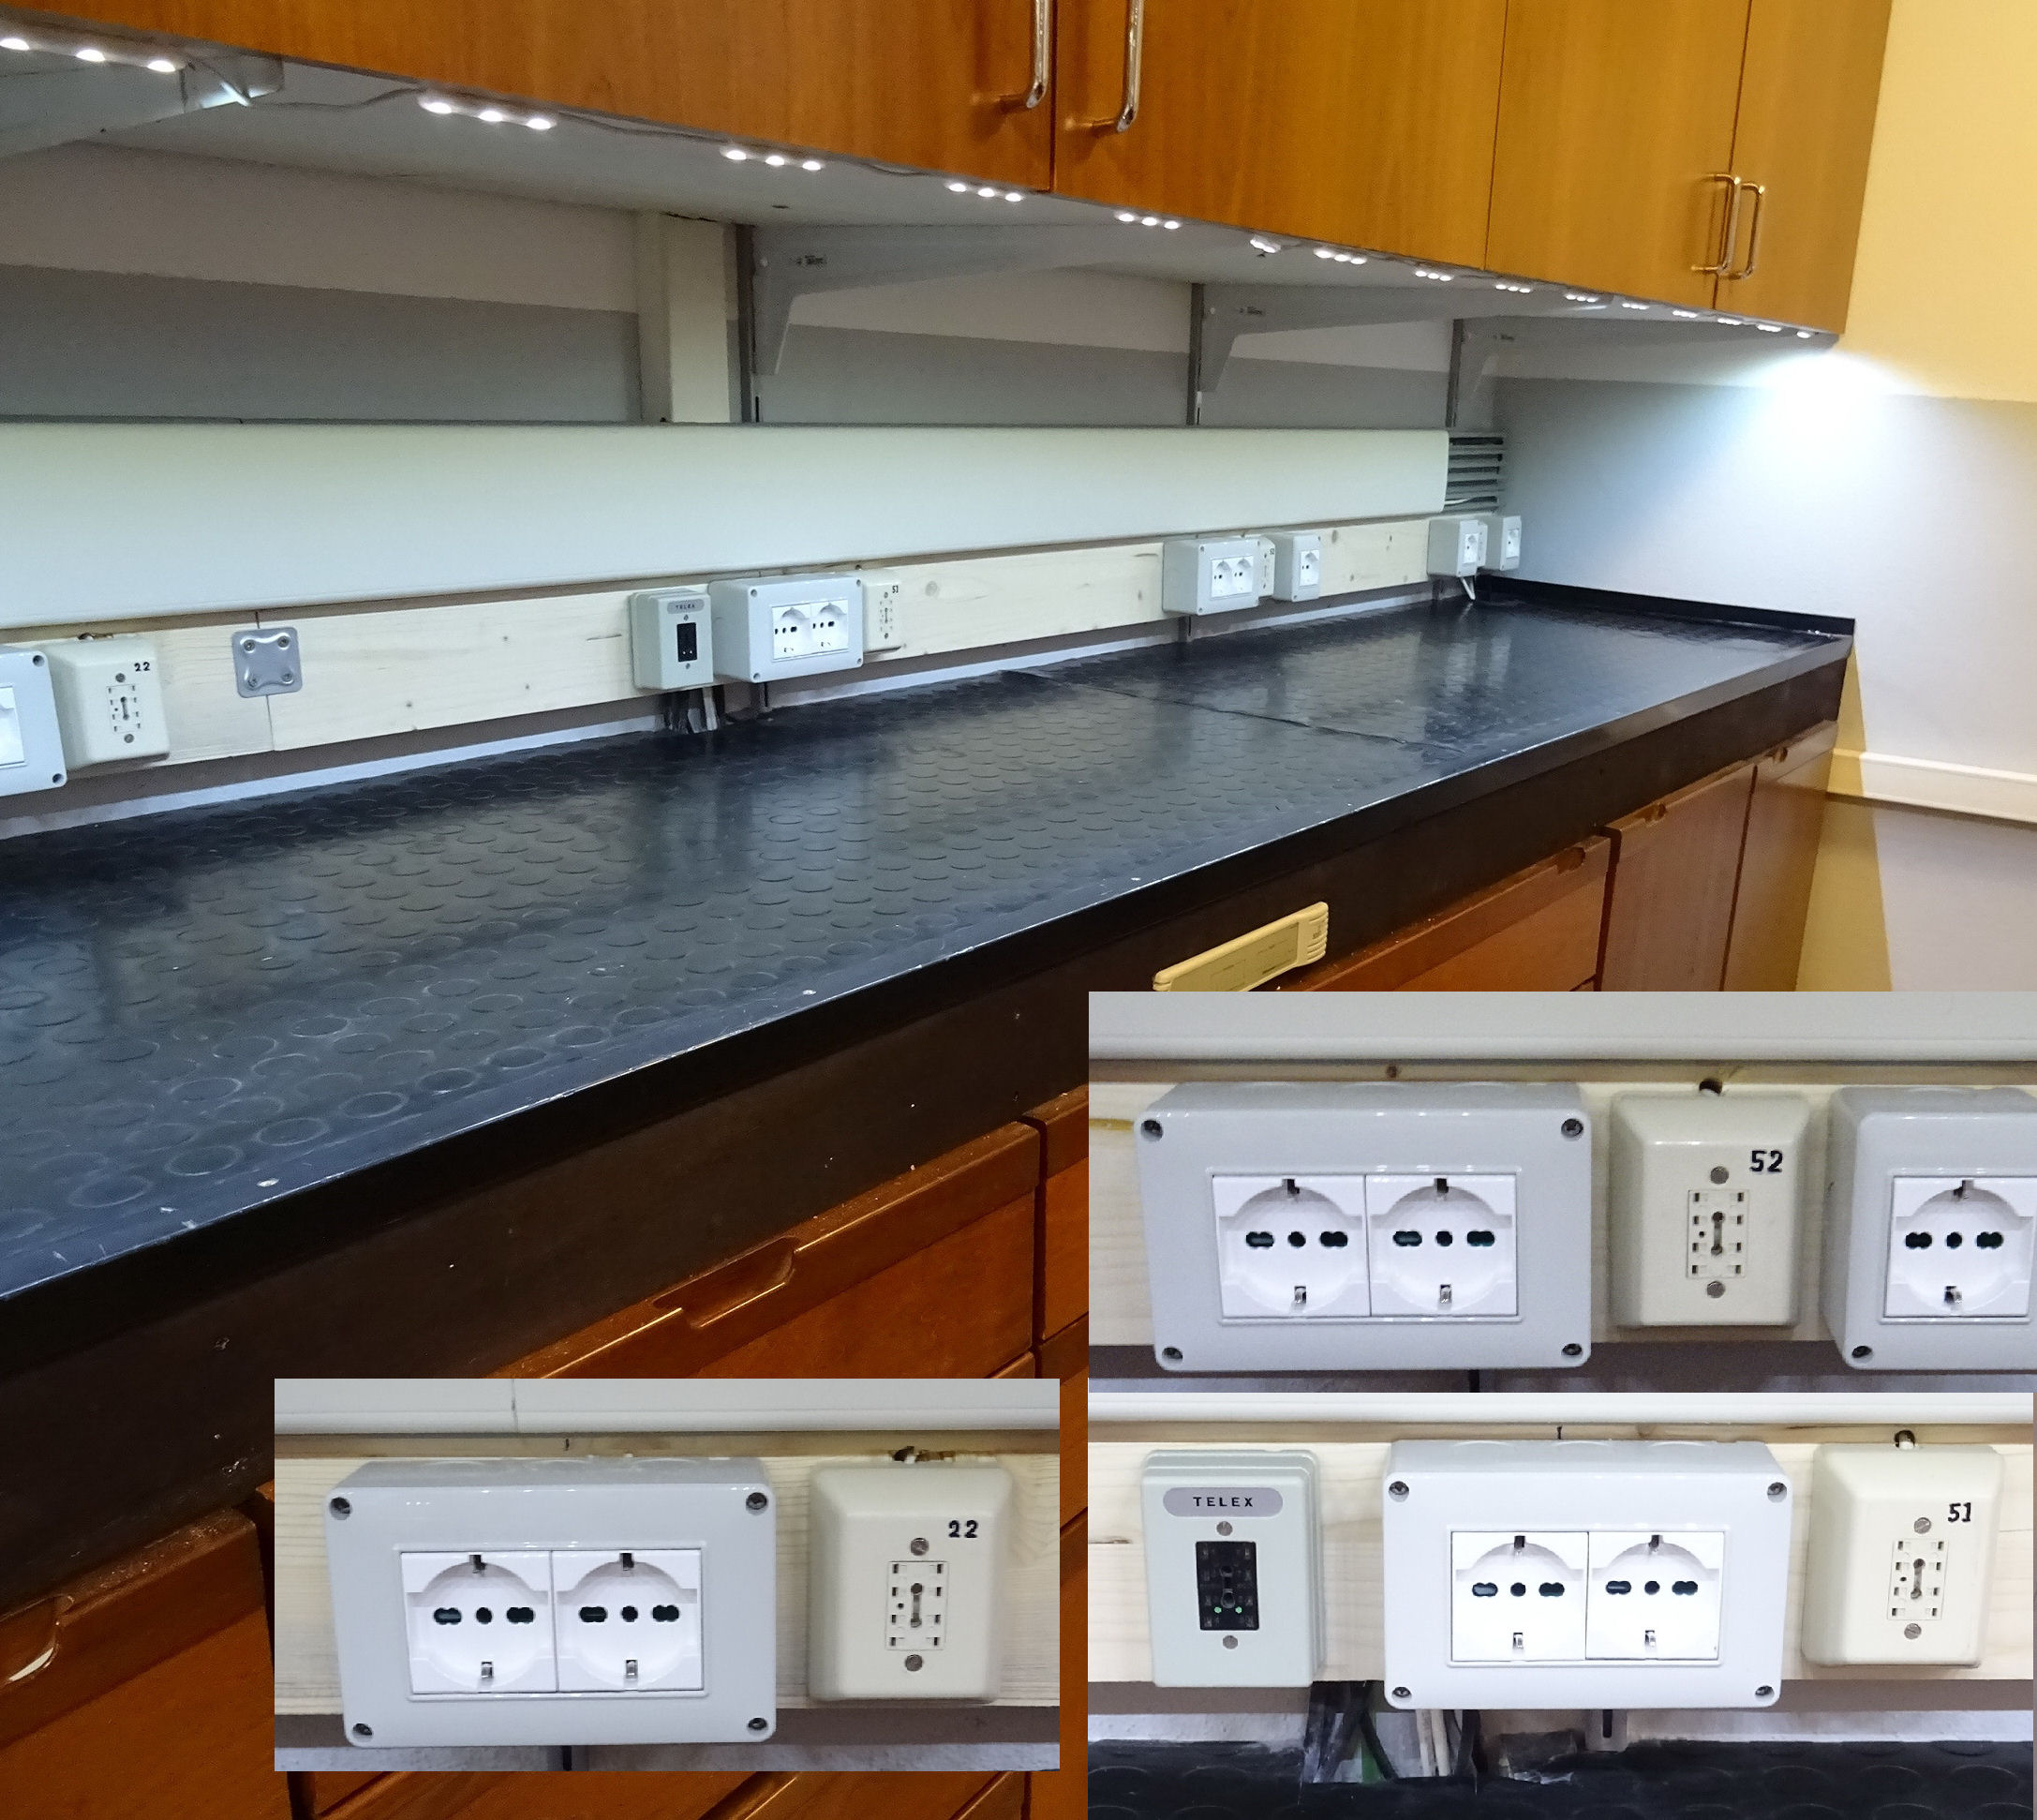 The ADo8 cans are each connected to one of the i-Telex FS outputs (TW39) of the various i-Telex racks (the white ones)
Newly designed device parking spaces with LED lighting and 3m 16 CH HUB / Switch.
Of course, I would also have to rearrange and reconnect the rest of my teleprinter and devices. That's why I redesigned the shelves, which was relatively easy because everything is built on rails and hooks. This meant I could largely adapt the gaps and heights to the size of the devices. I tried to keep certain types as well as decoders and so on in groups because of the operation and clarity.

Newly designed equipment parking spaces with LED lighting
This is what it looks like on this side of my hobby cellar. From left to right, these are Siemens T37h * Hasler SP300 RO * Olivetti TE550 (AT) Siemens T68d * Soldering station * Siglent SDG 1032X Easy Pulse Signal Generator 2 channel * Rigol DS 1104 Plus Digital 4 channel oscilloscope * Philps 4407 tape recorder (1972) * IPC Touchscreen for Meteosat / WXtoIMG / SPS control / RTTY reception.
Further devices are then set up on the next level, teleprinters, receivers, keypads, monitors, and the Weintek operating panel (HMI) with 10" touchscreen and various HiFi audio/video devices NVR/DVR/VHS/TUNER/.
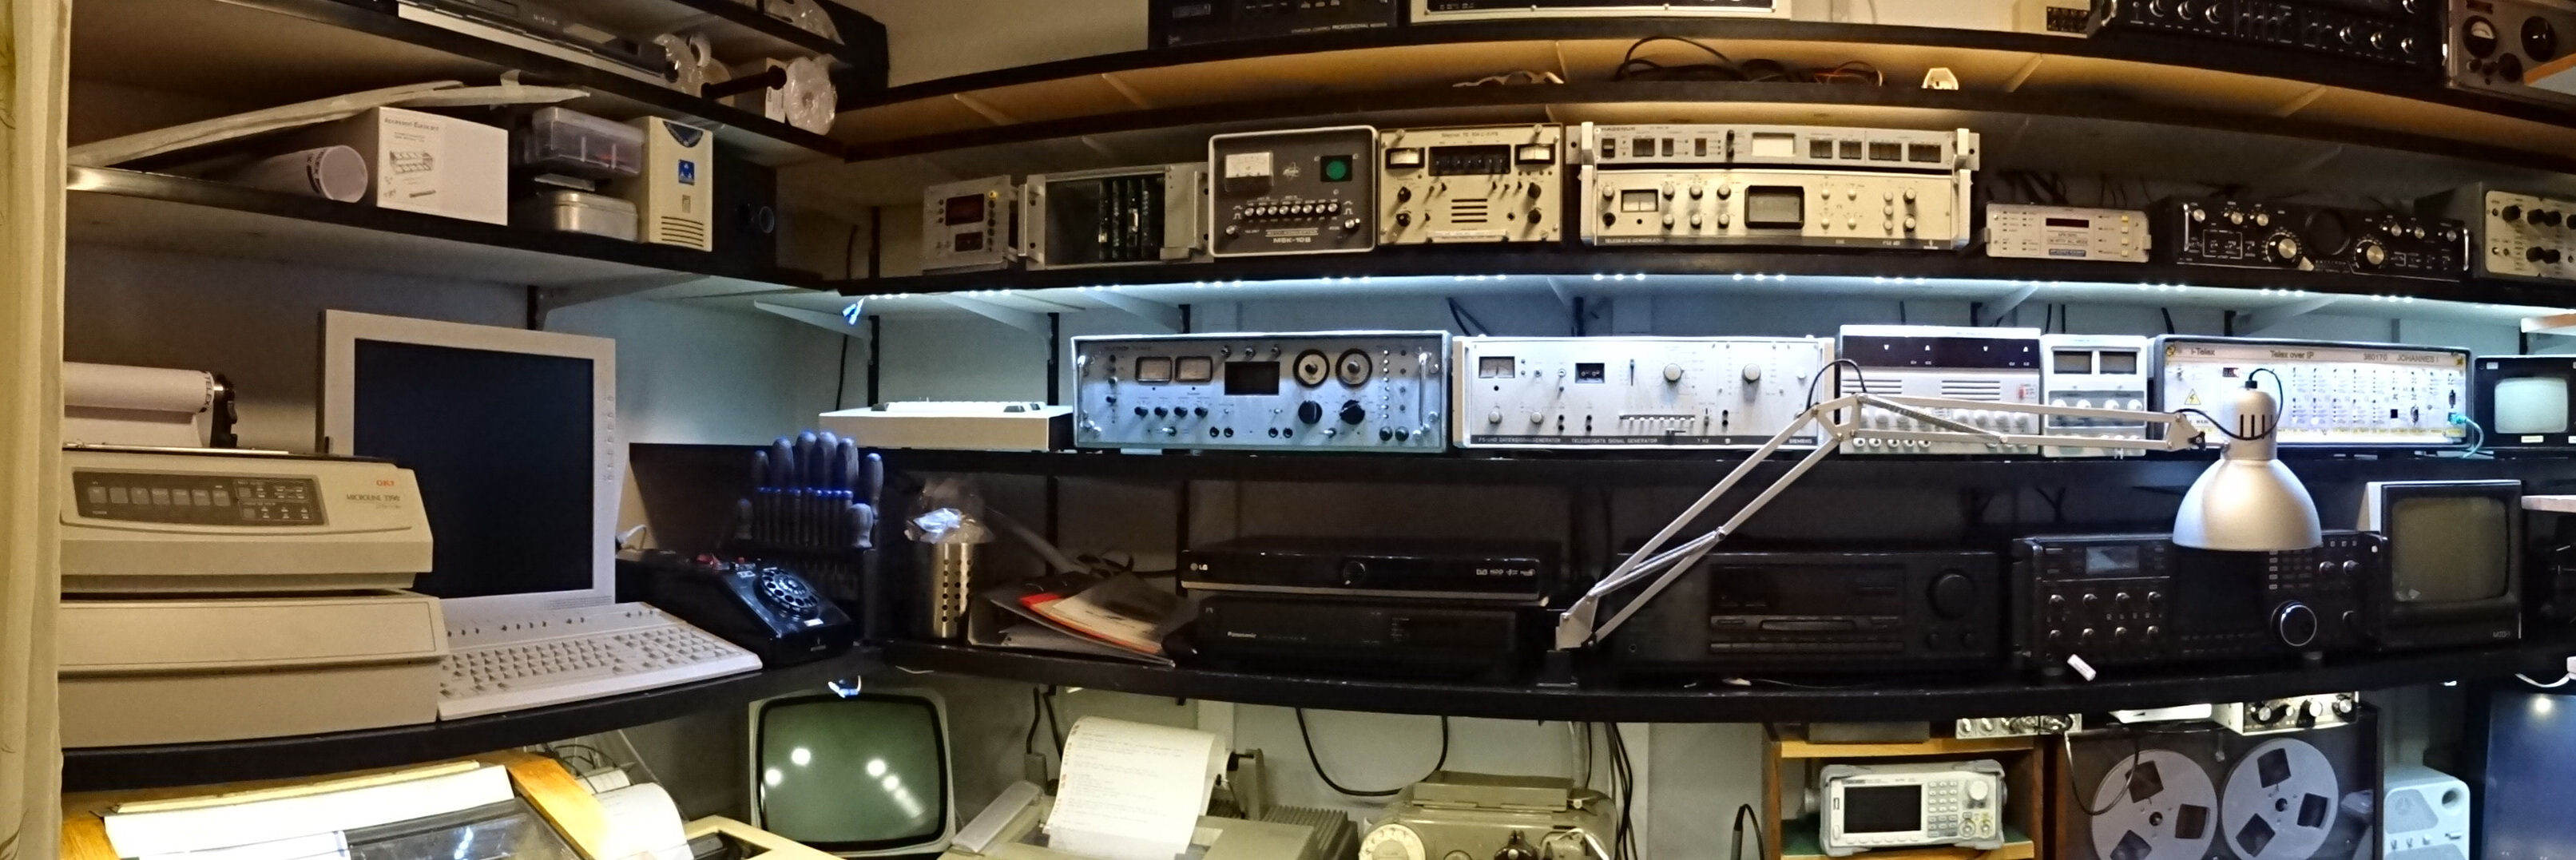
Newly designed equipment storage shelves with LED lighting
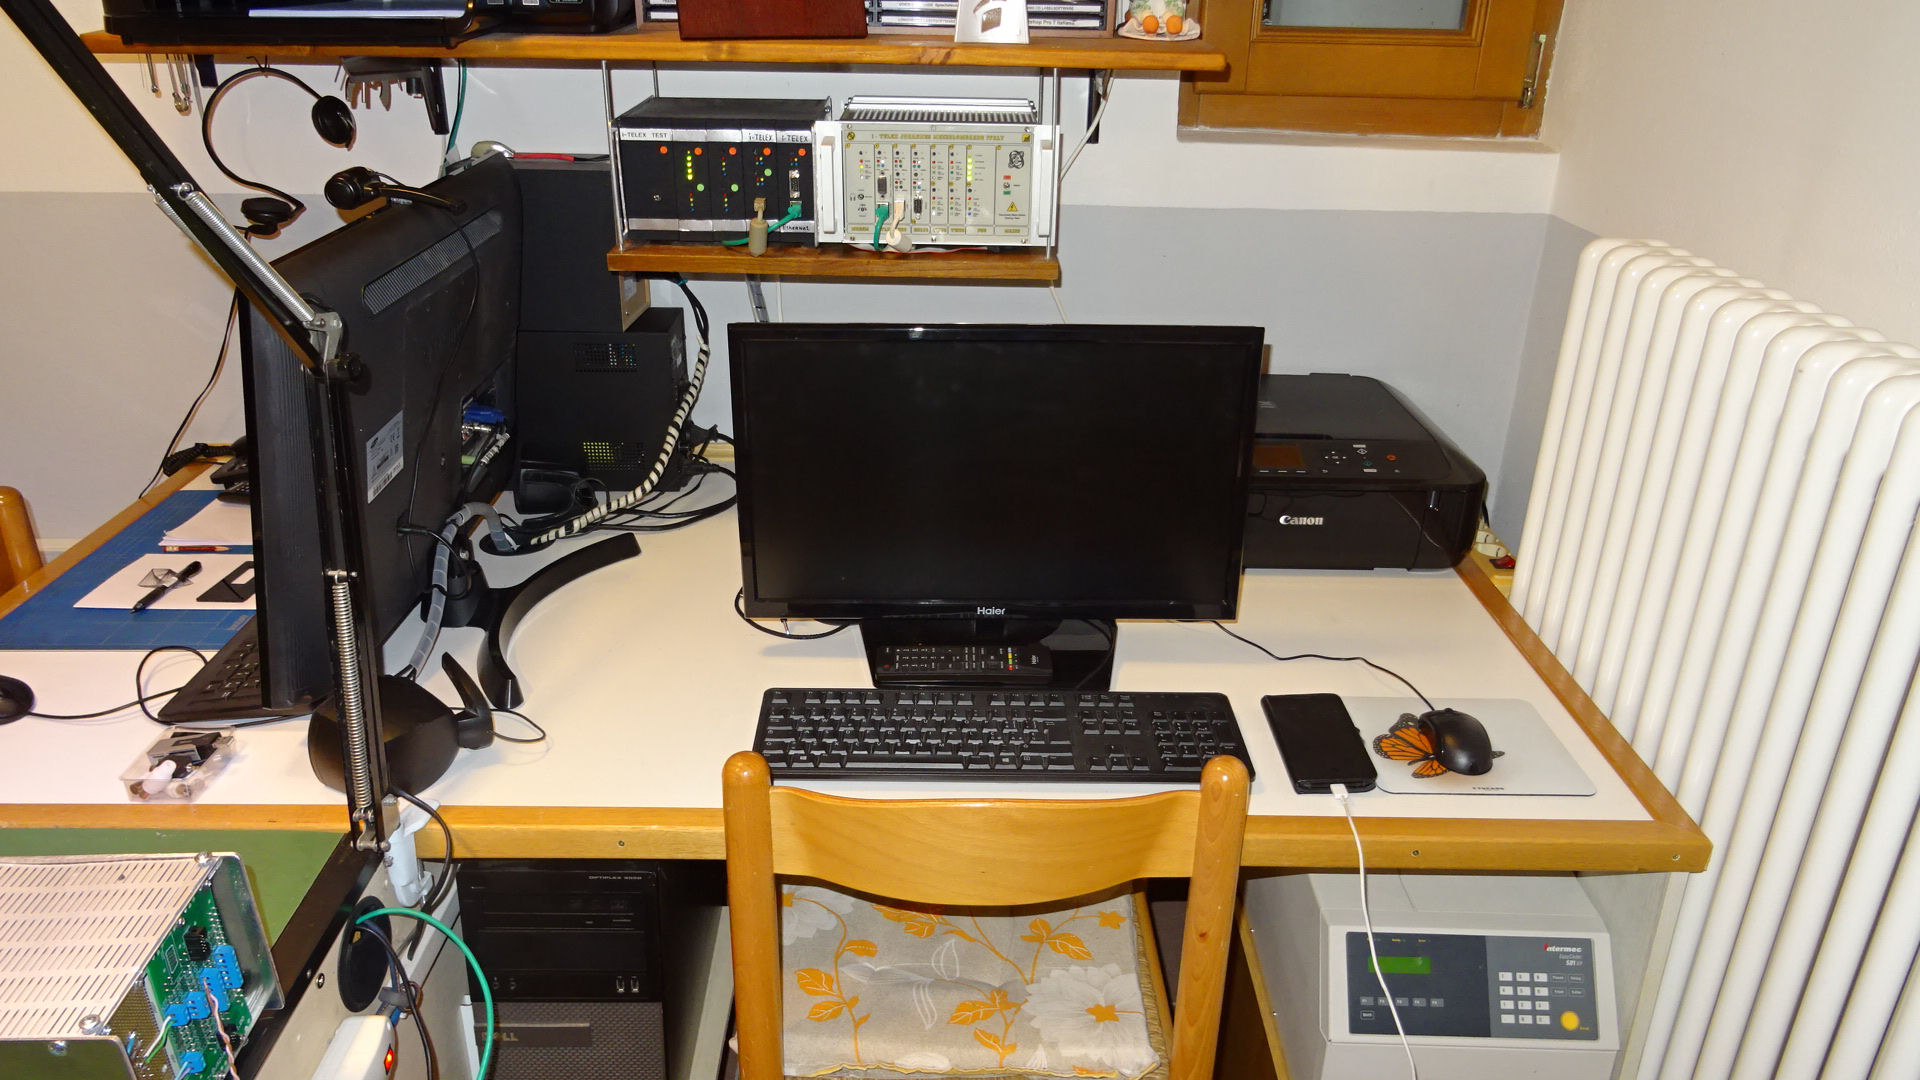
My wife and I's existing workstations have computers and printers
Operation PLC - Weintek touchscreen HMI
Having a PLC to control your devices is nice, but you should also be able to operate it and if possible without having to switch on a PC first. For this I used an HMI touchscreen from Weintek. The model is a 10.1" TFT color display MT8102iP . This touchscreen is connected to the PLC using a serial cable and corresponding interface. The display is ready for operation within 20 seconds after switching on. I have the display in an aluminum Housing installed by BUND.
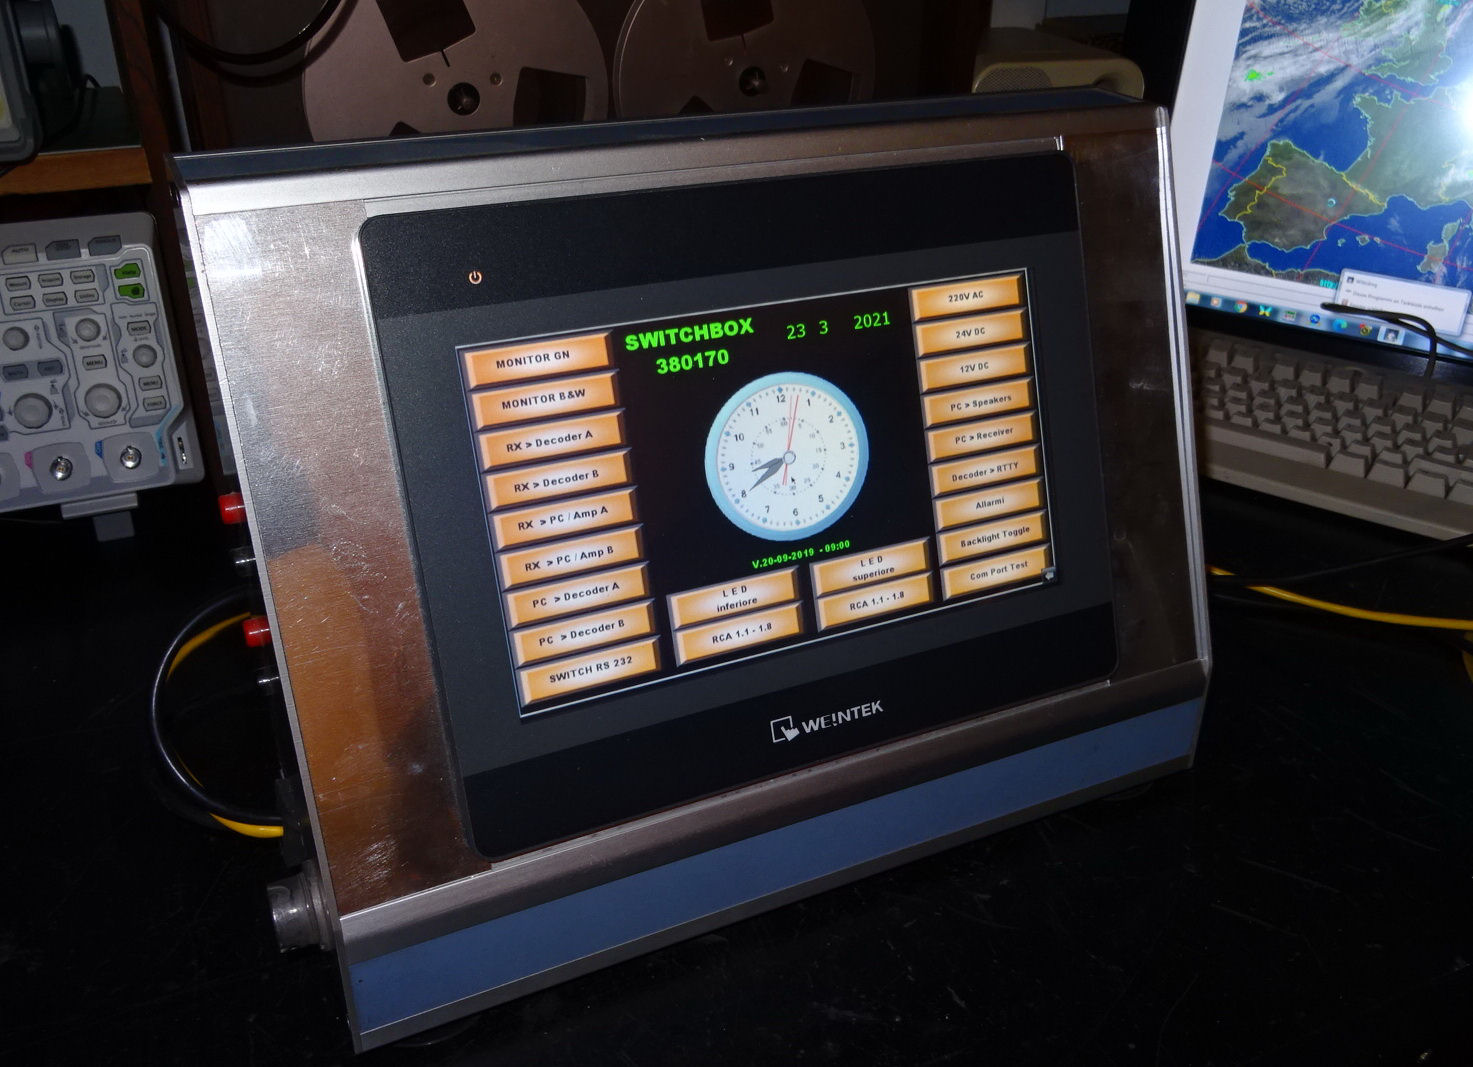 HMI touchscreen from Weintek with 10.1" TFT color display MT8102iP .
In order not to overload this article unnecessarily, I have created a picture gallery of the individual pages of the display. Here are just a few pictures to explain the function and procedure. Main screen with touchscreen buttons and RTC everything is reduced to the essentials, you don't need anything else because it is only used 2 - 5 times a day.
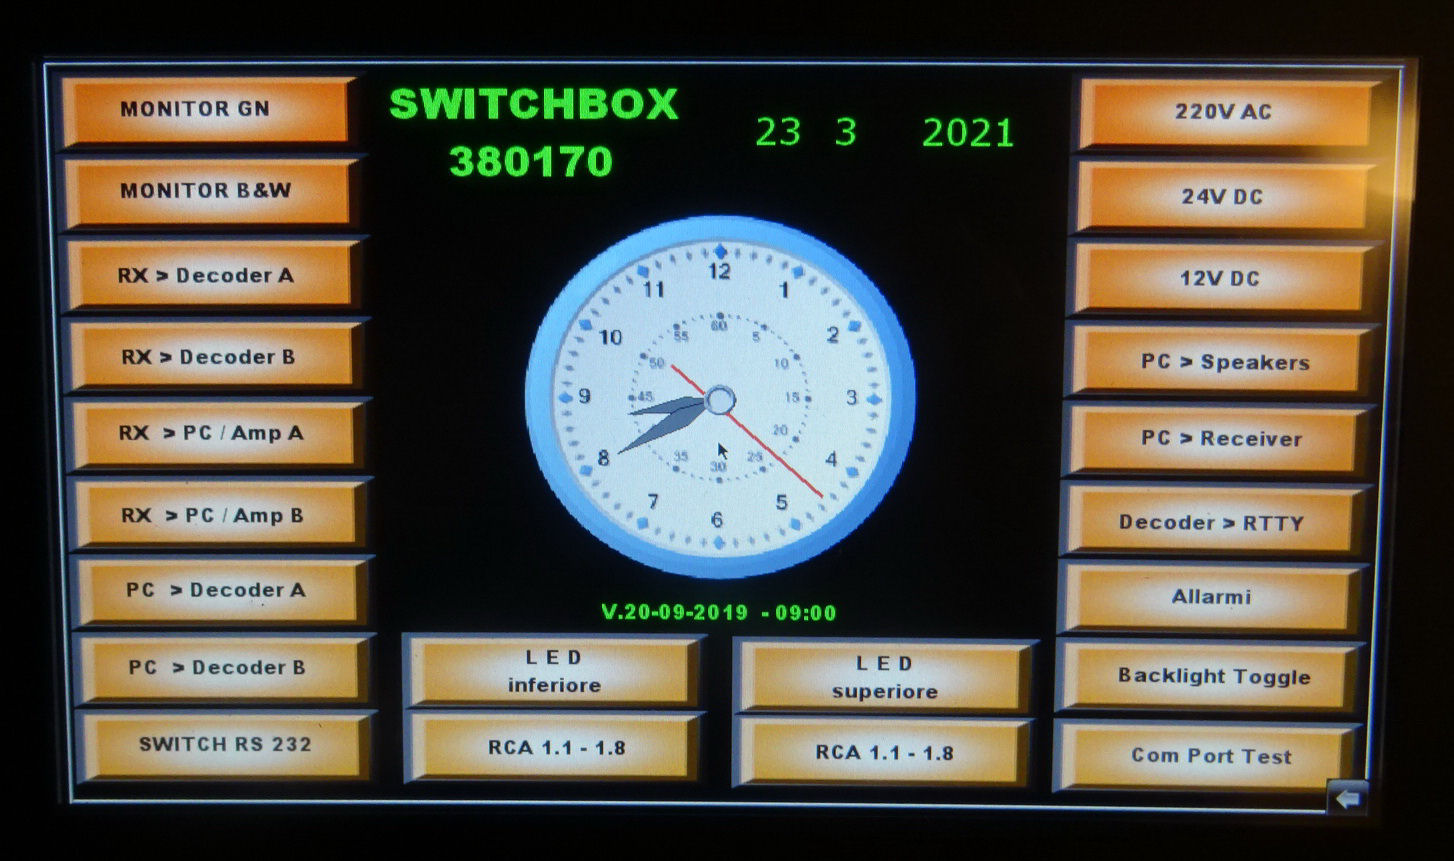
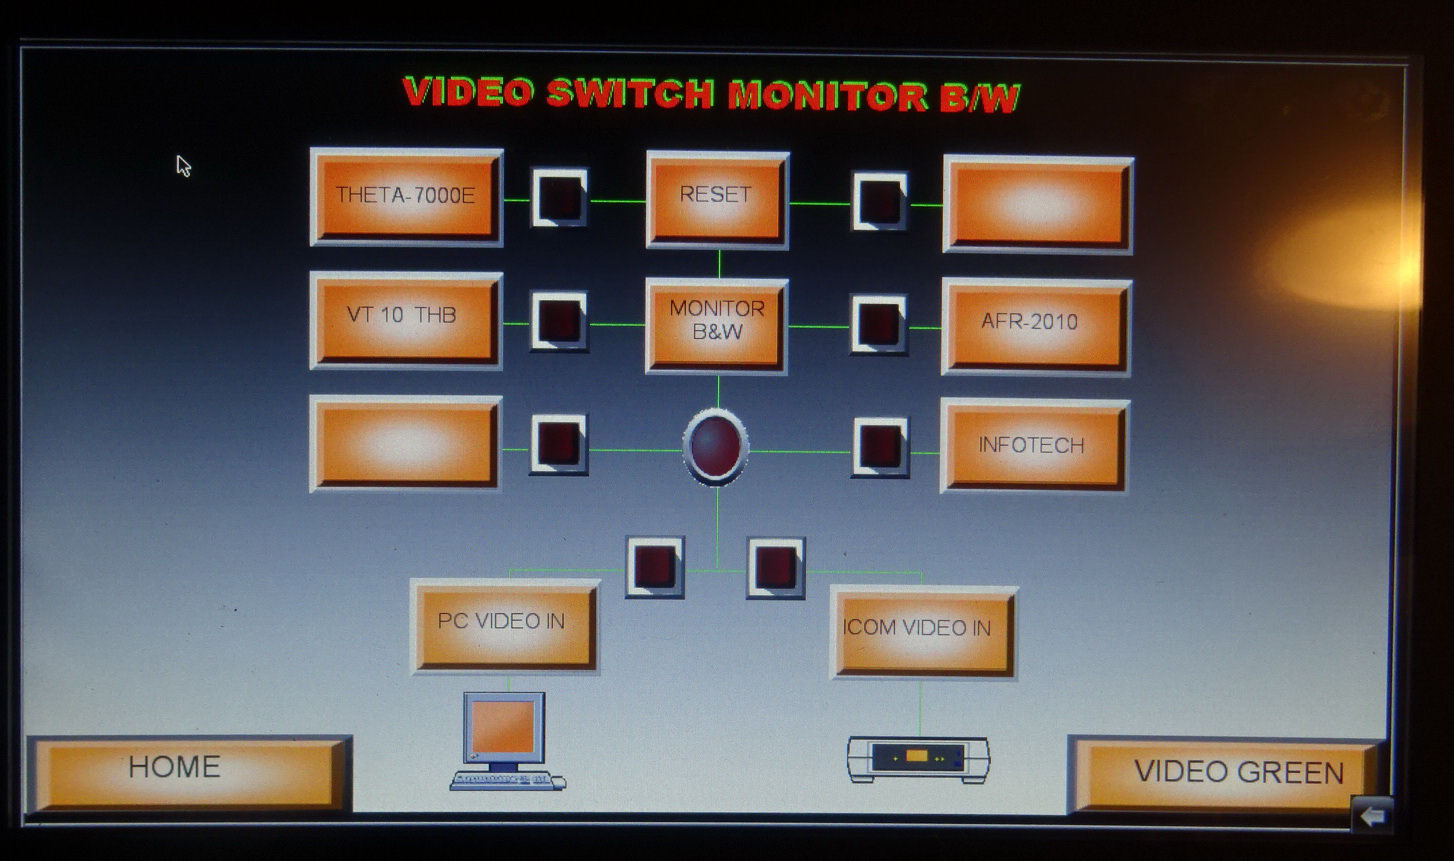
Main page and control panel for the video signals from the decoder, receiver, and monitor (only for the black/white monitor)
My teleprinters
Here are some pictures of the teleprinter currently in use. Some teleprinters are connected to the i-Telex system, and some are there as "decorative" devices and are only connected when needed. One of the teleprinters, the Hasler SP300 RO, is constantly connected to some type of keypad, DWD reception, or OM shortwave. There are also ones like the Tono Theta 7000e and Technoten, which are electronic RTTY keyboards with a teletype function. They need a monitor or a television so that you can see what you are doing.
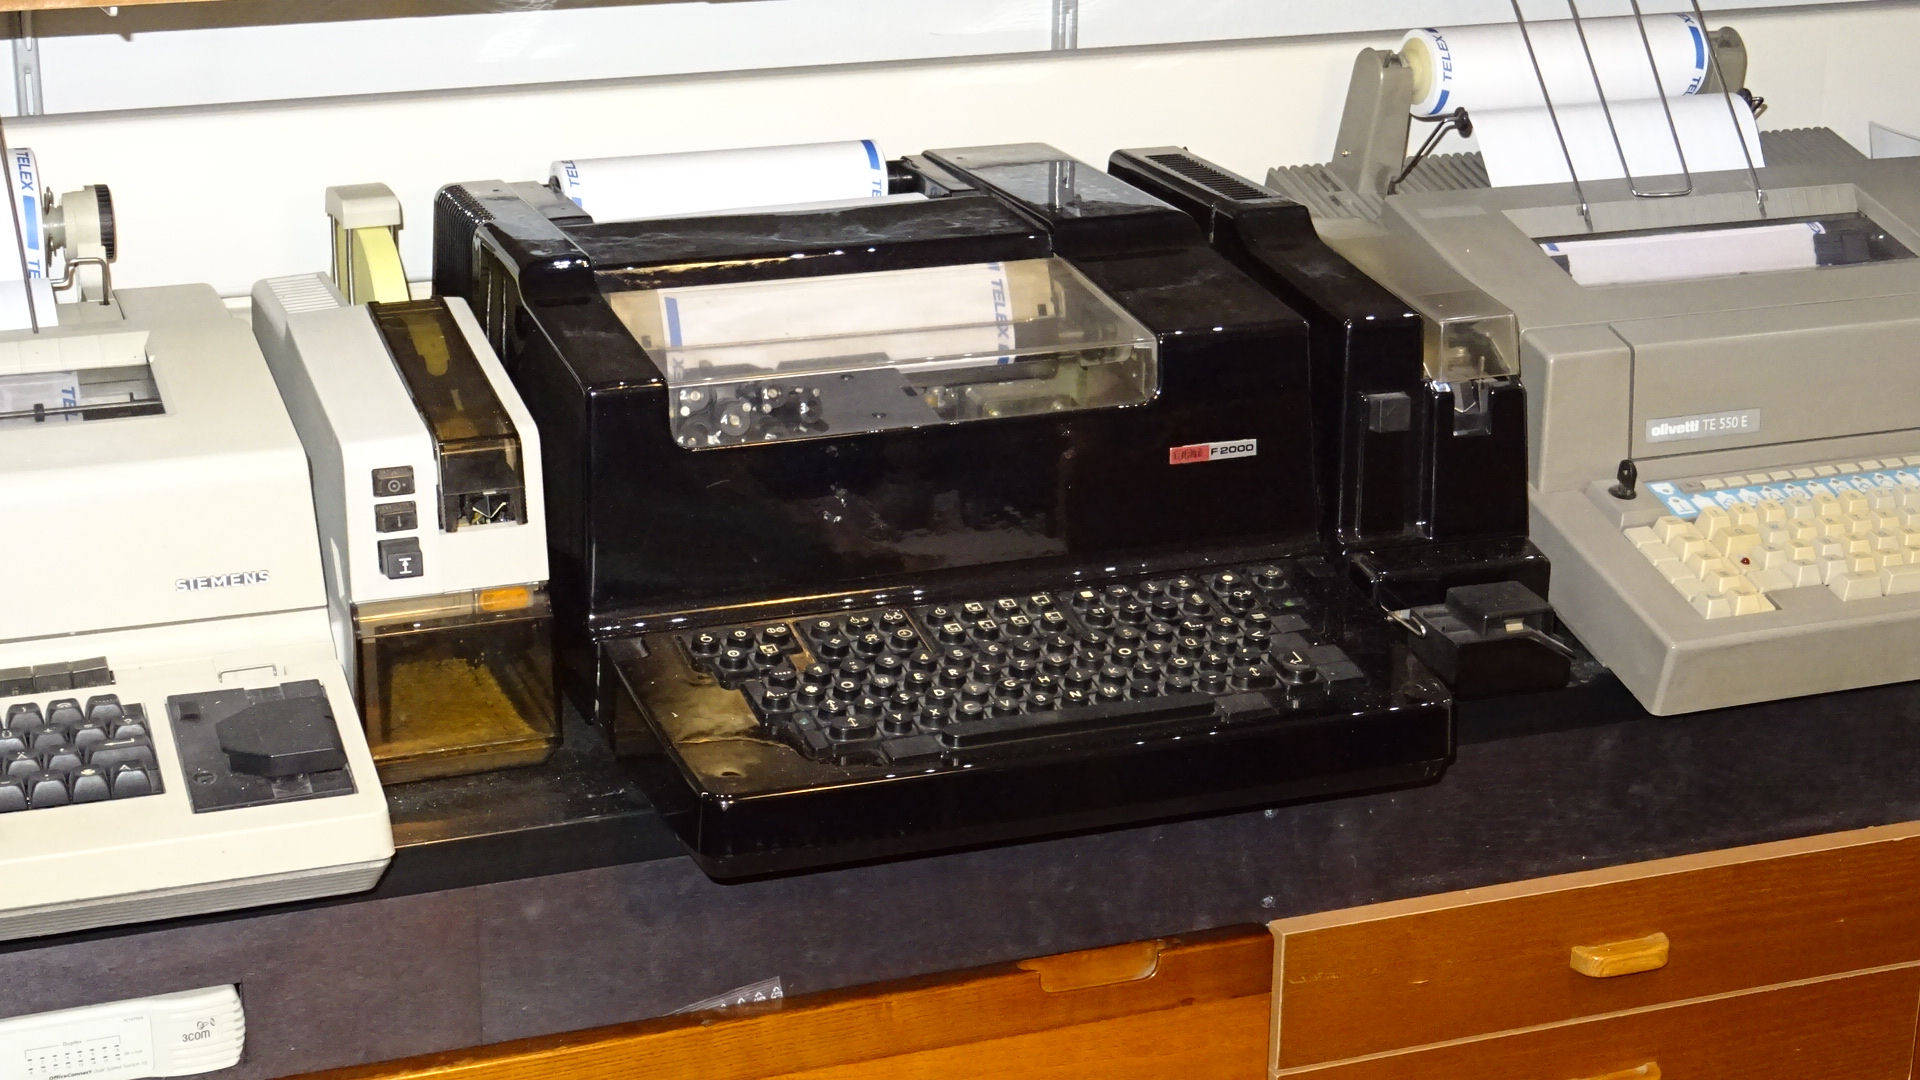 The main office, 380170 an RFT F2000 with identification 380170 Johannes it 24/7 online (ex 331343 wefa d Werkzeugmaschinenfabrik Altenburg
GmbH Brunnen0-44 600A ltenburg)
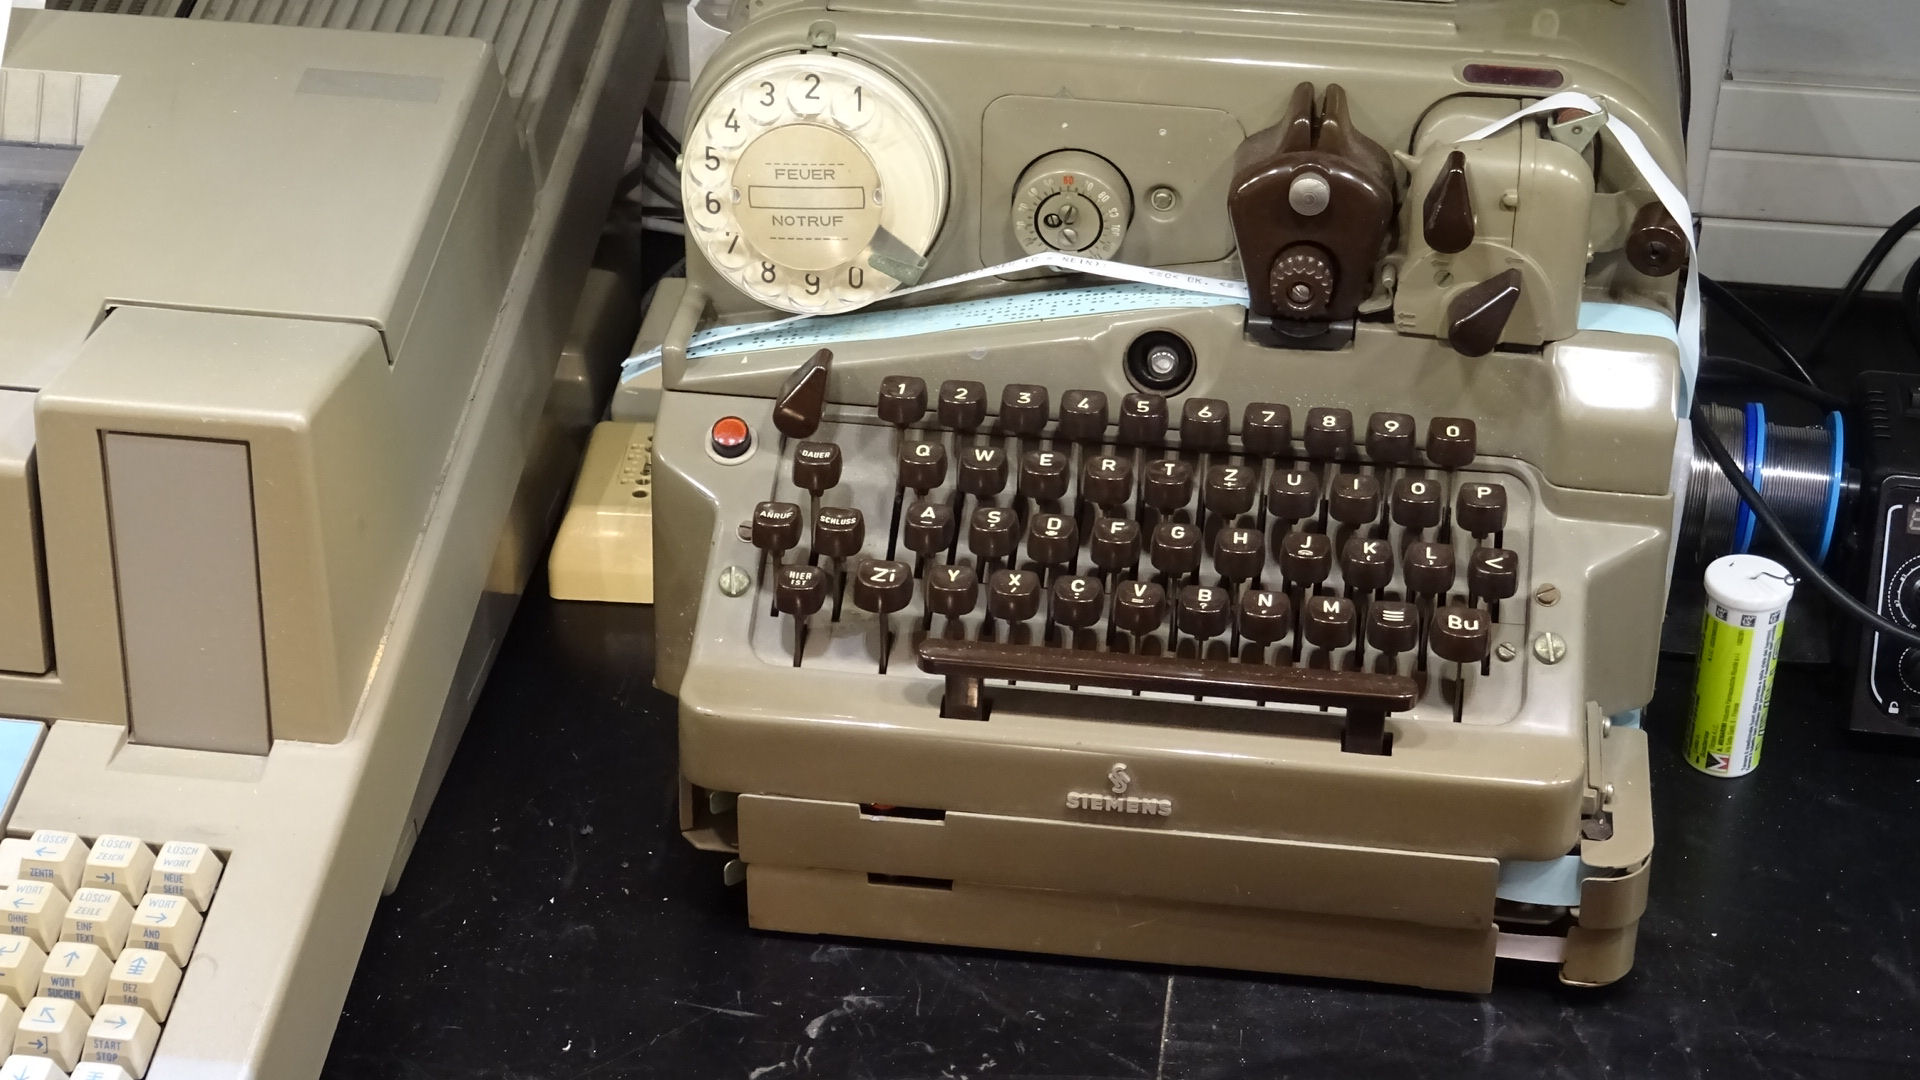
Siemens T68d number 245368 with identifier 245368 tls d (Tabak Lager und Speditionsgesellschaft mbH + Co Kg Pillauerstrasse. 10 2800 Bremen 1 Germany)
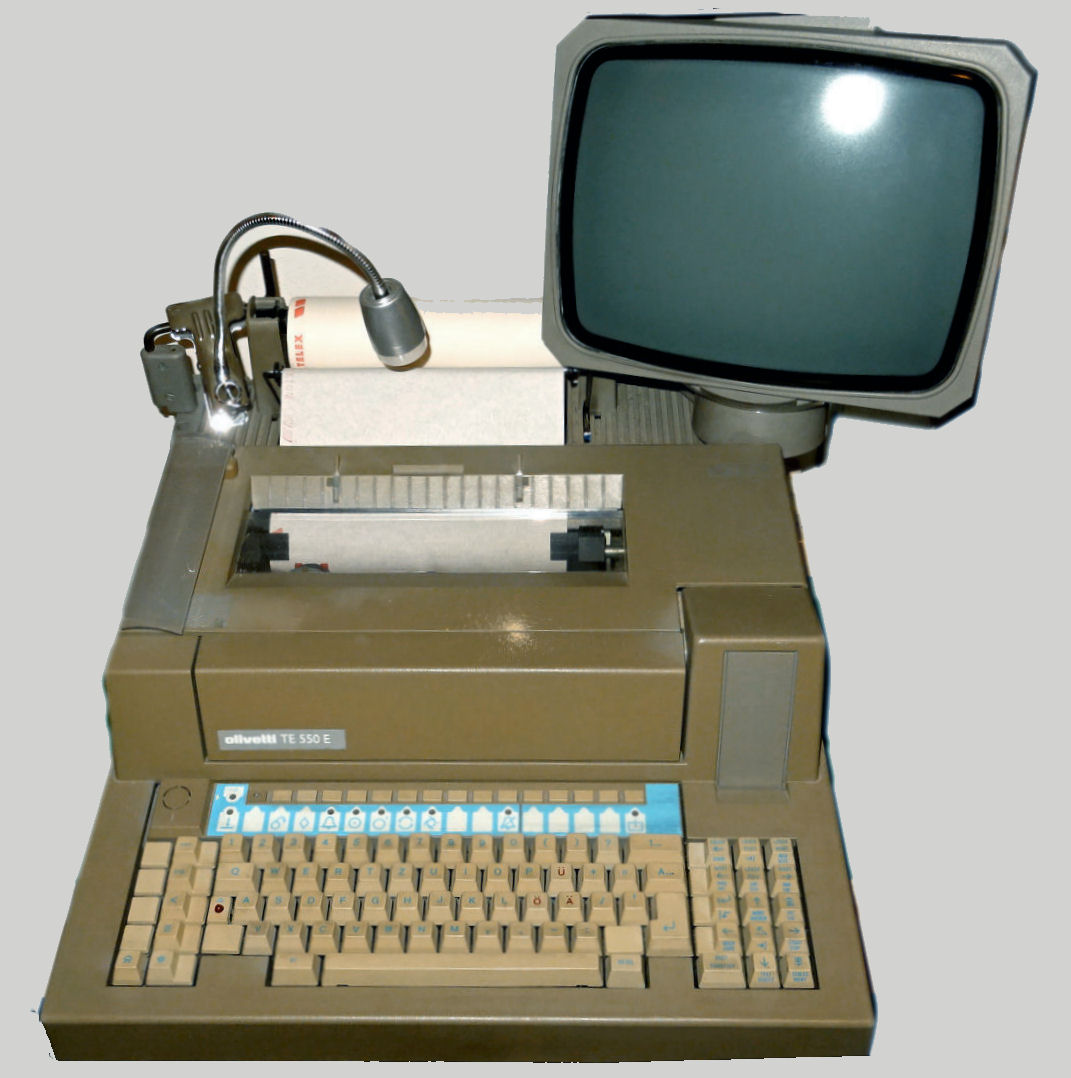
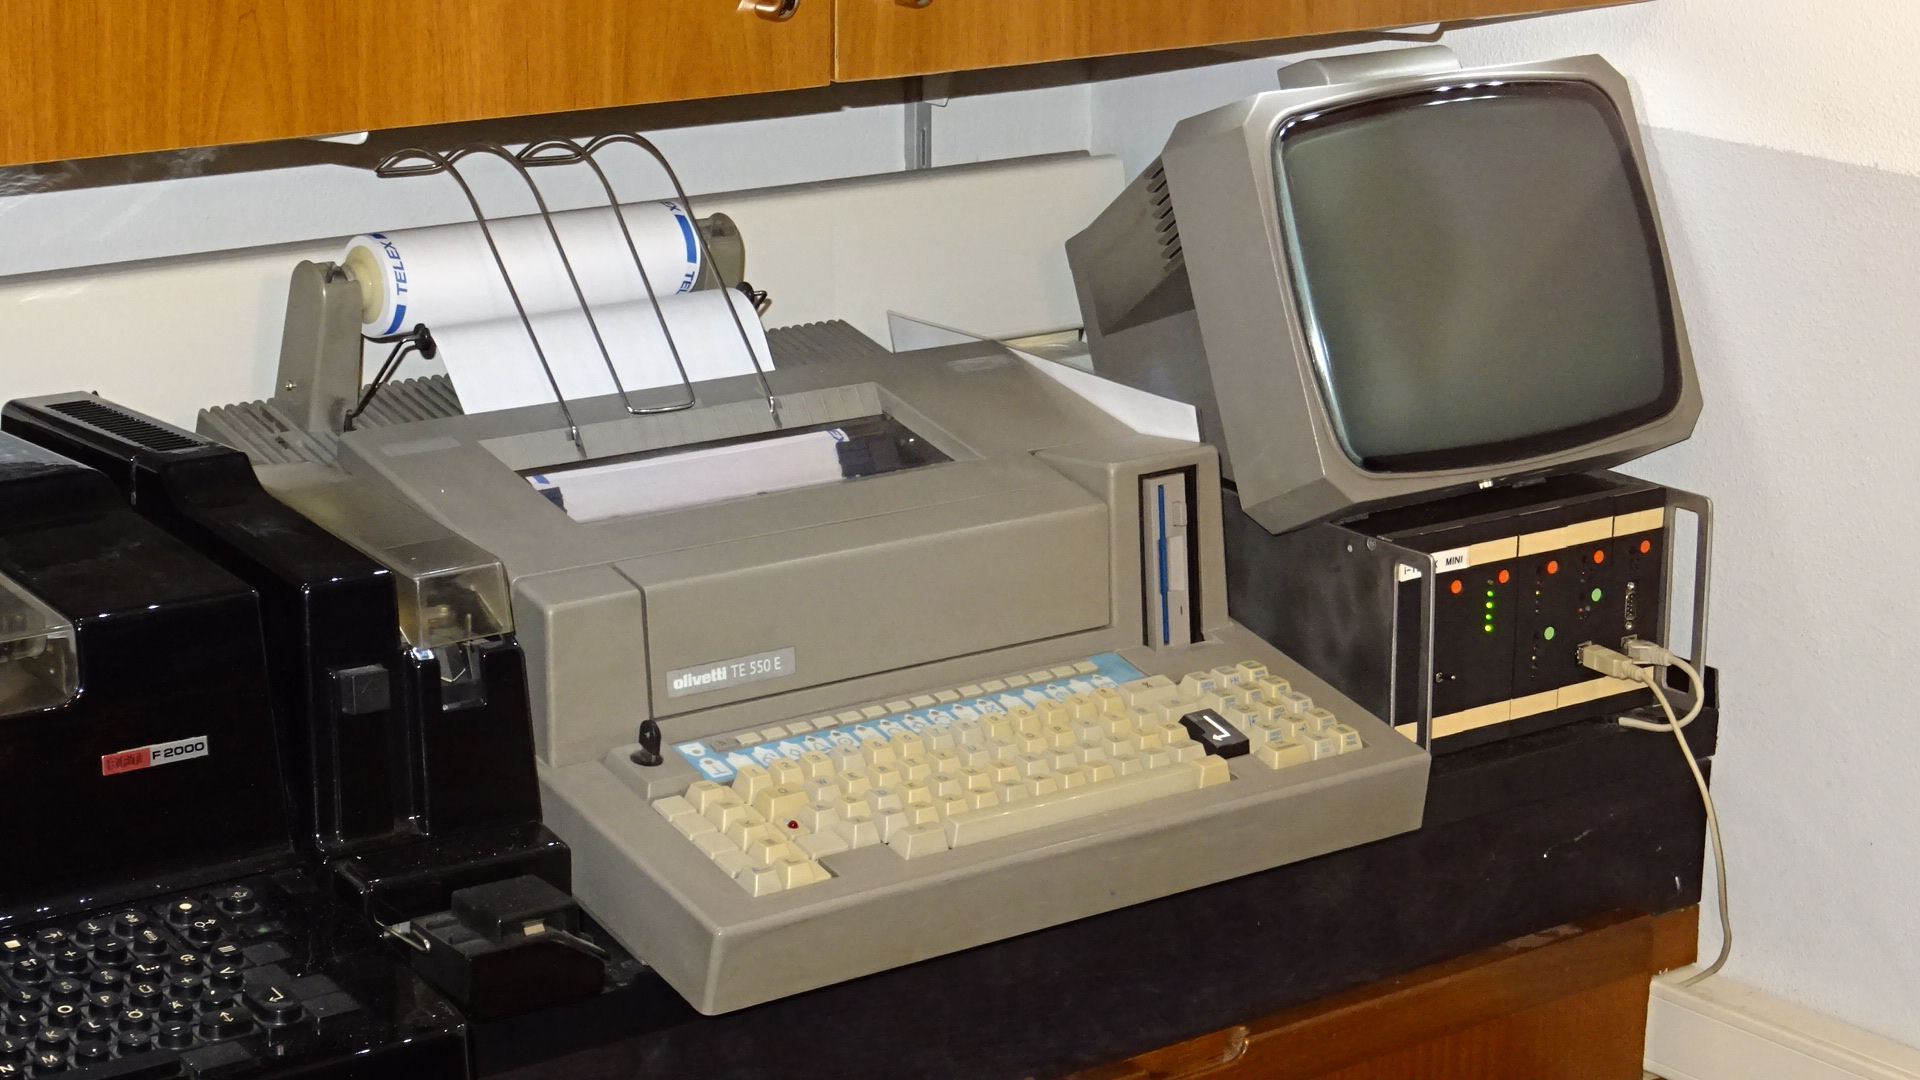 Olivetti TE550e with screen, floppy disk drive, Italian keyboard QWERTY number 970012 Identification 970012 varint i (Olivetti Works Ivrea)
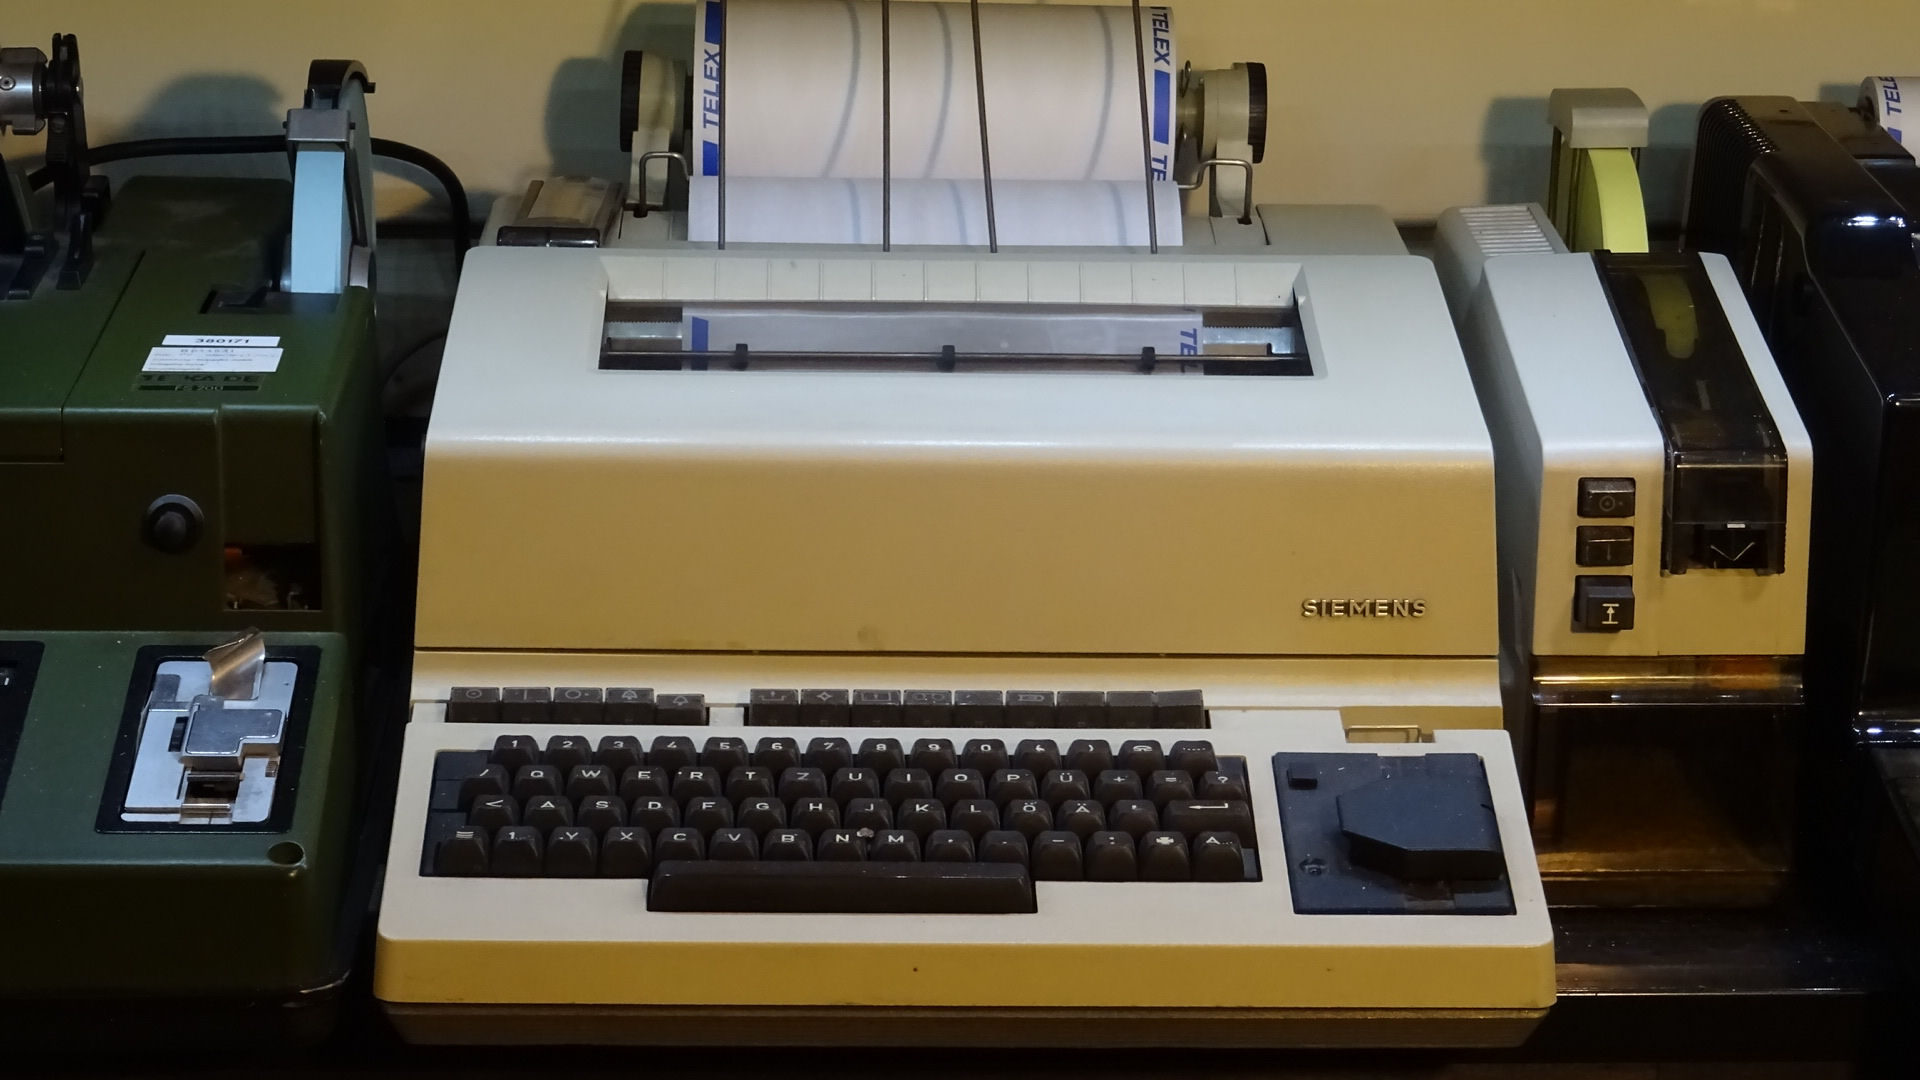
Siemens T1000z ED1000 number 529671 identifier 529671 hot d (Jens Peter Heiss fashion store Munich Germany -
https://www.facebook.com/designjph vintage car fan)
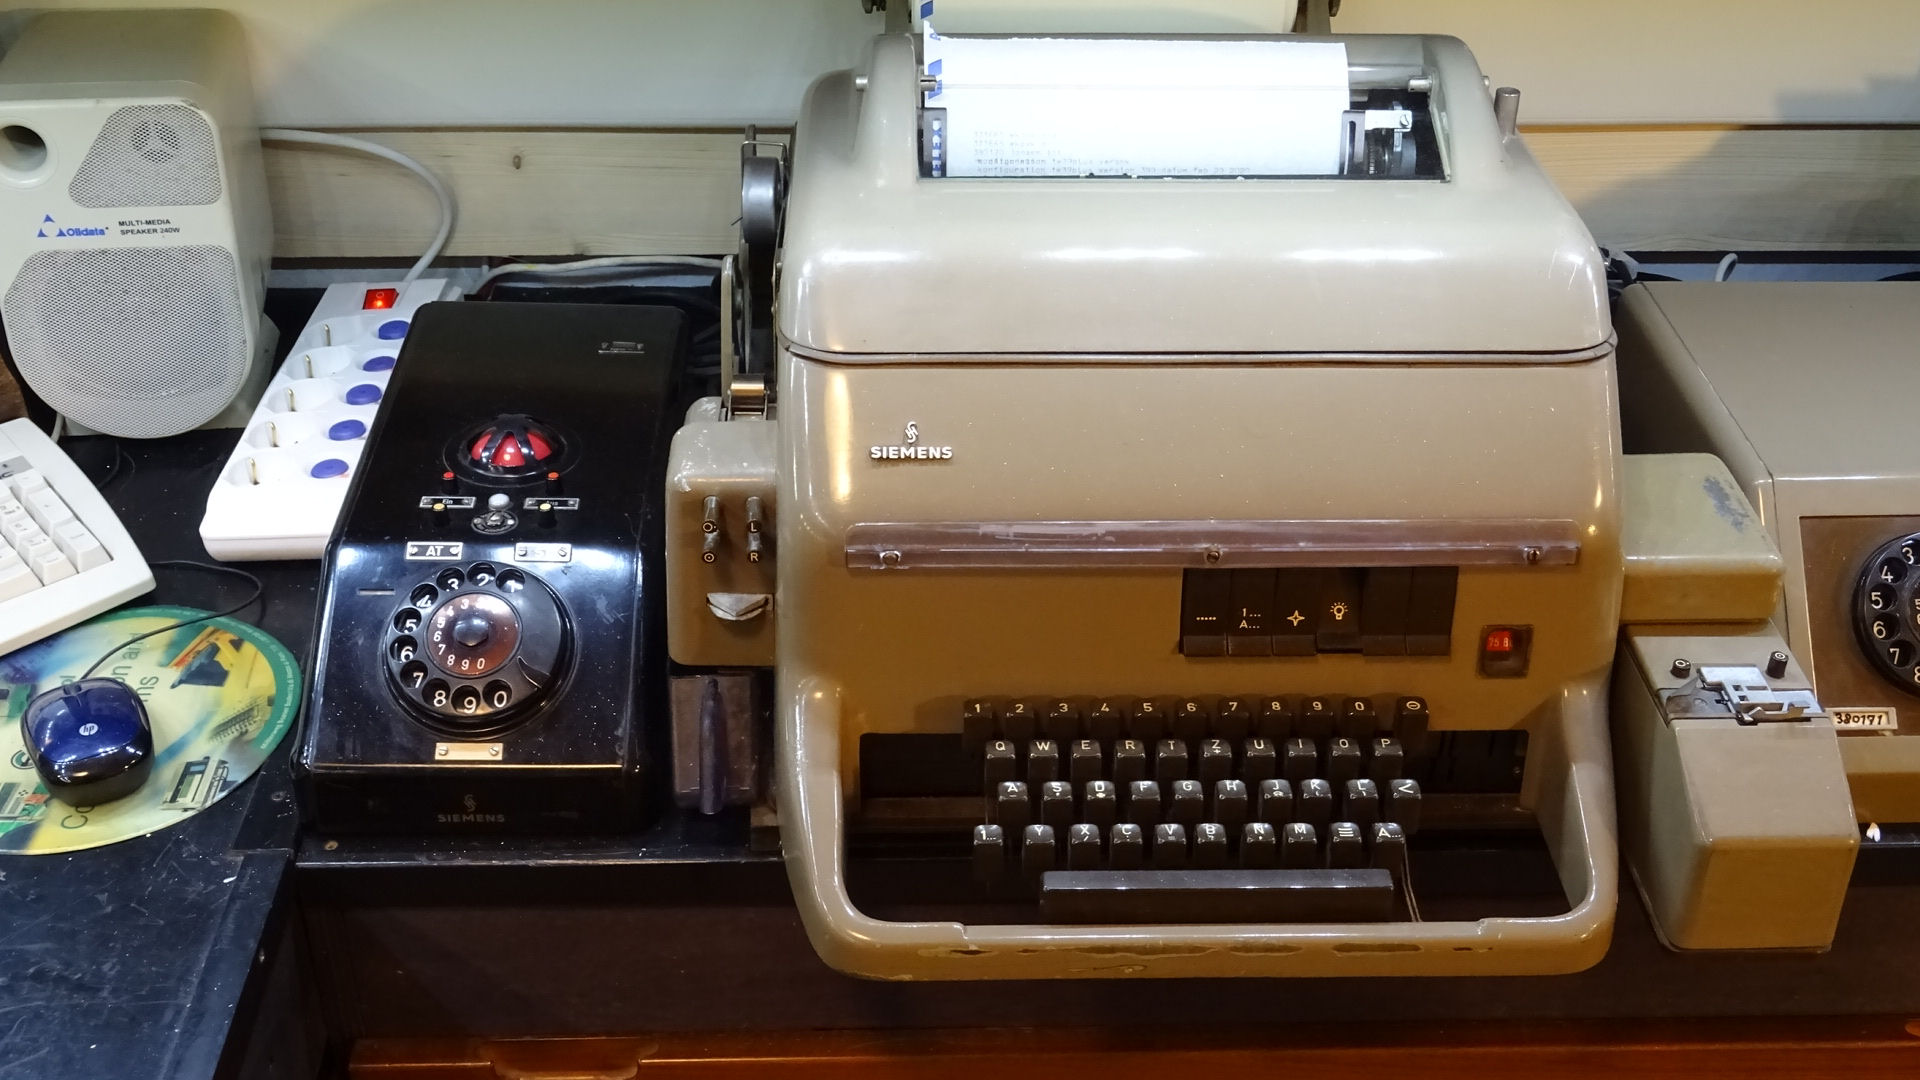 Siemens T100z identifier 465068 ehres d (Dieter Ehresmann trading agency. Edekastr. 1 O. 6805 Heddesheim)
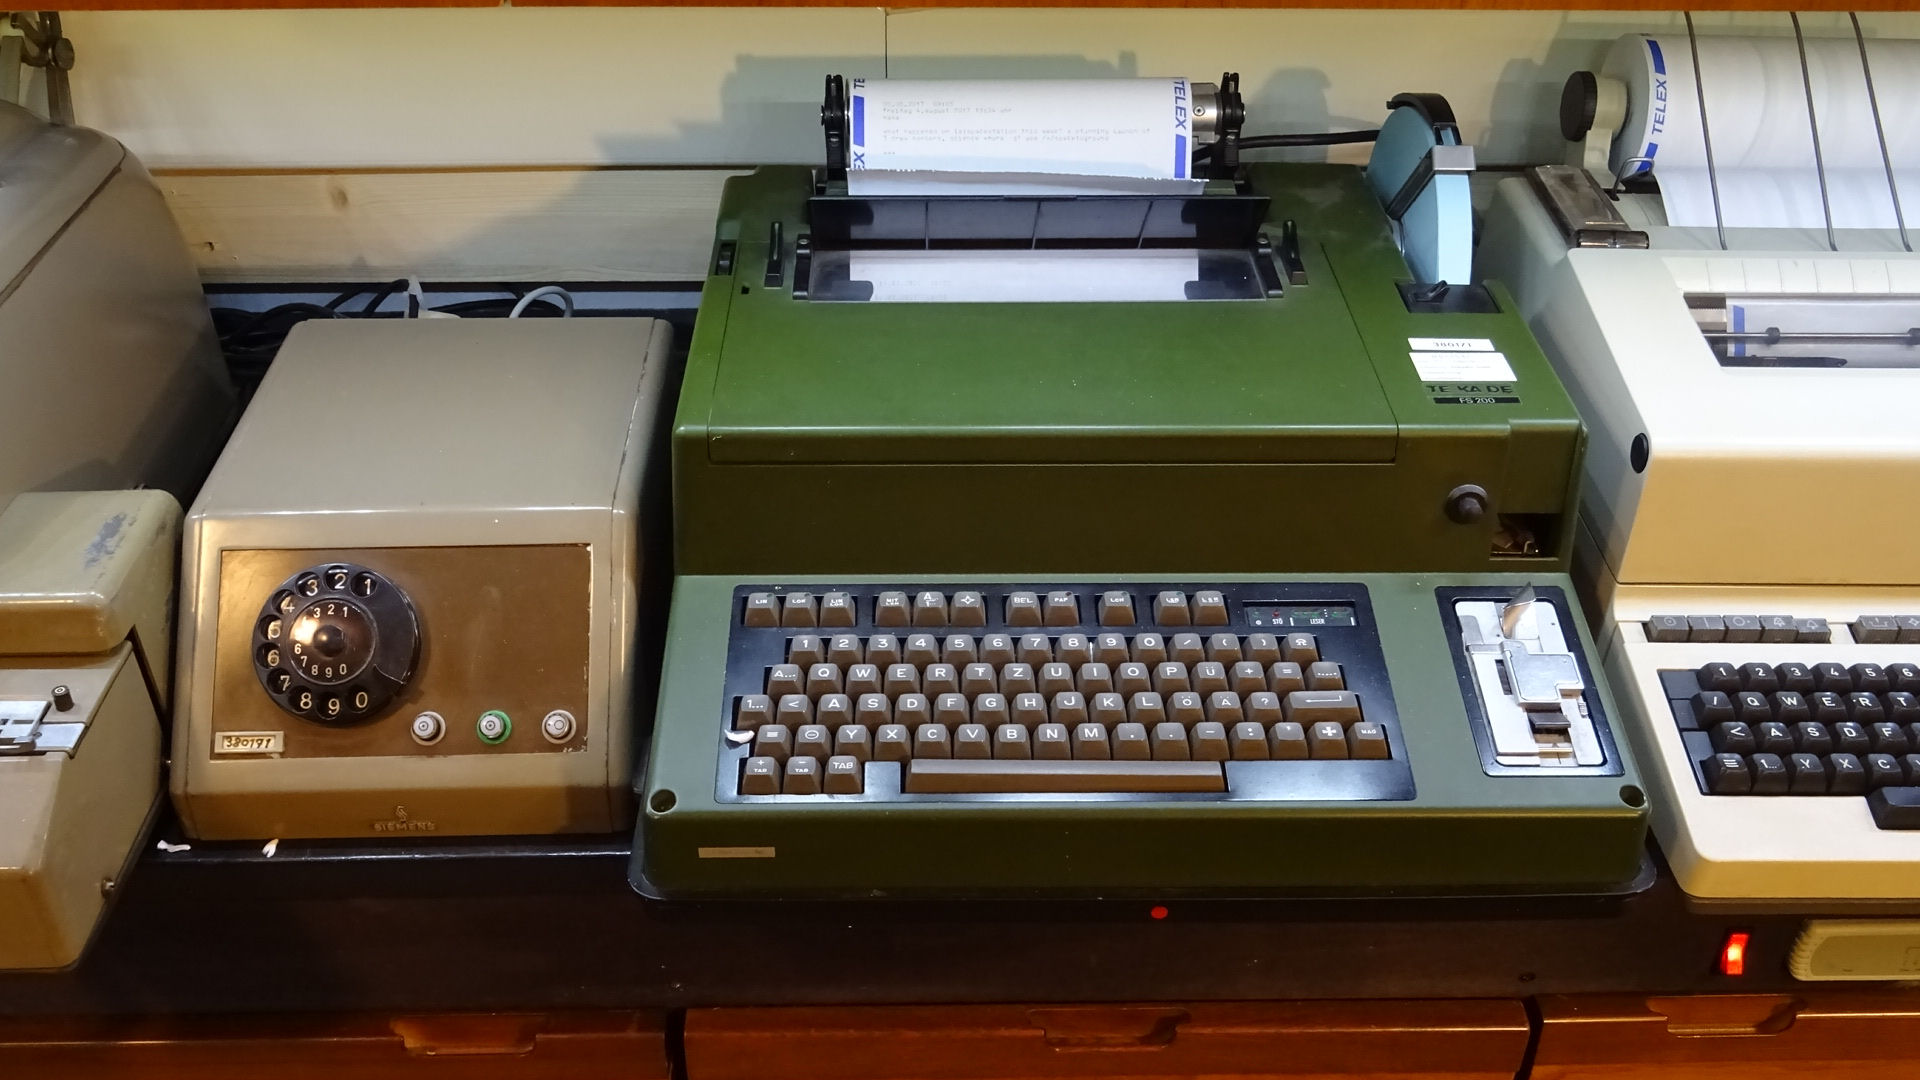 TeKaDe FS200 number 380171 identifier 380171 franco i (BUND)
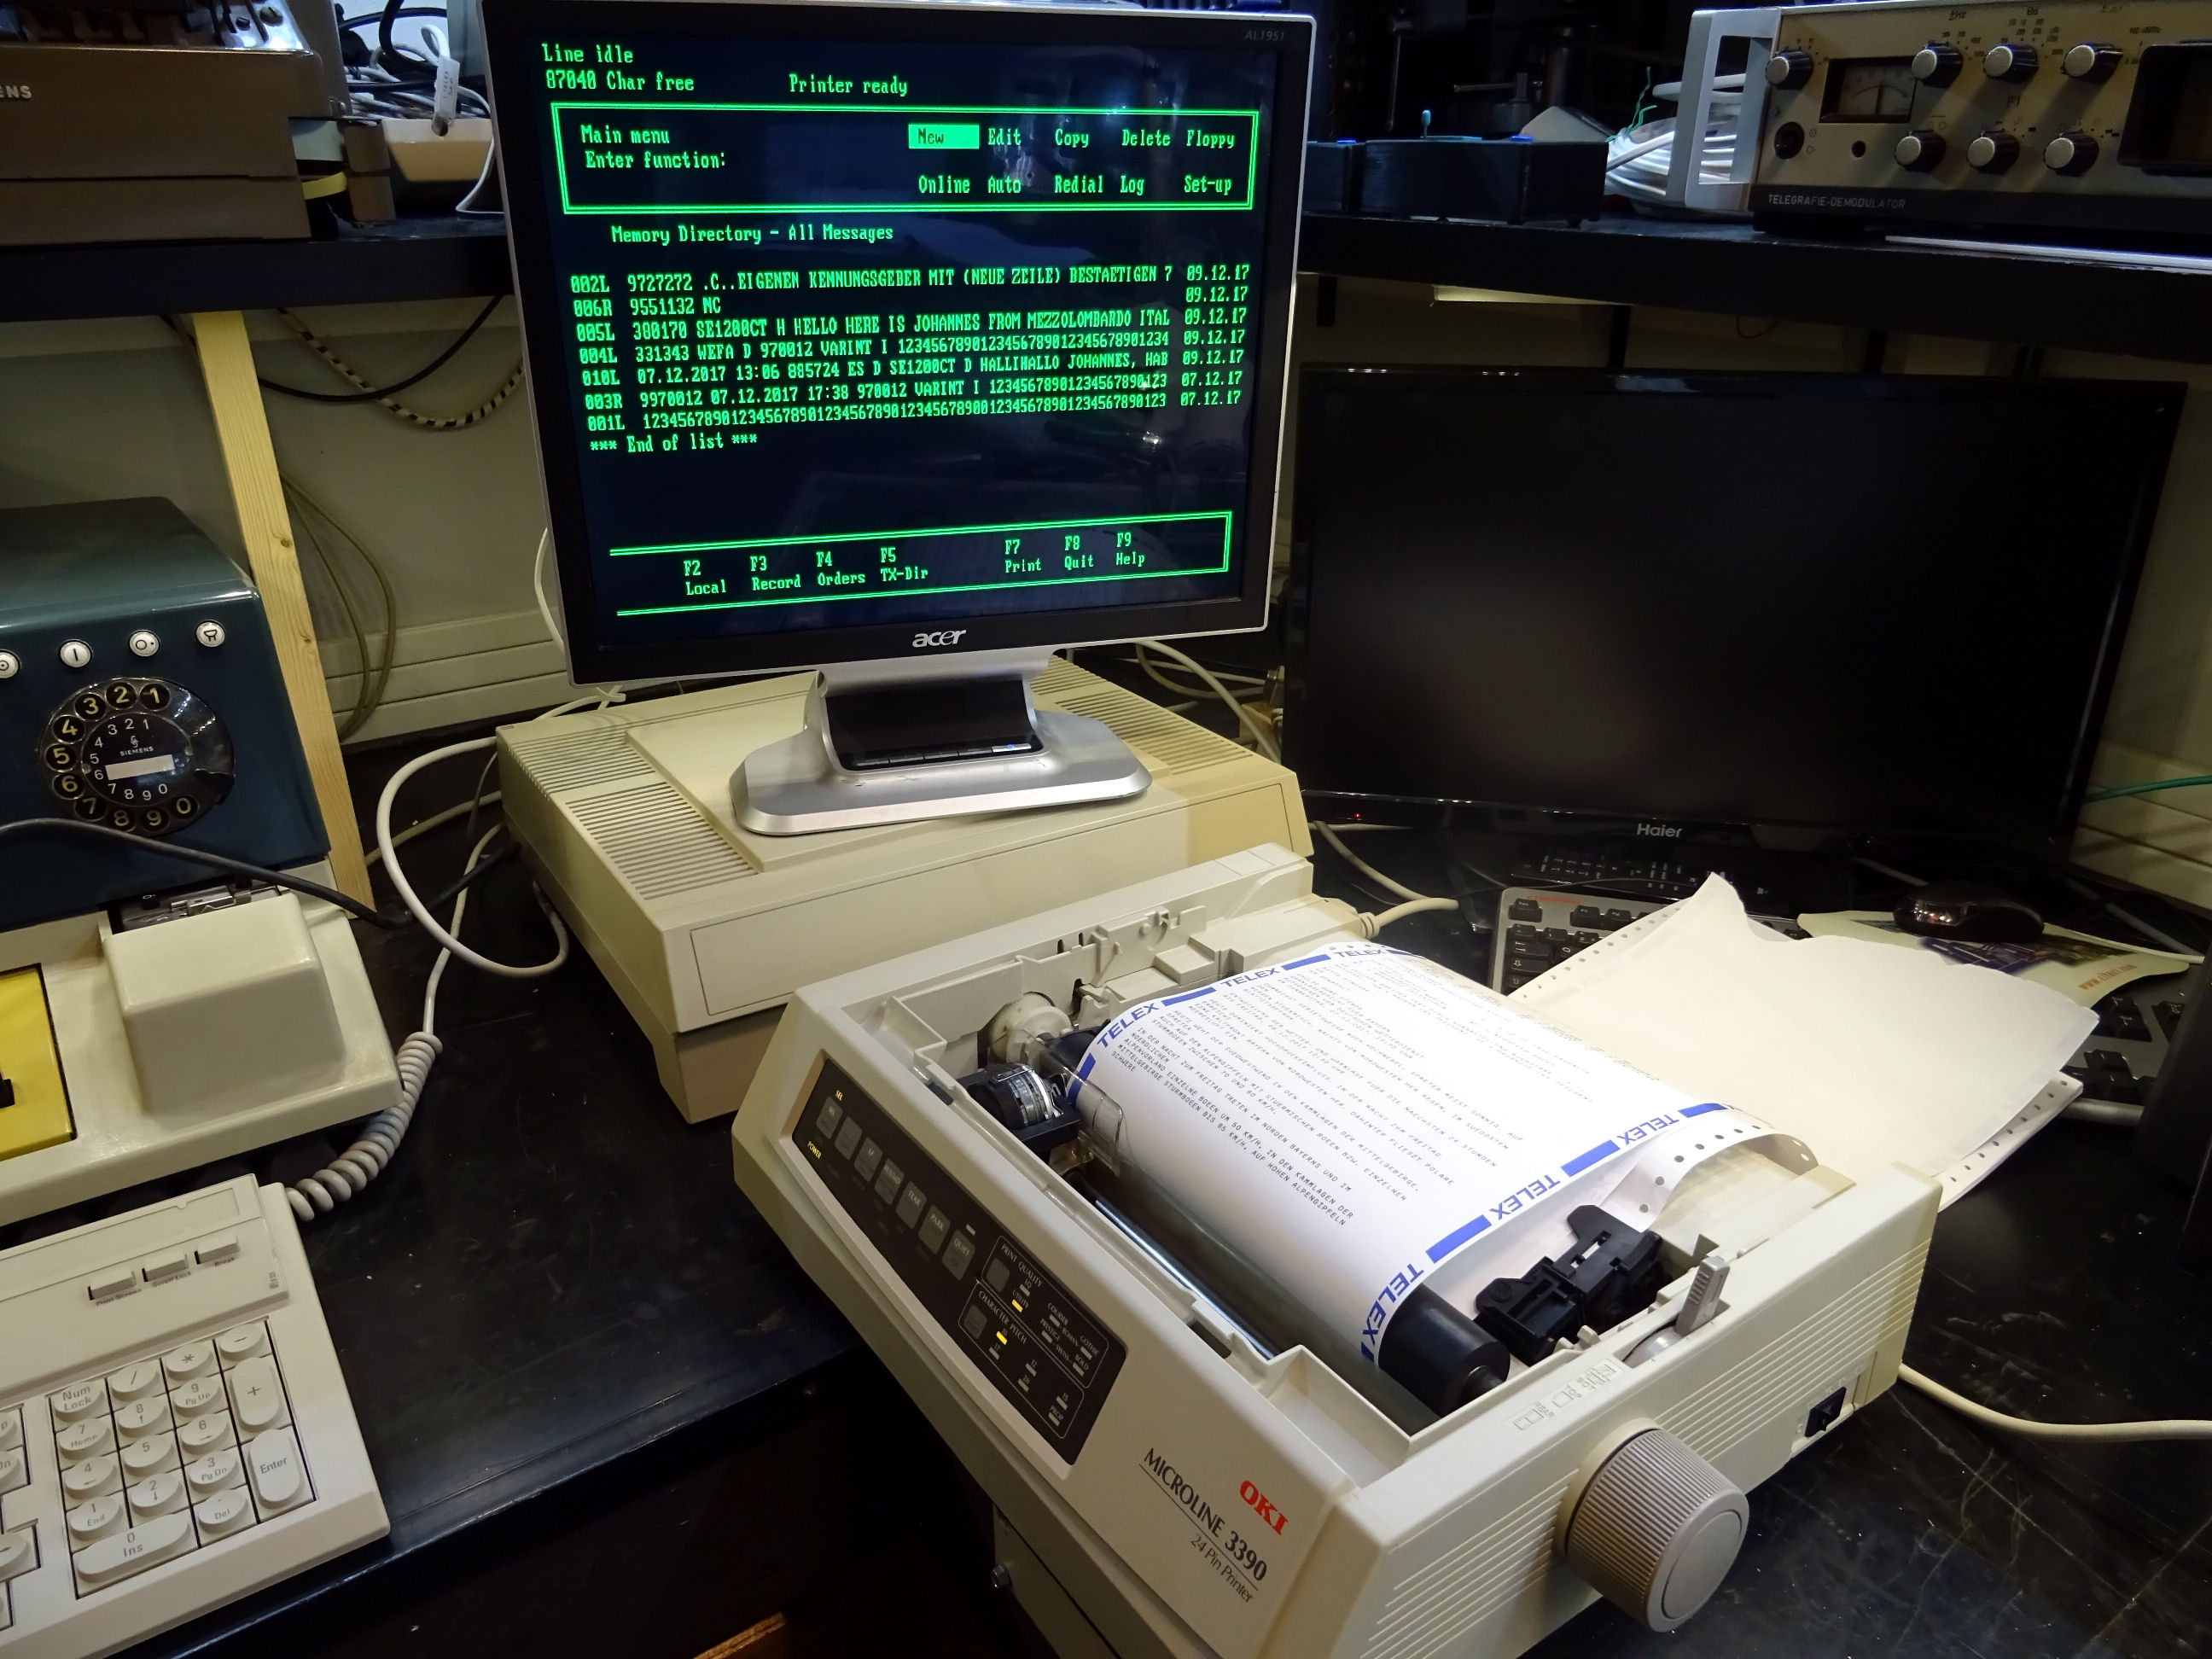 Siemens S1200CT Greece with double keyboard Gr + Latin is not connected to the i-Telex network
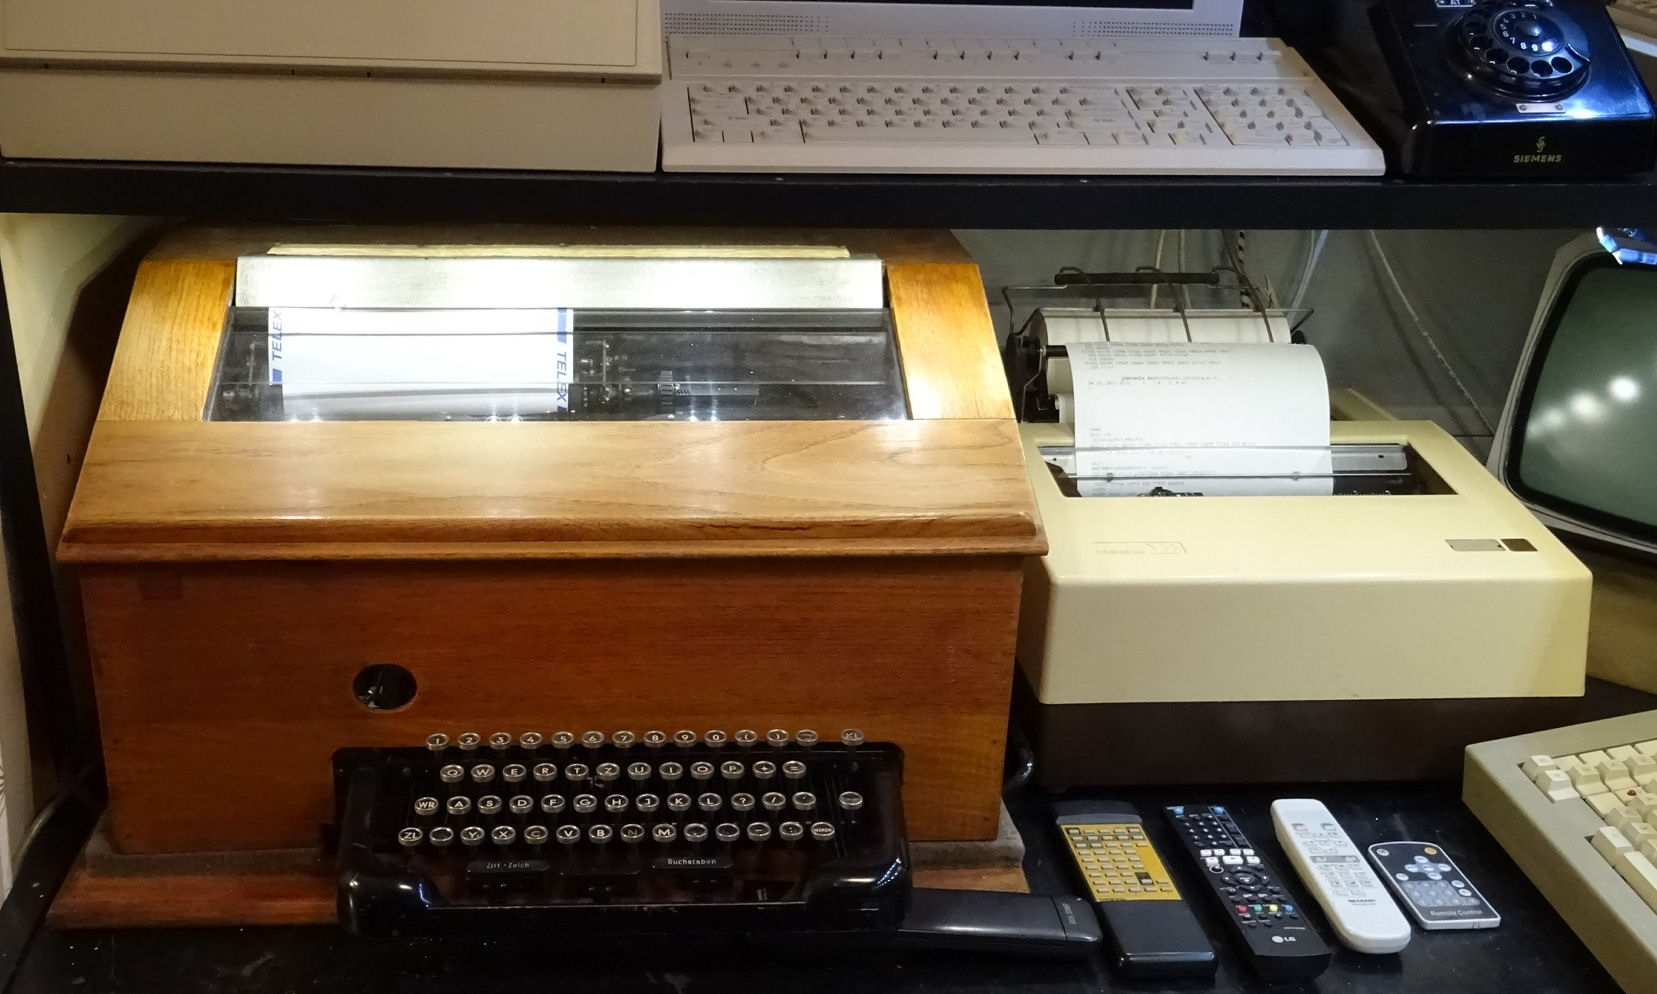 Siemens T37h identification 170380 johann i // Hasler Sp300 RO - DWD and shortwave OM
Olivetti TE550e with screen ED1000 keyboard German QWERTZ identifier 66545 huiex (Huber Import - Export Piesendorf A)
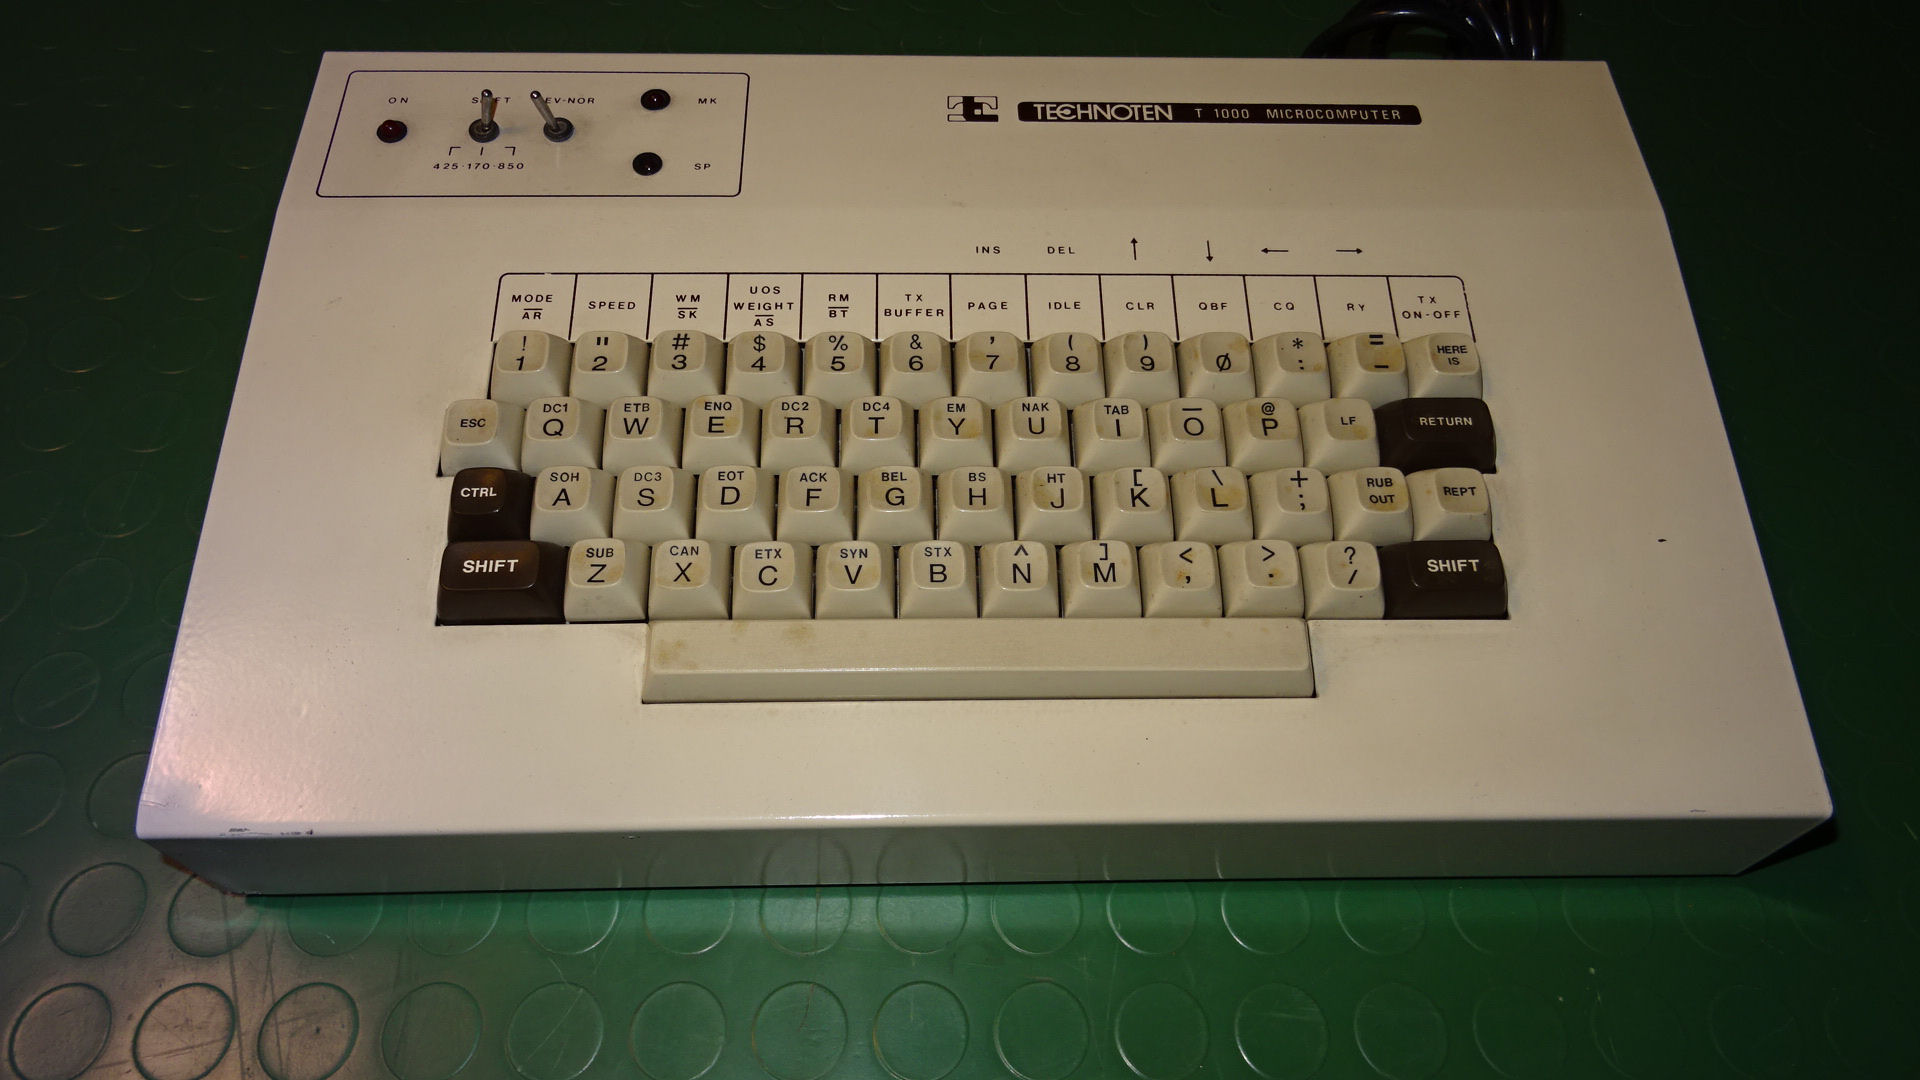
Tecnoten T1000 Communications Computer
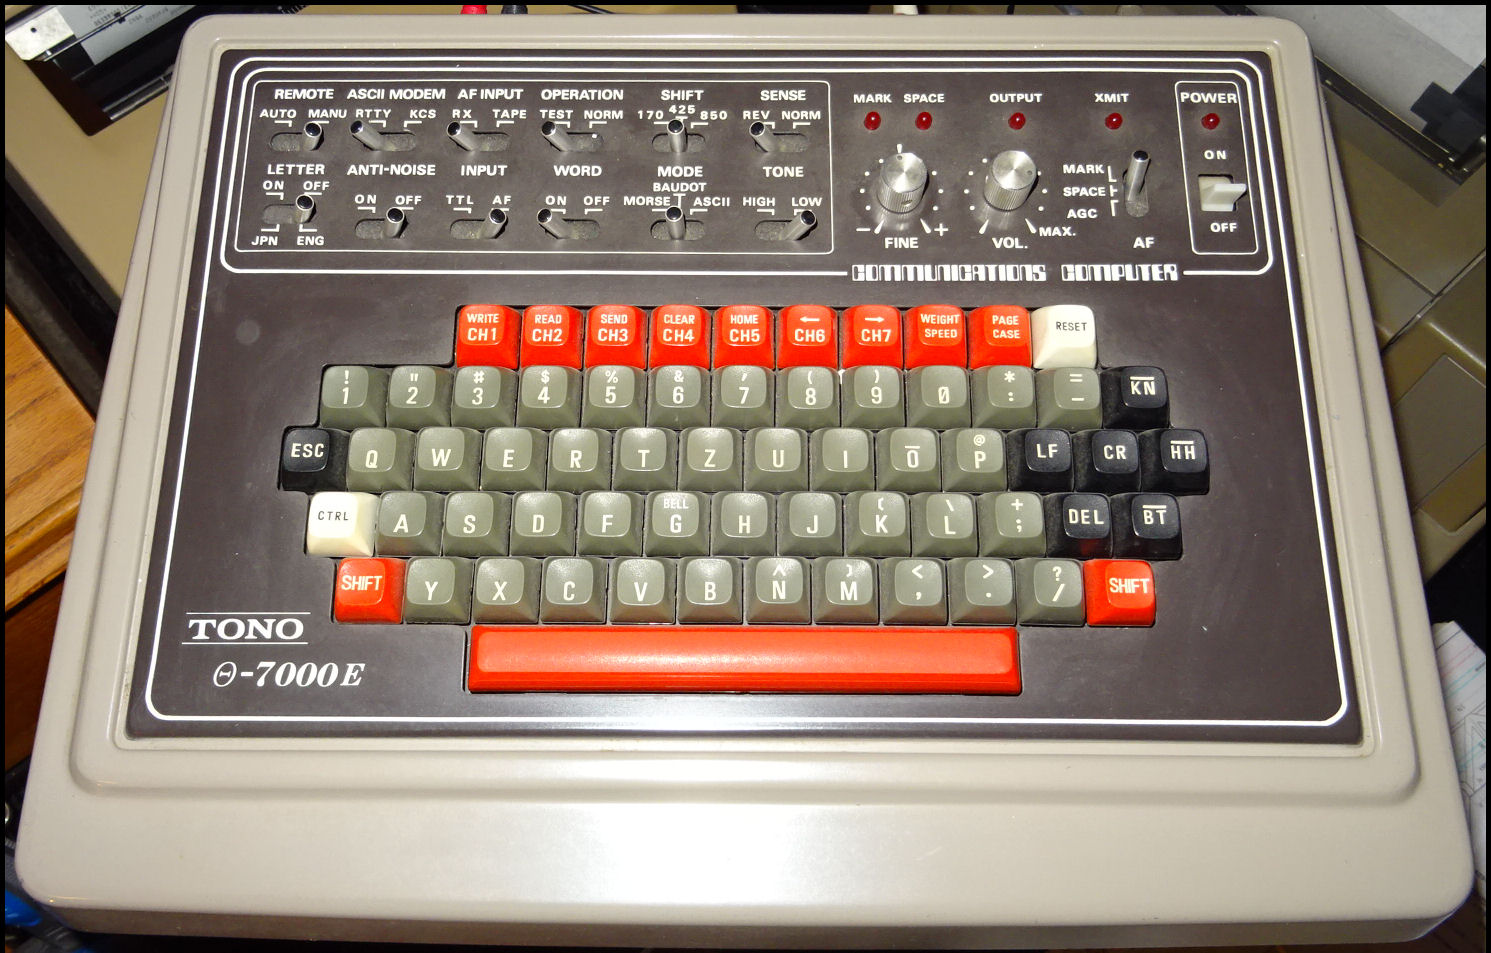
Tono Theta 7000e Communications Computer
Spare parts warehouse
Here are some pictures of my modest but now clean and clear spare parts warehouse. I once bought a used label printer from Intermec on Ebay.de, an Easycoder 501 XP . This printer is suitable for labels with thermal transfer ribbon or direct thermal printing. I got a few rolls of suitable direct thermal paper/labels from a friend ( Frutmac - Nals - Meran). The labels are 80 x 100 mm, self-adhesive, not removable.
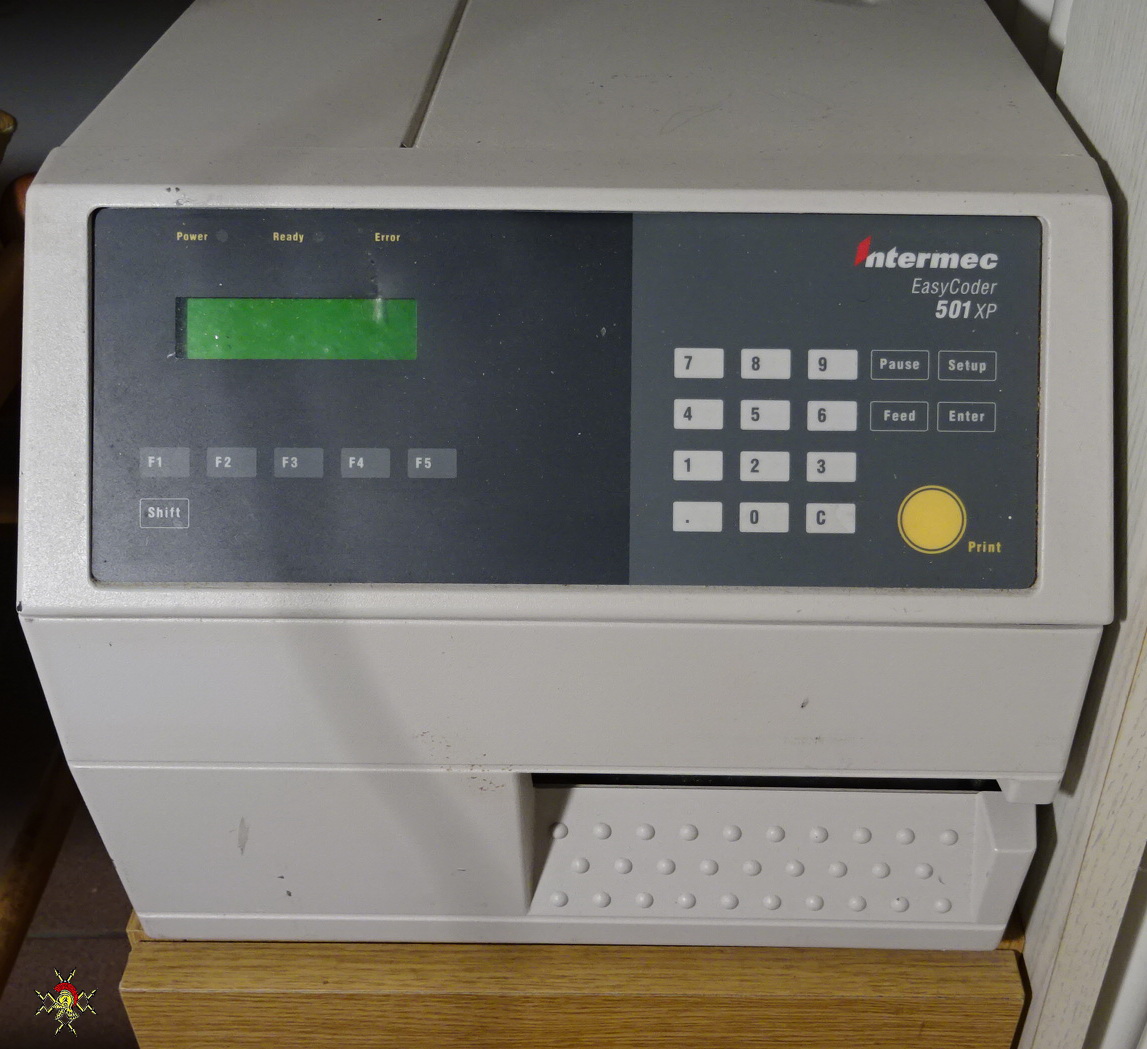 Label printer Intermec Easycoder 501xp with Centronics interface.
The label templates were created with black and white images and edited in a shareware graphics program ( Paintshop Pro 9.0 ). Luckily, Intermec provided a Windows 7 Ultimate Driver for this printer. But you still need a parallel interface / Centronics for this to work. The labels are printed in one piece and later cut off individually. The contrast and readability is sufficient for my purpose.
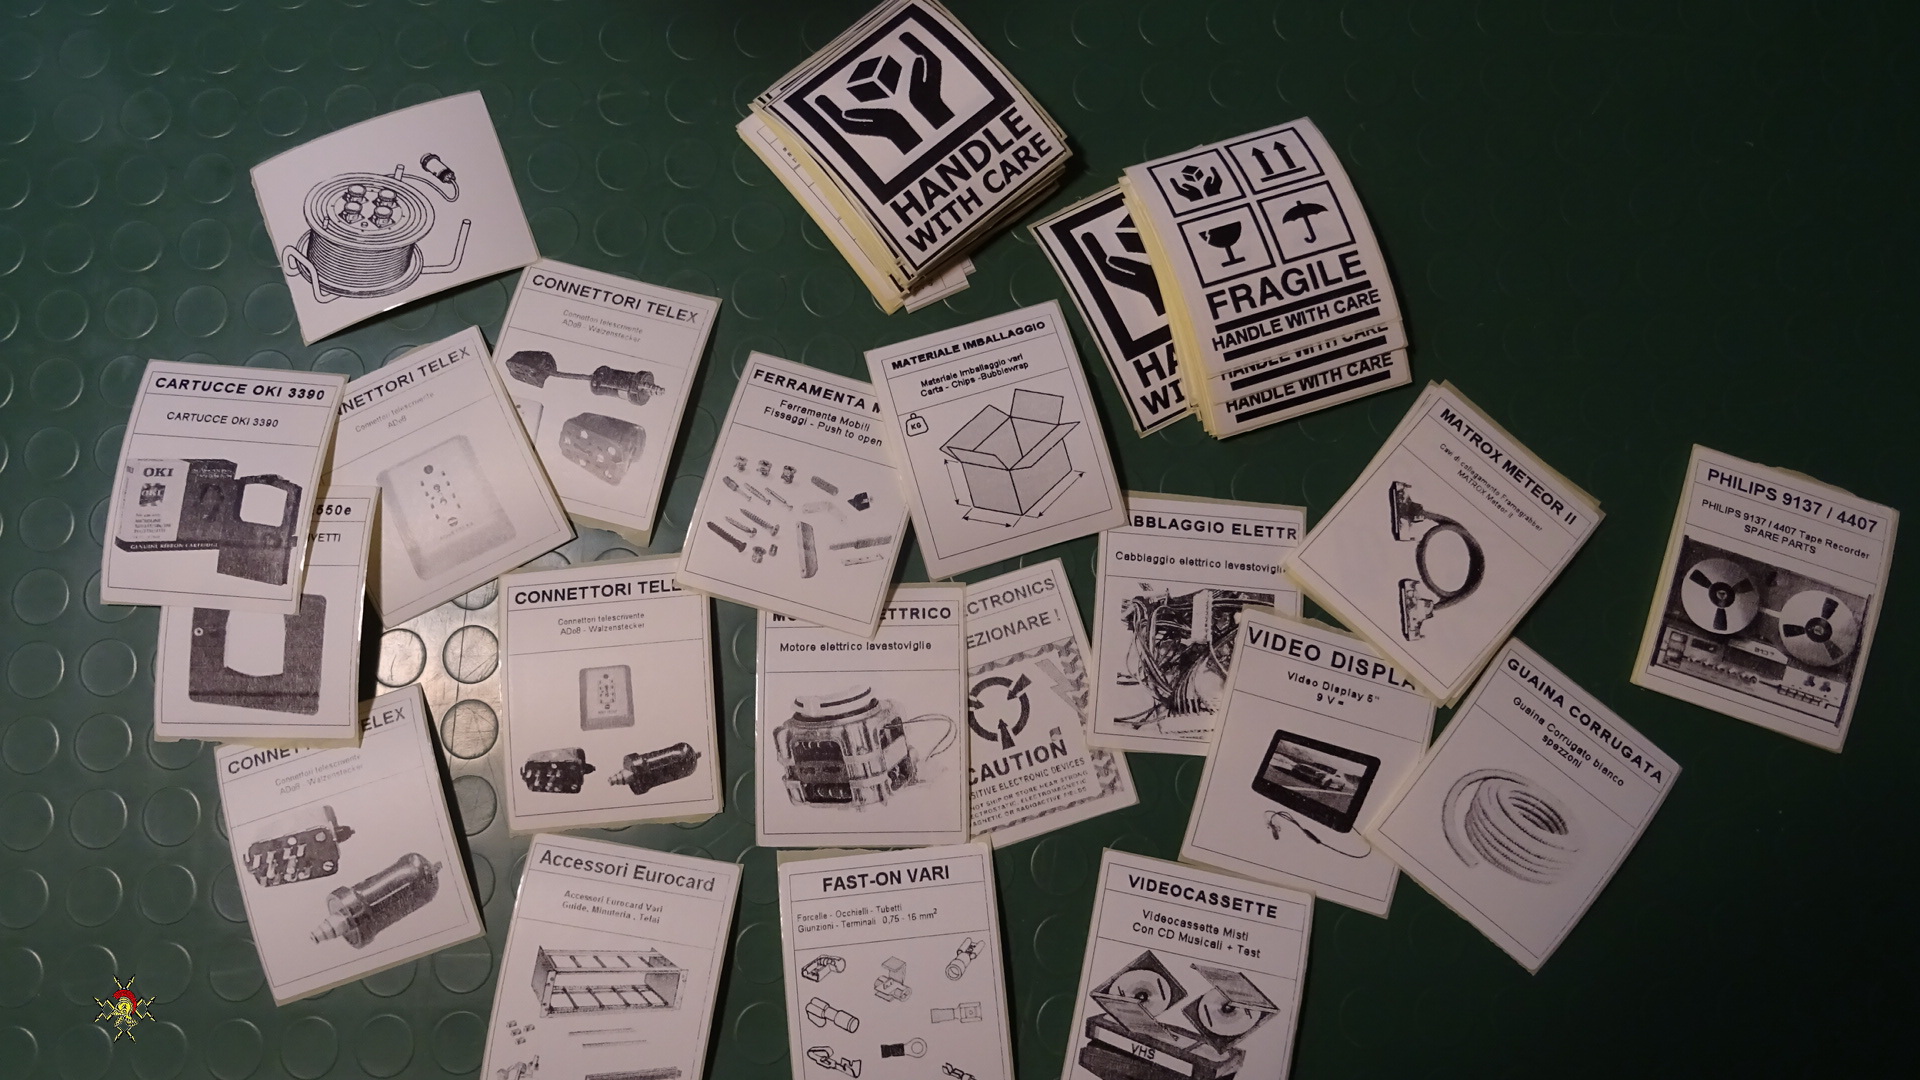
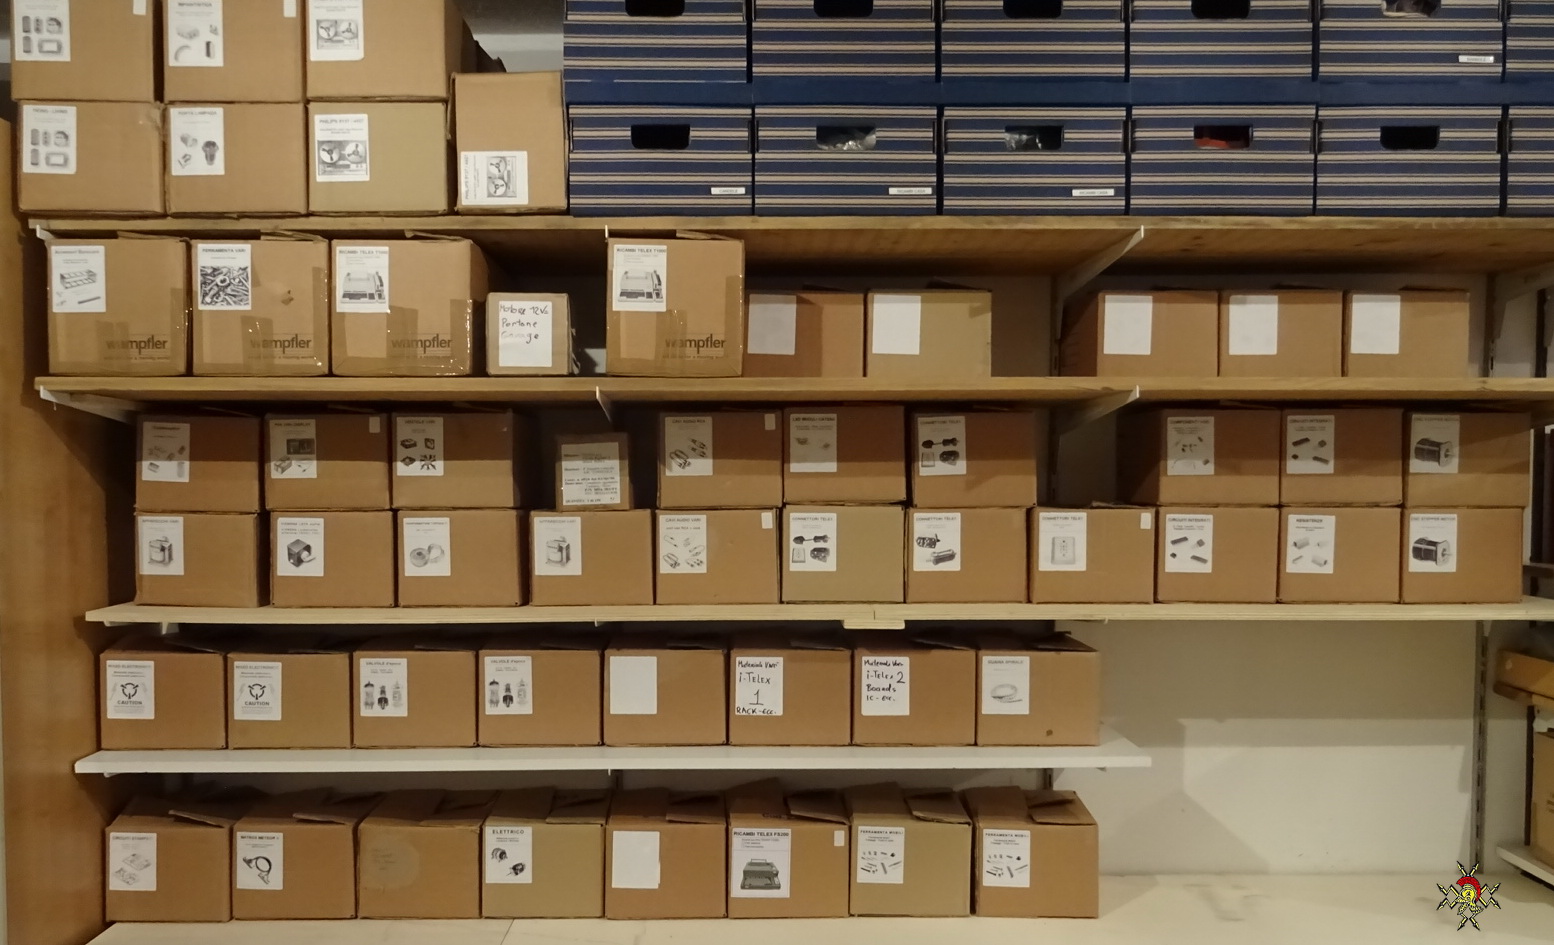
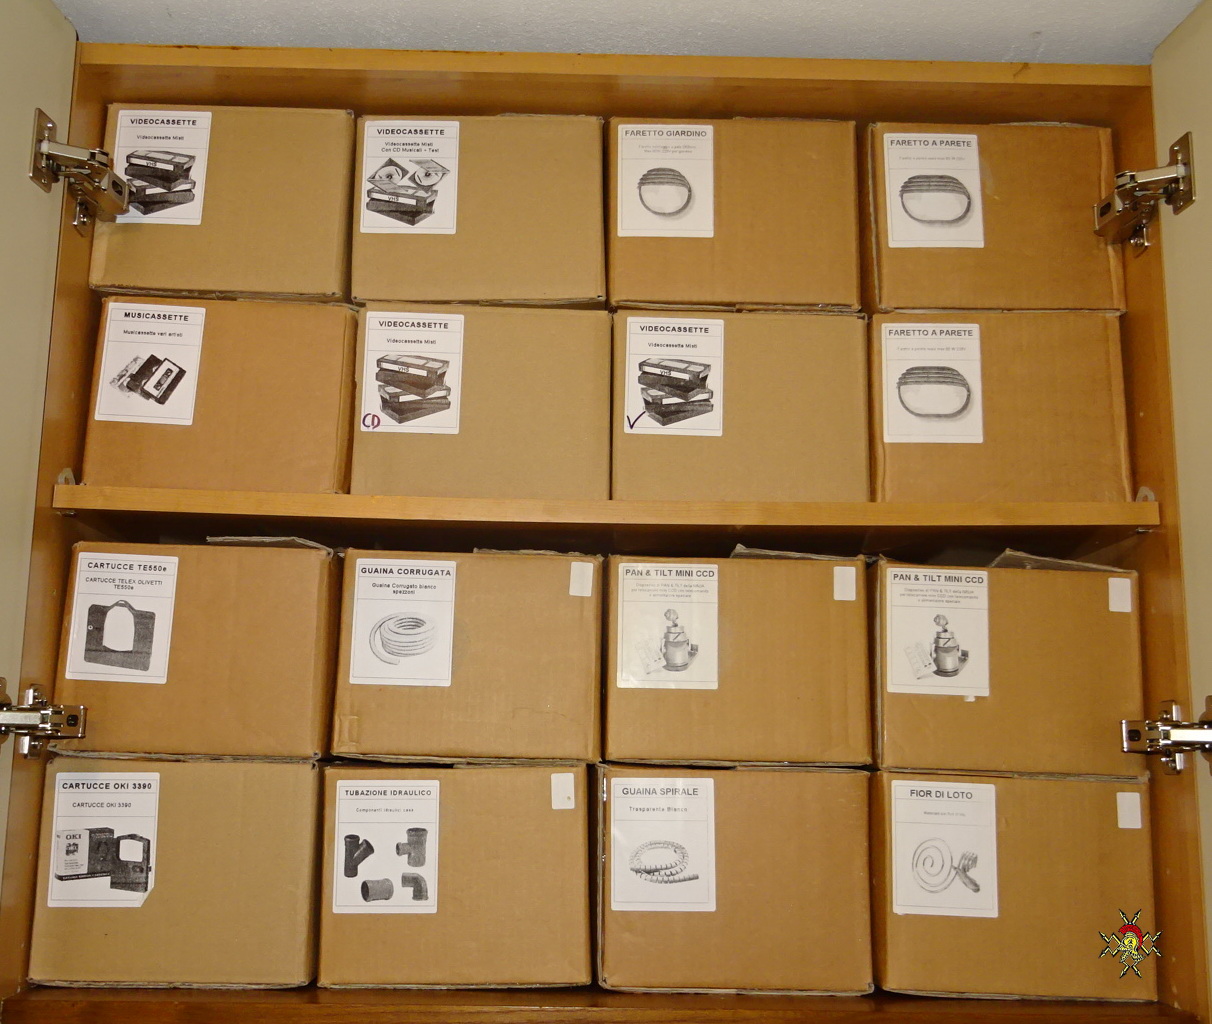
I ordered cardboard boxes measuring 20 x 25 x 30 cm on Amazon for the spare parts warehouse. The boxes were glued together with hot glue. The dimensions are generally okay for the small parts available and yet robust enough to withstand repeated opening and closing. Here is a small selection of the labels.
Labels 80 x 100 mm black and white in direct thermal printing without transfer tape.
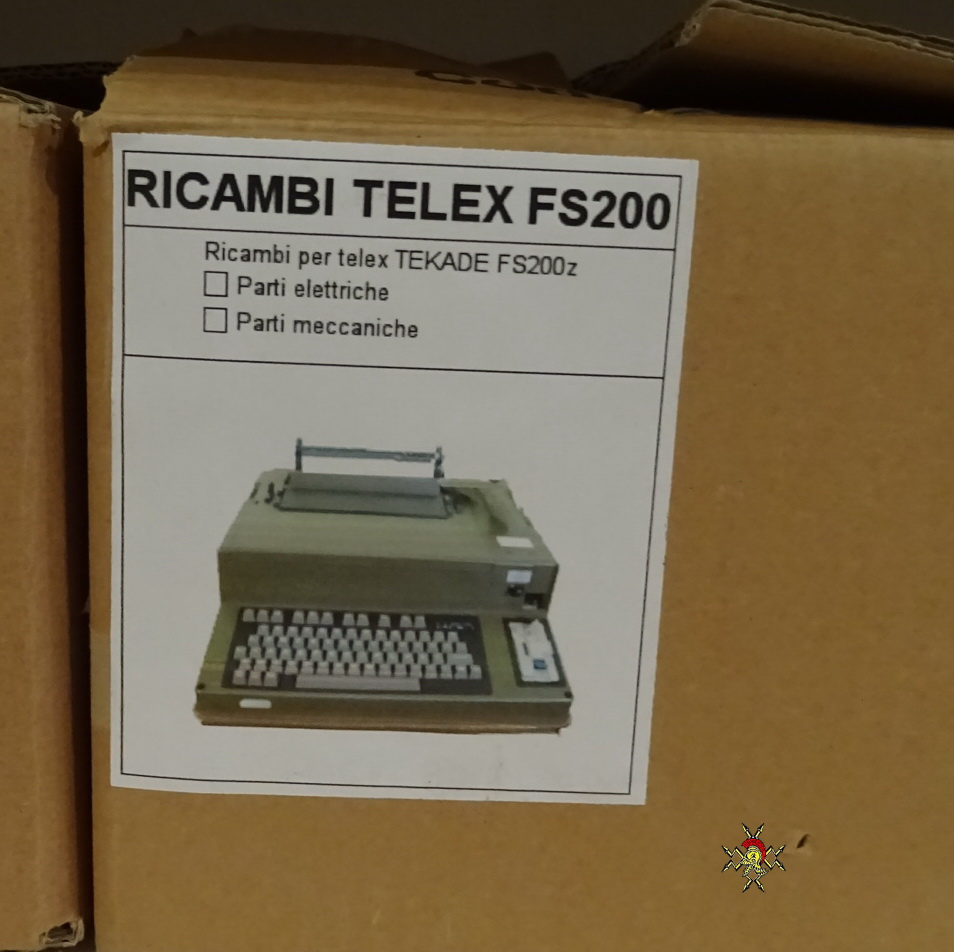
The type of labels are really general, sometimes for shipping (Handle With Care) and a little more specific for spare parts or other small items. It was important to me that I could see straight away what was actually in the box so that the search (sometimes up to a few hours) would be over. Where possible I have taken pictures of the parts, others were found on the internet and copied for personal use.
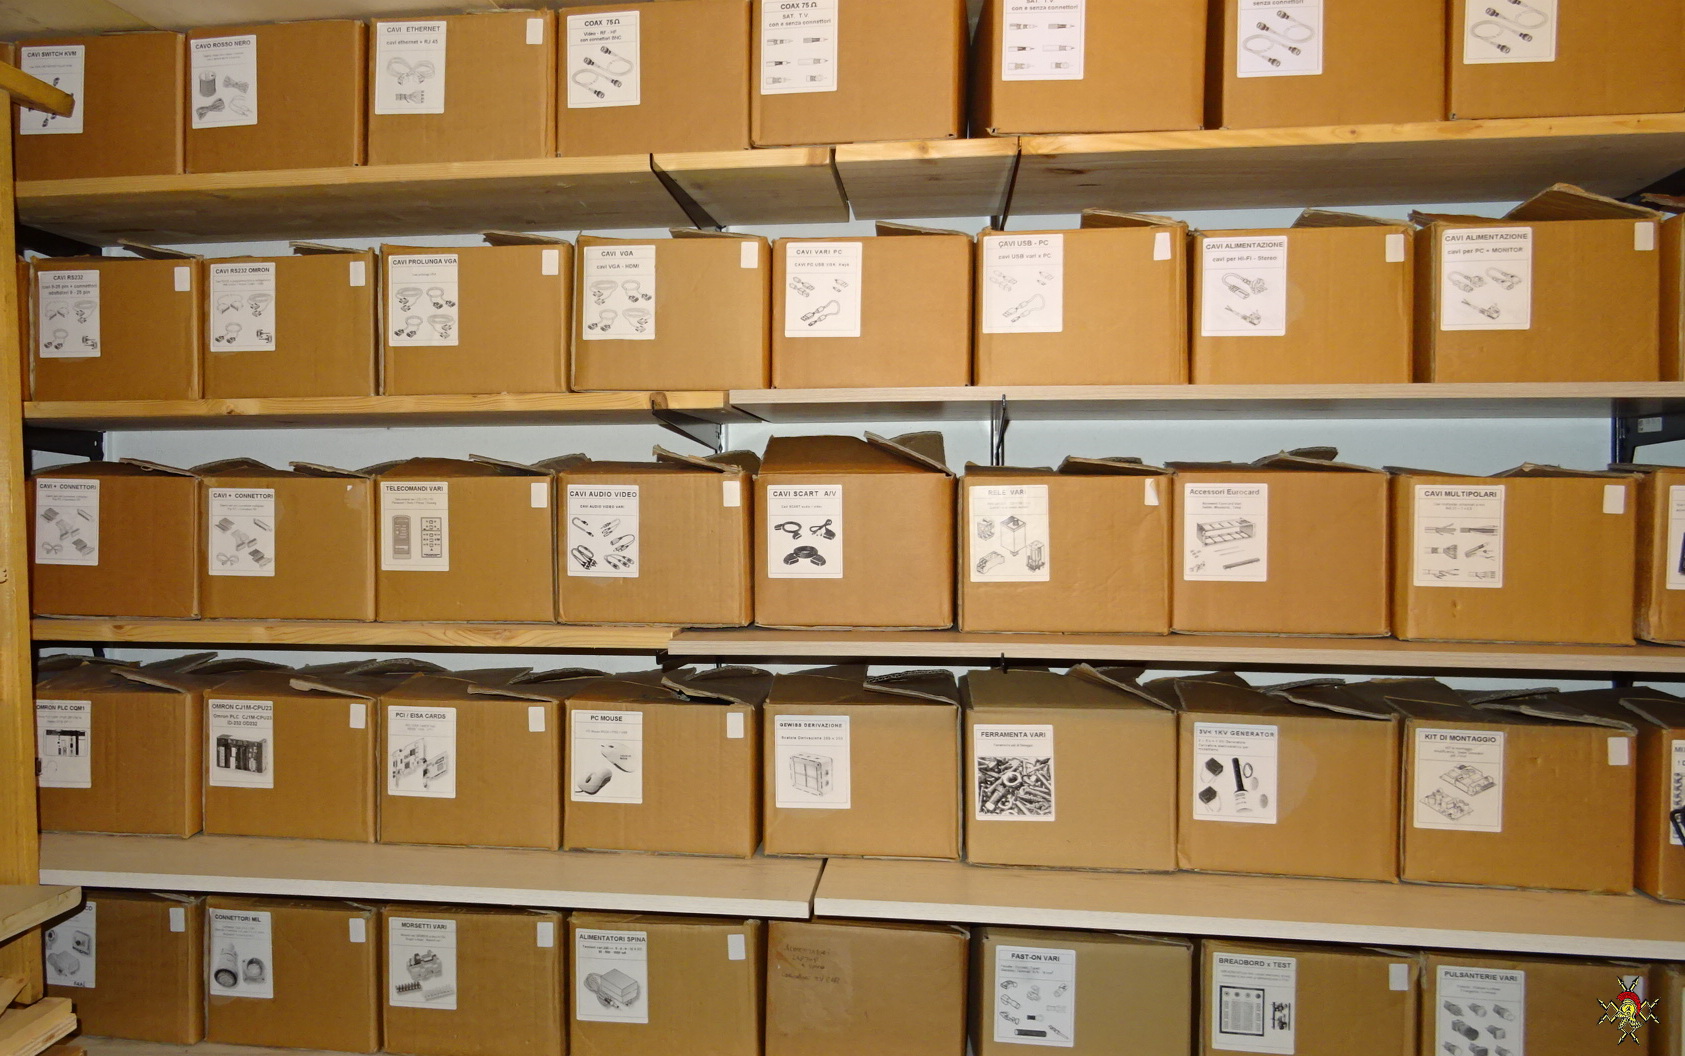
A section of the spare parts boxes, is simply tidy and clear.
There are spare parts that can be classified according to their use or nature. The parts of a TeKaDe FS200z are such an example. I have always made the distinction between mechanical parts and electronic/electrical parts. For this purpose, a few fields were printed on the labels where you can later specify the type by ticking or otherwise marking. This also certainly saves searching time and avoids unnecessary opening of the boxes.
If someone is looking for a part ( only for teleprinters and the like ), Siemens / Hasler / TeKaDe / Philips, and so on, just fill out the contact form with your wishes, please state the brand and image number. NB Not all spare parts are listed, if you don't see something then contact me anyway. I'll check when I get a chance to see if a part is still there and let you know. (There is currently no real inventory) Above all, please provide your postal address so that I can determine the approximate shipping costs. Here are a few links to the existing spare parts lists.
Spare parts: Siemens / Philps
Spare parts: TeKaDe
You've reached the end here, at some point we'll (maybe) move on, thank you for visiting my website. Stay cheerful and above all healthy!!


